
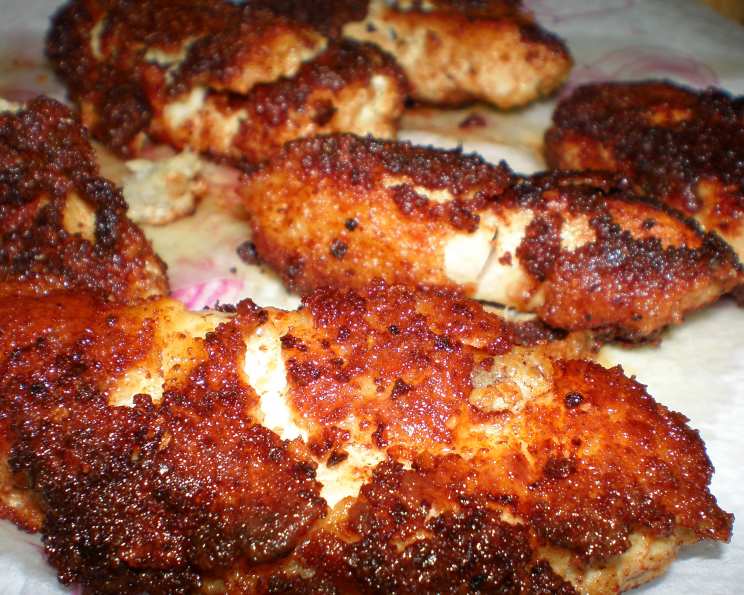
Mustardy Fried Chicken Breasts: A Symphony of Flavor and Simplicity
The scent of mustard always takes me back to my childhood. My grandmother, a woman whose kitchen was a laboratory of love, used to make the most incredible honey-mustard glazed ham. The tanginess of the mustard cutting through the sweetness of the honey was pure magic. This Mustardy Fried Chicken, while not my grandmother’s recipe, evokes that same happy feeling – a comforting blend of familiar flavors, elevated by a simple yet brilliant technique. It’s a dish that proves you don’t need a fancy restaurant or complicated ingredients to create something truly special.
Recipe Overview
- Prep Time: 10 minutes
- Cook Time: 15-20 minutes
- Total Time: 25-30 minutes
- Servings: 4
- Dietary Type: Varies (see variations)
Ingredients
- 4 boneless, skinless chicken breasts (skin-on can be used if preferred)
- 1 dash black pepper
- 1/4 cup grated parmesan cheese
- 1/4 cup dried breadcrumbs (Italian-style recommended)
- 1/2 teaspoon salt
- 1 egg
- 2 tablespoons mustard (yellow or Dijon)
- 2 tablespoons olive oil
Equipment Needed
- Two shallow bowls
- Fork or whisk
- Paper towels
- Skillet or frying pan
Instructions
- Begin by preparing the chicken breasts. Pat them dry with paper towels to ensure they brown properly. This step is essential for achieving a crispy crust.
- Season the chicken breasts generously with salt and black pepper. This simple seasoning will enhance the overall flavor of the dish.
- In one shallow bowl, beat the egg with the mustard until well combined. This mixture will act as the binding agent for the breadcrumb coating.
- In a separate shallow bowl, combine the grated parmesan cheese and dried breadcrumbs. Mix well to ensure even distribution.
- Dip each chicken breast into the egg-mustard mixture, ensuring it’s fully coated. Allow the excess to drip off before moving to the next step.
- Immediately transfer the egg-coated chicken breast into the breadcrumb-cheese mixture. Press gently to ensure the breadcrumbs adhere to all surfaces of the chicken. Repeat for all chicken breasts.
- Let the coated chicken breasts rest for about 10 minutes. This will allow the breadcrumb coating to set, preventing it from falling off during cooking.
- Heat the olive oil in a skillet or frying pan over medium heat. The oil should be hot enough to sizzle when a breadcrumb is dropped in, but not so hot that it burns.
- Carefully place the coated chicken breasts in the hot olive oil. Ensure not to overcrowd the pan; cook in batches if necessary to maintain even browning.
- Sauté the chicken for approximately 15-20 minutes, flipping halfway through, or until the chicken is cooked through and golden brown. The internal temperature should reach 165°F (74°C). Use a meat thermometer to ensure accuracy.
- Once cooked, remove the chicken breasts from the skillet and place them on a wire rack to drain any excess oil. This will help maintain the crispiness of the breadcrumb coating.
- Serve immediately and enjoy!
Expert Tips & Tricks
- For extra crispy chicken, try using panko breadcrumbs instead of regular dried breadcrumbs. Their coarser texture creates a more substantial and crunchy coating.
- Don’t be afraid to experiment with different mustards! Dijon mustard adds a sophisticated tang, while honey mustard provides a touch of sweetness. Even spicy brown mustard can add a kick.
- If you’re short on time, you can prepare the chicken breasts ahead of time by coating them in the breadcrumb mixture and storing them in the refrigerator for up to 24 hours. Just be sure to bring them to room temperature before cooking.
- If the breadcrumb coating starts to brown too quickly, reduce the heat slightly. You want the chicken to cook through completely without burning the crust.
- To ensure even cooking, pound the chicken breasts to an even thickness before coating them. This will prevent some parts from being overcooked while others are still underdone.
- For a healthier option, try baking the coated chicken breasts in a preheated oven at 375°F (190°C) for 20-25 minutes, or until cooked through. Be sure to spray them with cooking oil to help them brown. Covering with foil initially and then removing it for the last few minutes will help keep the chicken moist.
- If you don’t have Parmesan cheese on hand, you can substitute with another hard, aged cheese like Pecorino Romano or Asiago.
- Add some dried herbs like thyme, rosemary, or oregano to the breadcrumb mixture for extra flavor.
Serving & Storage Suggestions
Serve the Mustardy Fried Chicken Breasts immediately while they’re hot and crispy. They pair perfectly with a variety of sides, such as roasted vegetables, mashed potatoes, a fresh salad, or even a simple pasta dish. A squeeze of lemon juice just before serving can brighten the flavors.
Leftover chicken can be stored in an airtight container in the refrigerator for up to 3 days. To reheat, bake in a preheated oven at 350°F (175°C) until warmed through. Reheating in the oven helps maintain the crispiness of the breadcrumb coating better than microwaving. Microwaving can make the crust soggy.
The cooked chicken can also be frozen for up to 2 months. Wrap each breast individually in plastic wrap before placing them in a freezer-safe bag or container. To thaw, transfer to the refrigerator overnight. Reheat as described above.
Nutritional Information
| Nutrient | Amount per Serving | % Daily Value |
|---|---|---|
| Calories | 266.5 kcal | N/A |
| Calories from Fat | 106 g | 40% |
| Total Fat | 11.8 g | 18% |
| Saturated Fat | 2.9 g | 14% |
| Cholesterol | 126.8 mg | 42% |
| Sodium | 614 mg | 25% |
| Total Carbohydrate | 5.8 g | 1% |
| Dietary Fiber | 0.6 g | 2% |
| Sugars | 0.8 g | 3% |
| Protein | 32.4 g | 64% |
Note: Nutritional information is an estimate and may vary based on specific ingredients and preparation methods.
Variations & Substitutions
- Gluten-Free: Use gluten-free breadcrumbs instead of regular breadcrumbs. Ensure all other ingredients are also gluten-free.
- Dairy-Free: Omit the parmesan cheese or substitute with a dairy-free parmesan alternative.
- Spicy: Add a pinch of cayenne pepper or a dash of hot sauce to the egg mixture for a spicy kick.
- Herbed: Mix dried herbs like thyme, rosemary, or oregano into the breadcrumb mixture for added flavor.
- Lemon-Herb: Add lemon zest and chopped fresh herbs like parsley or chives to the breadcrumb mixture for a bright, flavorful twist.
- Honey-Mustard: Use honey mustard instead of regular mustard in the egg mixture.
FAQs (Frequently Asked Questions)
Q: Can I use skin-on chicken breasts for this recipe?
A: Yes, you can use skin-on chicken breasts. Just be sure to pat the skin dry thoroughly before coating it in the breadcrumb mixture. This will help the skin crisp up nicely during cooking.
Q: Can I use different types of breadcrumbs?
A: Absolutely! Panko breadcrumbs will give you a crispier crust, while Italian-style breadcrumbs add a hint of seasoning. You can even use crushed crackers or cornflakes for a unique texture.
Q: How do I know when the chicken is cooked through?
A: The internal temperature of the chicken should reach 165°F (74°C). Use a meat thermometer to check for doneness.
Q: Can I make this recipe ahead of time?
A: Yes, you can prepare the chicken breasts ahead of time by coating them in the breadcrumb mixture and storing them in the refrigerator for up to 24 hours. Just be sure to bring them to room temperature before cooking.
Q: What should I do if the breadcrumb coating starts to burn before the chicken is cooked through?
A: Reduce the heat slightly and continue cooking the chicken until it reaches an internal temperature of 165°F (74°C). You can also tent the chicken with foil to prevent further browning.
Final Thoughts
This Mustardy Fried Chicken is more than just a recipe; it’s a reminder that simple ingredients, when combined with a little care and attention, can create something truly delicious. Don’t be afraid to experiment with different mustards, herbs, and cheeses to find your perfect flavor combination. I encourage you to try this recipe and share your feedback – and maybe even pair it with a side of my grandmother’s honey-mustard glazed ham for a truly nostalgic meal! Happy cooking!