
My Best Banana Pudding Dessert
The scent of ripe bananas always takes me back to my grandmother’s kitchen. Every Thanksgiving, without fail, the star of her dessert table wasn’t a fancy pie or elaborate cake, but a simple, comforting banana pudding. Its creamy sweetness, the soft bite of vanilla wafers, and the fragrant slices of banana were pure nostalgia in every spoonful. It’s a dessert that speaks of family, love, and tradition, and now, I’m so excited to share my version of this classic with you!
Recipe Overview
- Prep Time: 15 minutes
- Servings: 10-12
Ingredients
- 1 (5 ounce) package vanilla instant pudding mix
- 2 cups cold milk
- 1 (14 ounce) can sweetened condensed milk
- 1 tablespoon vanilla extract
- 1 (8 ounce) Cool Whip, thawed
- 1 (11 ounce) box Nilla wafers
- 5-6 vine ripe bananas, peeled and sliced
Equipment Needed
- Large mixing bowl
- Whisk or electric mixer
- 13x9x2 inch glass dish
Instructions
-
In a large mixing bowl, beat together the vanilla instant pudding mix and cold milk for 2-3 minutes until the mixture begins to thicken. Using a whisk or an electric mixer works well here; you want to make sure the pudding mix is fully incorporated for a smooth texture.
-
Blend in the sweetened condensed milk and mix until smooth. This is where the pudding gets its extra rich and creamy body.
-
Stir in the vanilla extract and then gently fold in the thawed Cool Whip. Folding is key here to keep the mixture light and airy. Avoid overmixing, which can deflate the Cool Whip.
-
In a 13x9x2 glass dish, create the first layer by lining the bottom with Nilla wafers. Don’t worry if you need to break a few to fill in any gaps.
-
Add a layer of sliced bananas over the Nilla wafers. For the best flavor and texture, make sure the bananas are ripe but still firm.
-
Pour enough of the pudding mixture over the first layer of wafers and bananas to cover everything evenly, reserving some pudding for more layers. A spatula or spoon can help spread it out.
-
Repeat layers of Nilla wafers, sliced bananas, and pudding. The number of layers will depend on how high you want your pudding and how many bananas you’re using.
-
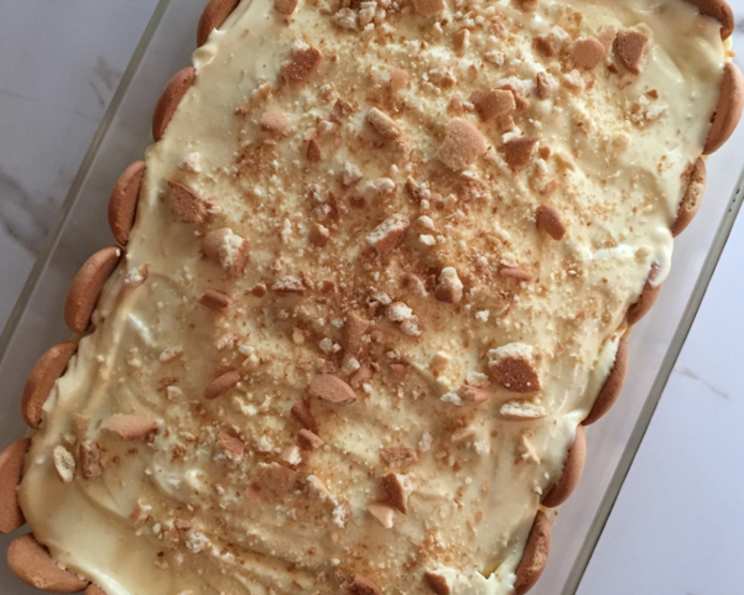
End with a few Nilla wafers on top. This adds a decorative touch and a satisfying crunch when serving.
-
Cover the dish tightly and chill in the refrigerator for several hours, or preferably overnight. This allows the flavors to meld together and the wafers to soften slightly.
Expert Tips & Tricks
- For extra banana flavor: Consider mashing one of the bananas into the pudding mixture. This will intensify the banana taste and add a lovely, natural sweetness.
- Preventing Banana Browning: A light squeeze of lemon juice over the sliced bananas can help prevent them from browning. However, if you’re making the pudding ahead of time, the pudding itself will usually keep the bananas from browning too much.
- Wafer Placement: Don’t be afraid to experiment with the wafer placement! You can stand them upright around the edges of the dish for a more decorative look.
- Making Ahead: This dessert is best made a day ahead of time. This allows the flavors to meld together, and the wafers to soften.
Serving & Storage Suggestions
Serve the banana pudding chilled, directly from the refrigerator. A dollop of extra Cool Whip or a sprinkle of crushed Nilla wafers makes a lovely garnish.
Leftovers should be stored in an airtight container in the refrigerator. It will keep for up to 3 days, although the bananas may become softer over time. It is not recommended to freeze banana pudding, as the texture will change significantly upon thawing.
Nutritional Information
| Nutrient | Amount per Serving | % Daily Value |
|---|---|---|
| Calories | 488 kcal | N/A |
| Calories from Fat | 155 g | 32% |
| Total Fat | 17.3 g | 26% |
| Saturated Fat | 9.9 g | 49% |
| Cholesterol | 20.3 mg | 6% |
| Sodium | 380.3 mg | 15% |
| Total Carbohydrate | 78.1 g | 26% |
| Dietary Fiber | 2.2 g | 8% |
| Sugars | 47.4 g | 189% |
| Protein | 7 g | 14% |
Variations & Substitutions
- Dairy-Free Option: Substitute the milk with almond milk or soy milk and use a dairy-free whipped topping alternative.
- Gluten-Free Option: Use gluten-free vanilla wafers to make this dessert gluten-free.
- Spice it Up: Add a pinch of cinnamon or nutmeg to the pudding mixture for a warm, comforting flavor.
- Chocolate Banana Pudding: Swirl some chocolate syrup into the pudding layers or add a layer of chocolate shavings on top.
- Boozy Banana Pudding: A splash of rum or bourbon in the pudding mixture adds a sophisticated touch.
FAQs (Frequently Asked Questions)
Q: Can I use regular pudding instead of instant pudding?
A: While you can use regular cook-and-serve pudding, instant pudding works best in this recipe because it sets up quickly and provides the right consistency.
Q: How do I keep my bananas from turning brown?
A: The pudding itself helps to protect the bananas from browning. If you’re concerned, a squeeze of lemon juice can help as well.
Q: Can I make this pudding in individual serving cups?
A: Absolutely! This recipe works great in individual cups or jars. Just layer the ingredients as directed.
Q: How long will the banana pudding last in the refrigerator?
A: It’s best enjoyed within 3 days, as the bananas will start to soften and the wafers may become soggy after that.
Q: Can I use store-bought whipped cream instead of Cool Whip?
A: Yes, you can, but Cool Whip holds its shape better and is generally preferred for this type of dessert.
Final Thoughts
I hope you’ll give this banana pudding recipe a try and create your own cherished memories around it. It’s a simple, comforting dessert that’s perfect for any occasion. Don’t hesitate to experiment with variations and make it your own. I’d love to hear your feedback and see your creations – happy baking!