
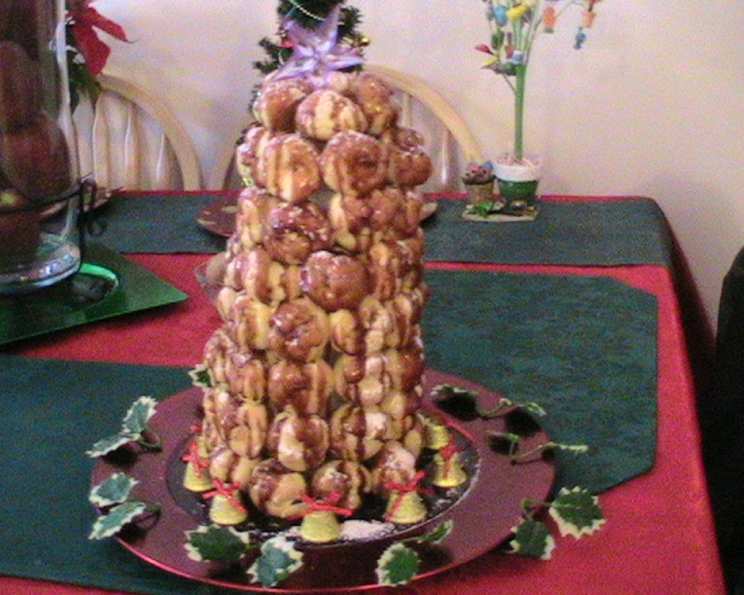
My Christmas Croquembouche: A Festive Tower of Cream Puff Dreams
My grandmother, bless her heart, wasn’t the most adventurous baker. Christmas desserts were usually a rotation of fruitcake (which no one really ate), sugar cookies, and maybe, if we were lucky, a simple apple pie. But one year, she surprised us all. I remember walking into her kitchen and seeing this towering confection, a shimmering mountain of cream puffs drizzled with chocolate and dusted with what looked like freshly fallen snow. It wasn’t her creation, of course. She’d gotten the idea from a magazine and cleverly simplified it, but the “wow” factor was undeniable. That year, the Christmas Croquembouche became a beloved family tradition, a delicious testament to her willingness to step outside her comfort zone and bring a bit of magic to the table.
Recipe Overview
- Prep Time: 20 minutes
- Cook Time: 5 minutes (for chocolate sauce)
- Total Time: 25 minutes
- Servings: 12-16
- Yield: 1 Croquembouche
- Dietary Type: Varies (depending on cream puff ingredients)
Ingredients
- 64 frozen cream puffs, ready-made, bought frozen then thawed per package directions
- Chocolate syrup or ganache, for drizzling
- Toothpicks, to secure the cream puffs
- Icing sugar, for dusting
- 1 8-inch styrofoam cone
- Small Christmas decorations
Equipment Needed
- Plate or charger plate for presentation
- Microwave-safe bowl (if using chocolate syrup)
- Microwave
- Two-way tape (optional)
Instructions
- Begin by preparing your base. Affix the 8-inch styrofoam cone to the plate or charger you’ll be using for presentation. Two-way tape can be helpful here to keep the cone stable.
- Ensure that the frozen cream puffs are fully thawed according to the package directions. This is essential for easy handling and adhesion.
- Starting at the bottom of the cone, begin attaching the cream puffs. Use a toothpick to secure each cream puff to the cone, pushing the toothpick all the way in so that it’s hidden from view.
- Continue adding cream puffs row by row, working your way up the cone. Keep the cream puffs close together to minimize any visible gaps of the white styrofoam.
- If you’re using Hershey’s chocolate syrup, pour it into a microwave-safe bowl. Heat in the microwave for short intervals (approximately 30 seconds), stirring in between, until the syrup is pourable. Be careful not to overheat; you want it warm and fluid, not boiling hot.
- Alternatively, prepare your favorite ganache. If using this, ensure that it is not too hot, allowing it to cool slightly to a drizzling consistency before applying.
- Once the cone is entirely covered in cream puffs, carefully drizzle the chocolate syrup or ganache over the entire structure. Ensure that each cream puff receives some chocolate, creating a visually appealing and delicious coating.
- While the chocolate is still slightly wet, generously dust the entire croquembouche with icing sugar, creating a snow-like effect.
- Finally, enhance the festive appearance of your creation. Place the small Christmas decorations around the base of the plate.
Expert Tips & Tricks
- Cream Puff Stability: Ensure cream puffs are fully thawed, but not soggy. Soggy puffs will be difficult to work with.
- Chocolate Consistency: The chocolate syrup or ganache should be warm enough to drizzle smoothly but not so hot that it melts the cream puffs. Test a small area first.
- Securing Cream Puffs: Use enough toothpicks to ensure the cream puffs are securely attached. Consider using more than one toothpick for larger puffs.
- Concealing Gaps: If you have gaps between cream puffs, fill them with extra icing sugar or small pieces of chocolate.
- Alternative Adhesives: For a stronger hold, consider using melted chocolate or a simple sugar glaze as “glue” instead of toothpicks. Be aware this will affect the taste.
- Make Ahead: You can assemble the cone with cream puffs a few hours in advance and keep it refrigerated. However, drizzle the chocolate and dust with icing sugar just before serving to prevent sogginess.
Serving & Storage Suggestions
Serve your Christmas Croquembouche immediately after assembling for the best texture and presentation. The cream puffs are best enjoyed fresh and crisp.
If you have leftovers, store them in the refrigerator. However, be aware that the cream puffs will soften over time. They will generally keep for 1-2 days in the refrigerator, though the texture will degrade. It’s not recommended to freeze the assembled croquembouche, as the cream puffs will become very soggy upon thawing.
If you must store it, loosely cover the croquembouche with plastic wrap, being careful not to crush the cream puffs.
Nutritional Information
Note: Nutritional information is approximate and will vary based on the specific ingredients used, especially the brand and type of cream puffs and chocolate syrup.
| Nutrient | Amount per Serving | % Daily Value |
|---|---|---|
| Calories | 250 kcal | 13% |
| Total Fat | 12g | 18% |
| Saturated Fat | 7g | 35% |
| Cholesterol | 30mg | 10% |
| Sodium | 100mg | 4% |
| Total Carbohydrate | 30g | 10% |
| Dietary Fiber | 1g | 4% |
| Sugars | 20g | N/A |
| Protein | 3g | 6% |
Variations & Substitutions
- Gluten-Free: Use gluten-free cream puffs to make a gluten-free version.
- Dairy-Free: Look for dairy-free cream puffs and use dairy-free chocolate syrup or ganache made with coconut milk.
- Flavor Variations: Add flavor extracts to the chocolate syrup, such as peppermint or orange, for a unique twist.
- Caramel Croquembouche: Instead of chocolate, use a homemade caramel sauce. Be cautious when making caramel as it gets extremely hot.
- Seasonal Decorations: Adapt the decorations to suit any holiday or celebration. Use edible glitter, sprinkles, or fresh berries.
- Different Sauces: White chocolate, butterscotch, or even a simple powdered sugar glaze can be used in place of chocolate.
FAQs (Frequently Asked Questions):
Q: Can I use homemade cream puffs instead of store-bought?
A: Absolutely! Homemade cream puffs will elevate the dessert. Just make sure they are cooled completely before assembling.
Q: How do I prevent the cream puffs from sliding off the cone?
A: Ensure the cone is stable and that you are using enough toothpicks, inserting them at an angle for better grip. Also, make sure the chocolate or caramel isn’t too hot, as this can cause the cream puffs to soften and slide.
Q: Can I make this a day ahead of time?
A: It is best to assemble the croquembouche as close to serving time as possible. However, you can prepare the cone base and thaw the cream puffs in advance. Drizzle the chocolate and decorate just before serving.
Q: What if I don’t have a styrofoam cone?
A: You can try using a sturdy cardboard cone, or even create a cone shape out of rolled aluminum foil. Just ensure the cone is stable and can support the weight of the cream puffs.
Q: Is there a way to make this healthier?
A: Choose lower-sugar cream puffs and use a dark chocolate with a higher cocoa content. You can also use a light dusting of icing sugar instead of a heavy coating.
Final Thoughts
Creating this Christmas Croquembouche is more than just assembling a dessert; it’s about building a showstopping centerpiece that sparks joy and conversation. Don’t be intimidated by its impressive appearance. With a few simple steps and readily available ingredients, you can create a memorable treat that will delight your friends and family. So gather your loved ones, embrace the spirit of the season, and give this delightful recipe a try. I’m confident that your Christmas Croquembouche will become a cherished tradition, just as it has in my family. And please, share your creations and feedback – I’d love to see your festive towers!