
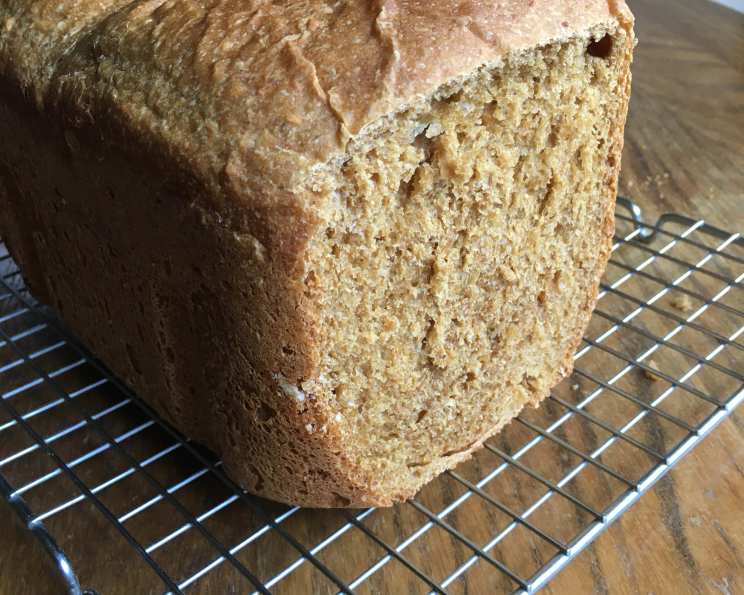
My Favorite Molasses Oatmeal Bread Machine Bread
The scent of molasses, warm oatmeal, and freshly baked bread – it’s a Proustian rush straight back to my grandmother’s kitchen. She always had a loaf of something wholesome and deeply comforting on the counter, and this molasses oatmeal bread, made effortlessly in a bread machine, captures that same spirit. It’s the kind of bread that makes a simple breakfast feel special, and a humble sandwich taste extraordinary. Every time I slice into a loaf, I feel a little closer to those cozy childhood memories.
Recipe Overview
- Prep Time: 5 minutes
- Cook Time: 4 hours
- Total Time: 4 hours 5 minutes
- Servings: Approximately 12 slices
- Yield: 1 2 Lb. Loaf
- Dietary Type: Vegetarian
Ingredients
- 1 1/4 cups lukewarm water
- 1 egg
- 1 tablespoon vegetable oil
- 1/2 cup molasses
- 1 teaspoon salt
- 3 cups bread flour
- 1 cup oatmeal
- 2 teaspoons yeast
Equipment Needed
- Bread Machine
Instructions
-
Begin by adding 1 cup of lukewarm water to your measuring cup. This is your base liquid.
-
Crack 1 egg directly into the water in the measuring cup. The egg contributes to the bread’s richness and structure.
-
Add enough additional lukewarm water to the measuring cup to bring the total liquid volume up to 1 1/4 cups. Accurate liquid measurement is crucial for bread machine success.
-
Using a fork, thoroughly mix the egg and water together until the yolk is completely broken and evenly distributed.
-
Pour the egg and water mixture directly into the bread machine pan. This starts the layering of your ingredients.
-
Now, carefully add the remaining ingredients in the exact order listed in the recipe. This layering order is important for proper bread machine function: first the 1 tablespoon of vegetable oil, then the 1/2 cup of molasses, followed by 1 teaspoon of salt, 3 cups of bread flour, 1 cup of oatmeal, and finally, 2 teaspoons of yeast. Ensure each ingredient is measured accurately.
-
Place the bread machine pan into the bread machine. Secure it properly according to your machine’s instructions.
-
Set the bread machine settings to the basic white bread cycle with a light crust setting. This program is designed for a consistent rise and bake.
-
Start the bread machine. The machine will automatically mix, knead, rise, and bake the bread.
-
During the initial kneading phase (usually within the first 10-15 minutes), carefully observe the dough’s consistency through the bread machine’s window. If the dough appears excessively sticky, meaning it clings stubbornly to the sides of the pan, gradually add a small amount of bread flour, approximately 1 tablespoon at a time, to the pan.
-
Continue adding small amounts of bread flour until the dough starts to pull away from the sides of the pan and forms a cohesive ball. Be careful not to add too much flour, as this can result in a dry, dense loaf. The goal is a dough that is slightly tacky but not overly sticky.
-
Allow the bread machine to complete its entire cycle. This usually takes around 4 hours, including the rising and baking time.
-
Once the cycle is complete, carefully remove the bread machine pan from the machine using oven mitts, as it will be hot.
-
Immediately invert the bread machine pan to release the loaf of bread onto a wire cooling rack. If the loaf sticks slightly, gently loosen it with a heat-resistant spatula.
-
Allow the molasses oatmeal bread to cool completely on the wire rack before slicing and serving. This is crucial to prevent a gummy texture.
Expert Tips & Tricks
- Molasses Matters: Use a good-quality, unsulphured molasses for the best flavor. Blackstrap molasses will give a bolder, more intense flavor, while light molasses will be milder.
- Oatmeal Options: Quick-cooking or rolled oats both work well in this recipe. Avoid using instant oatmeal, as it can make the bread too soft.
- Yeast is Key: Ensure your yeast is fresh for optimal rising. If you’re unsure, proof it by dissolving it in a little lukewarm water with a pinch of sugar before adding it to the bread machine. If it doesn’t foam up, it’s likely inactive.
- Dough Consistency: Achieving the right dough consistency is vital. Remember to adjust the flour amount based on humidity and the specific flour you’re using.
- Even Slicing: For even slices, use a serrated bread knife and allow the bread to cool completely before slicing.
Serving & Storage Suggestions
This molasses oatmeal bread is fantastic on its own, toasted with butter, or as a base for sandwiches. It pairs exceptionally well with creamy cheeses, hearty soups, and even a simple pat of butter and a drizzle of honey.
Store leftover bread in an airtight container at room temperature for up to 3 days. For longer storage, wrap the loaf tightly in plastic wrap and then place it in a freezer bag. Frozen bread will keep for up to 2 months. To reheat, thaw at room temperature and then toast or warm in a low oven (300°F/150°C) for a few minutes.
Nutritional Information
| Nutrient | Amount per Serving | % Daily Value |
|---|---|---|
| Calories | 198 kcal | 10% |
| Total Fat | 2.3 g | 3% |
| Saturated Fat | 0.4 g | 2% |
| Cholesterol | 15.5 mg | 5% |
| Sodium | 207 mg | 9% |
| Total Carbohydrate | 39.2 g | 13% |
| Dietary Fiber | 1.7 g | 7% |
| Sugars | 8 g | – |
| Protein | 4.9 g | 10% |
Note: Nutritional information is an estimate and may vary based on specific ingredients and serving sizes.
Variations & Substitutions
- Sweetness Boost: Add a tablespoon of brown sugar or maple syrup for a sweeter loaf.
- Nutty Twist: Incorporate 1/2 cup of chopped walnuts, pecans, or sunflower seeds for added texture and flavor.
- Spice It Up: Add 1/2 teaspoon of ground cinnamon, nutmeg, or allspice to the dough for a warm, comforting flavor profile.
- Dairy-Free: Substitute the egg with 1/4 cup of unsweetened applesauce or a flax egg (1 tablespoon flaxseed meal mixed with 3 tablespoons water, let sit for 5 minutes to thicken).
- Gluten-Free: While this recipe is not inherently gluten-free, you can experiment with gluten-free bread flour blends designed for bread machines. Be sure to follow the instructions on the gluten-free flour blend package, as the liquid-to-flour ratio may need adjustments. You may also need to add a binder like xanthan gum.
FAQs (Frequently Asked Questions)
Q: Can I use regular flour instead of bread flour?
A: Bread flour has a higher protein content than all-purpose flour, which results in a chewier texture. While you can use all-purpose flour, the bread may not rise as much and may be slightly denser.
Q: Why is my bread machine bread collapsing?
A: Over-proofing is a common cause of collapsing bread. Make sure you’re using fresh yeast and avoid adding too much liquid. Also, ensure the bread machine is not in a drafty area.
Q: Can I add dried fruit to this recipe?
A: Yes, you can add up to 1/2 cup of dried fruit, such as raisins or cranberries, to the dough. Add them during the last kneading cycle, as indicated by your bread machine’s instructions.
Q: The crust of my bread is too hard. What can I do?
A: Selecting the “light crust” setting on your bread machine can help. You can also try brushing the top of the loaf with melted butter or oil immediately after baking to soften the crust.
Q: How can I prevent the bread from sticking to the pan?
A: Ensure the bread machine pan is clean and lightly greased with cooking spray or butter before adding the ingredients. Allowing the bread to cool slightly in the pan before inverting it can also help with release.
Final Thoughts
I hope this recipe for my favorite molasses oatmeal bread brings as much comfort and joy to your kitchen as it has to mine. It’s a simple pleasure, easily achieved with a bread machine, and the results are consistently delicious. Don’t be afraid to experiment with the variations and make it your own. I’d love to hear about your baking adventures and any tweaks you make to this recipe. Perhaps serve it alongside a bowl of hearty chili on a cold evening – pure perfection!