
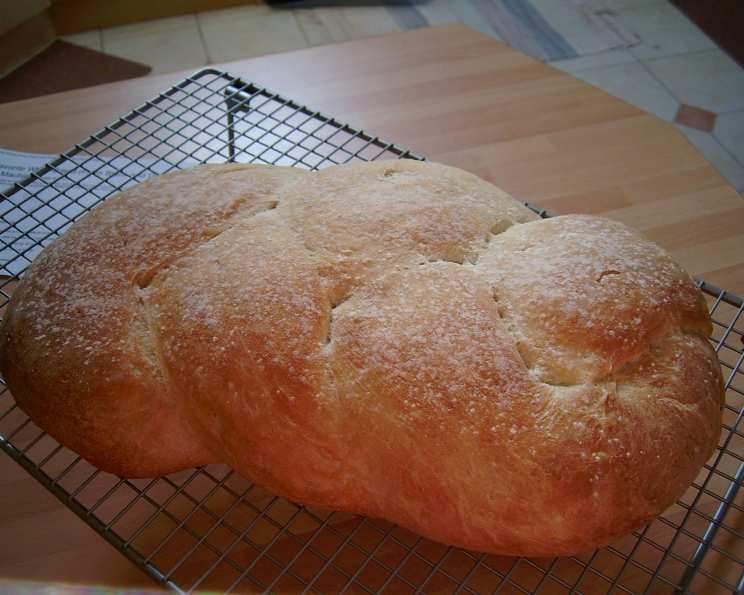
My Favorite White Bread (From Black and Decker Bread Machine)
I remember the first time I baked bread in a bread machine. It was a gift from my grandmother, and the aroma that filled her tiny kitchen was pure magic. The taste of that warm, slightly crusty loaf remains imprinted in my memory. While I’ve experimented with countless bread recipes since, this simple white bread, effortlessly made in a Black and Decker bread machine, consistently delivers a perfect texture and flavor that evokes those cherished moments. It’s the kind of bread that turns an ordinary sandwich into something truly special.
Recipe Overview
- Prep Time: 10 minutes
- Cook Time: 3 hours 20 minutes (includes bread machine cycle)
- Total Time: 3 hours 30 minutes
- Yields: 1 loaf
- Dietary Type: Vegetarian
Ingredients
- 1 1/2 cups water
- 1 1/2 teaspoons salt
- 1 tablespoon sugar
- 3 3/4 cups all-purpose flour
- 1 1/2 teaspoons bread machine yeast
Equipment Needed
- Black and Decker bread machine
- Mixing bowl (optional, for shaping)
- Clean kitchen towel or plastic wrap
- Oven
- Baking sheet
- Wire cooling rack
Instructions
-
Add the ingredients to the bread machine pan in the order recommended by your bread machine’s manufacturer. Generally, you should add the wet ingredients first (in this case, the water), followed by the dry ingredients (salt, sugar, flour), and then top with the yeast. This prevents the yeast from prematurely activating.
-
Place the bread machine pan into the bread machine.
-
Select the “Dough” cycle on your Black and Decker bread machine. This cycle will mix, knead, and perform the first rise for the dough. The cycle typically takes around 1 hour and 30 minutes to 2 hours, but times may vary depending on your model.
-
Once the “Dough” cycle is complete, carefully remove the dough from the bread machine pan. Gently deflate the dough by pressing out some of the air.
-
On a lightly floured surface, shape the dough into a loaf. You can either form a simple oval loaf, a round boule, or try braiding the dough for a more decorative loaf. If the dough is sticky, lightly flour your hands. Cover the shaped loaf with a clean kitchen towel or plastic wrap and let it rest for 15 minutes. This resting period allows the gluten to relax, making it easier to shape and giving the final bread a better texture.
-
Preheat your oven to 425°F (220°C).
-
Place the shaped dough onto a baking sheet. Lightly score the top of the loaf with a sharp knife or bread lame. Scoring helps control the expansion of the bread during baking, preventing it from cracking unevenly.
-
Let the loaf rise in the oven for 45 minutes. For the best rise, create a warm, humid environment by placing a pan of hot water on the bottom rack of the oven. The steam will help keep the surface of the loaf moist, allowing it to expand more fully.
-
Bake the loaf in the preheated oven for 20 minutes, or until golden brown and the internal temperature reaches 200-210°F (93-99°C).
-
Remove the bread from the oven and transfer it to a wire cooling rack. Allow the bread to cool completely before slicing. Cutting into the bread while it’s still warm will result in a gummy texture.
Expert Tips & Tricks
- Ingredient Temperature: Ensure the water is lukewarm (around 105-115°F or 40-46°C) to activate the yeast properly. Water that is too hot can kill the yeast, while water that is too cold will slow down its activity.
- Yeast Quality: Use fresh, active dry yeast or instant yeast for the best results. If you’re unsure about the yeast’s viability, proof it by mixing it with a little warm water and sugar. If it foams up after a few minutes, it’s good to use.
- Flour Measurement: Accurate flour measurement is crucial for bread baking. Use the “spoon and level” method: spoon flour into your measuring cup, then level it off with a straight edge. Avoid scooping directly from the bag, as this can compress the flour and result in too much flour in the recipe.
- Sesame Oil Enhancement: For a delightful twist, try adding a teaspoon of sesame oil and a tablespoon of sesame seeds to the dough, as suggested in recipe #207023. This will impart a subtle nutty flavor and a pleasant texture.
- Kneading Test: While the bread machine handles the kneading, you can still check the dough’s elasticity. It should be smooth and slightly tacky, but not overly sticky. If it’s too sticky, add a tablespoon of flour at a time until it reaches the desired consistency.
- Oven Temperature: Oven temperatures can vary, so keep an eye on the bread while it’s baking. If it’s browning too quickly, tent it loosely with foil to prevent burning.
Serving & Storage Suggestions
This white bread is incredibly versatile. Serve it warm with butter, use it to make sandwiches, toast it for breakfast, or use it in recipes like French toast or bread pudding.
Store leftover bread in an airtight container at room temperature for up to 3 days. For longer storage, wrap the bread tightly in plastic wrap and freeze it for up to 2 months. To thaw, simply leave it at room temperature for a few hours. You can also refresh frozen bread by warming it in a low oven (300°F or 150°C) for a few minutes.
Nutritional Information
| Nutrient | Amount per Serving | % Daily Value |
|---|---|---|
| Calories | 1772.7 kcal | N/A |
| Calories from Fat | 43 g | 2% |
| Total Fat | 4.9 g | 7% |
| Saturated Fat | 0.8 g | 3% |
| Cholesterol | 0 mg | 0% |
| Sodium | 3507.7 mg | 146% |
| Total Carbohydrate | 372.6 g | 124% |
| Dietary Fiber | 13.9 g | 55% |
| Sugars | 13.8 g | 55% |
| Protein | 50.7 g | 101% |
Please note that these values are estimates and may vary based on specific ingredients and preparation methods.
Variations & Substitutions
- Whole Wheat White Bread: Replace up to half of the all-purpose flour with whole wheat flour for a more nutritious loaf with a slightly nutty flavor.
- Herb Infused Bread: Add a tablespoon of dried herbs, such as rosemary, thyme, or oregano, to the dough for a savory twist.
- Cheese Bread: Incorporate 1 cup of shredded cheese, such as cheddar or mozzarella, into the dough for a cheesy and delicious bread.
- Sweet Bread: Increase the sugar to 2-3 tablespoons and add a teaspoon of vanilla extract for a slightly sweet bread, perfect for toast or sandwiches.
- Dairy-Free: The recipe is already dairy-free. Ensure the yeast you are using is also dairy-free, as some brands may contain trace amounts of dairy.
FAQs (Frequently Asked Questions)
Q: Can I use instant yeast instead of bread machine yeast?
A: Yes, you can substitute instant yeast for bread machine yeast. The amount remains the same: 1 1/2 teaspoons. Just be sure to add the instant yeast directly to the dry ingredients without proofing it first.
Q: My bread is too dense. What could be the reason?
A: Several factors can contribute to dense bread. Ensure your yeast is fresh and active, you’re measuring the flour accurately, and you’re not over-kneading the dough.
Q: Can I add other grains or seeds to this recipe?
A: Absolutely! You can add up to 1/2 cup of other grains or seeds, such as flax seeds, sunflower seeds, or rolled oats, to the dough for added texture and flavor.
Q: My bread is browning too quickly. What should I do?
A: If your bread is browning too quickly, tent it loosely with aluminum foil to prevent burning. You can also lower the oven temperature by 25 degrees Fahrenheit.
Q: How can I tell if the bread is done?
A: The best way to check for doneness is to use a digital thermometer. The internal temperature should reach 200-210°F (93-99°C). You can also tap the bottom of the loaf; it should sound hollow.
Final Thoughts
There’s something incredibly satisfying about baking your own bread, and this recipe makes it easy and approachable for everyone, even beginners. The aroma alone is enough to brighten any day, and the taste of freshly baked white bread is simply irresistible. So, dust off your Black and Decker bread machine, gather your ingredients, and experience the joy of homemade bread. I encourage you to try this recipe and share your creations with friends and family. Pair a slice with a bowl of hearty soup or a simple pat of butter, and enjoy the warmth and comfort of this classic loaf!