
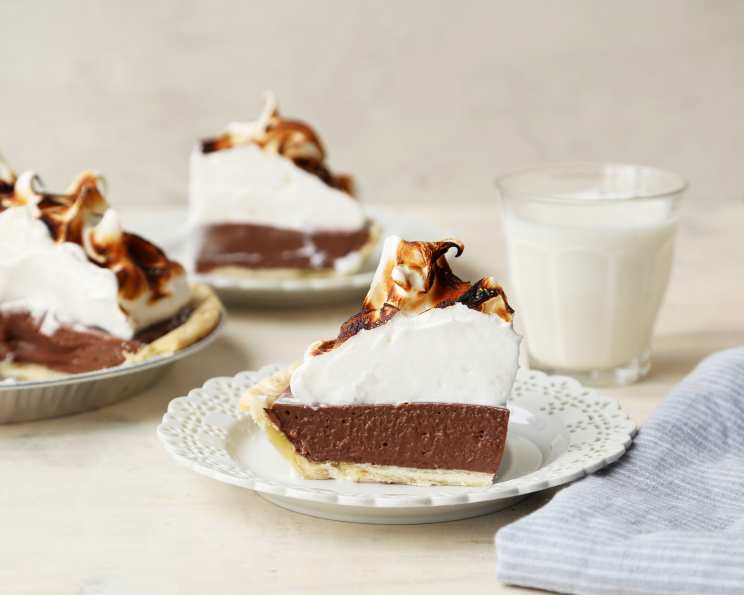
My Grandma’s Chocolate Pies
The scent of cocoa and vanilla still transports me back to Grandma’s kitchen, a place perpetually warmed by the oven’s glow and filled with the murmur of her gentle humming. Her chocolate pies were legendary, disappearing faster than she could pull them from the oven at every family gathering. Each bite was a velvety, bittersweet hug, a taste of pure, unadulterated love baked into a flaky crust. She never wrote anything down; it was all done by feel and instinct, but I’ve tried my best to capture the magic.
Recipe Overview
- Prep Time: 25 minutes
- Cook Time: 30 minutes
- Total Time: 55 minutes
- Yield: 2 pies
- Dietary Type: Not Gluten-Free
Ingredients
-
For the Pie Filling:
- 2 (9-inch) deep dish pie shells, baked (bought or homemade)
- 2 cups sugar
- 6 tablespoons cornstarch
- 6 tablespoons good quality cocoa powder
- 1/4 teaspoon salt
- 6 eggs, separated
- 1 teaspoon vanilla flavoring (NOT ARTIFICIAL)
- 1 (15 ounce) can evaporated milk
- 4 cups whole milk
- 1/4 cup butter
-
For the Meringue:
- 6 teaspoons sugar
- 1/2 teaspoon cream of tartar
Equipment Needed
- Heavy 3-quart boiler (or large saucepan)
- Whisk
- Electric mixer
- Baking sheet
- Oven
Instructions
-
In a heavy 3-quart boiler or large saucepan, stir together the sugar, cornstarch, salt, and cocoa powder until well combined. This ensures even distribution and prevents lumps from forming later.
-
In a separate bowl, beat the egg yolks lightly. Then, add the evaporated milk and whole milk to the egg yolks and stir well to combine. Gradually stir this mixture into the dry ingredients in the boiler.
-
Cut the butter into small cubes and add them to the mixture in the boiler. The small cubes will melt quickly and evenly as the filling cooks.
-
Place the boiler over medium heat. Cook, stirring constantly with a whisk, until the mixture thickens and just begins to “bubble“. This usually takes about 10-15 minutes. It’s crucial to stir constantly to prevent scorching, especially on the bottom of the pan. If you prefer, you can do this step in a double boiler; it will take longer, but it’s a more foolproof way to prevent scorching.
-
Once the filling has thickened, remove it from the heat. Immediately stir in the vanilla and pour the hot filling into the baked pie shells, dividing it evenly between the two. Let cool slightly while you prepare the meringue. This will help the meringue adhere better.
-
Preheat your oven to 325°F (160°C).
-
In a clean, dry bowl, beat the egg whites with an electric mixer until soft peaks form. Add the cream of tartar and continue beating until stiff peaks form. Gradually add the sugar, one teaspoon at a time, beating well after each addition until the meringue is glossy and smooth.
-
Spread the meringue on top of the pies, making sure to seal the edges to the crust. This prevents the meringue from shrinking during baking. You can create decorative swirls with a spoon or spatula.
-
Bake the pies in the preheated oven for 12-15 minutes, or until the meringue is nicely browned. Watch carefully to prevent burning.
-
Remove the pies from the oven and let cool at least 30 minutes before you attempt to cut them. This allows the filling to set properly and the meringue to stabilize.
-
Finally, let the kids (or your dear hubby) have the pot and stirring spoon to lick clean – it’s the best part!
Expert Tips & Tricks
- Preventing a Soggy Crust: Brushing the baked pie crust with a thin layer of melted chocolate before adding the filling can help to prevent a soggy crust.
- Perfect Meringue: Make sure your bowl and beaters are completely clean and dry before whipping the egg whites. Any trace of fat will prevent the meringue from forming properly.
- Even Browning: If your meringue is browning too quickly, loosely tent the pies with foil.
- Cocoa Quality Matters: Using a high-quality cocoa powder will significantly impact the flavor of your pie. Look for Dutch-processed cocoa for a richer, smoother taste.
- Double Boiler Method: For a foolproof method to avoid scorching the filling, use a double boiler. It will take longer to cook, but it’s a much gentler heat.
Serving & Storage Suggestions
Serve the chocolate pies chilled or at room temperature. They are best enjoyed the day they are made, but leftovers can be stored in the refrigerator for up to 3 days. Cover the pies loosely with plastic wrap to prevent the meringue from drying out. Due to the meringue, these pies do not freeze well. If you have leftover filling without the meringue, it can be stored separately in the refrigerator for a few days or frozen for up to 2 months. Thaw overnight in the refrigerator before using.
Nutritional Information
| Nutrient | Amount per Serving | % Daily Value |
|---|---|---|
| Calories | 750 kcal | 38% |
| Total Fat | 57g | 88% |
| Saturated Fat | 27g | 135% |
| Cholesterol | 365mg | 122% |
| Sodium | 935mg | 39% |
| Total Carbohydrate | 188g | 63% |
| Dietary Fiber | 5g | 21% |
| Sugars | 122g | 488% |
| Protein | 31g | 62% |
Note: Nutritional information is an estimate and may vary based on specific ingredients and portion sizes.
Variations & Substitutions
- Gluten-Free: Use gluten-free pie crusts for a gluten-free version.
- Dairy-Free: Substitute the evaporated milk and whole milk with coconut milk or other plant-based milk alternatives. Use a dairy-free butter substitute. Note: the taste will be different.
- Lower Sugar: Reduce the amount of sugar in the filling by 1/4 cup. You can also use a sugar substitute, but be aware that this may affect the texture and taste of the filling.
- Chocolate Intensity: Adjust the amount of cocoa powder to your liking. For a more intense chocolate flavor, add an extra tablespoon or two.
- Add Coffee: Stir in 1-2 teaspoons of instant coffee powder into the filling for a mocha flavor.
FAQs (Frequently Asked Questions)
Q: Why is my pie filling lumpy?
A: Lumps in the filling usually occur when the cornstarch is not properly incorporated with the sugar and cocoa powder. Be sure to whisk the dry ingredients together thoroughly before adding the milk mixture.
Q: How do I prevent the meringue from weeping?
A: Ensure that you have beaten the egg whites to stiff peaks and that the sugar is fully dissolved. Also, seal the meringue to the edges of the crust to prevent shrinking.
Q: Can I make this pie ahead of time?
A: Yes, you can bake the pie crusts and prepare the filling a day ahead of time. Store them separately in the refrigerator. Make the meringue just before assembling and baking the pie.
Q: My filling is too thick/thin, what can I do?
A: If the filling is too thick, whisk in a little more milk until it reaches the desired consistency. If it’s too thin, mix a tablespoon of cornstarch with a tablespoon of cold water and whisk it into the filling while it’s simmering.
Q: Can I use a different type of cocoa powder?
A: Yes, you can use natural cocoa powder, but it will result in a slightly more acidic flavor. Dutch-processed cocoa powder is recommended for a richer, smoother taste.
Final Thoughts
I hope this recipe brings you as much joy as it has brought my family over the years. Don’t be intimidated by the meringue – with a little patience, you’ll be rewarded with a beautiful, golden-brown topping. Bake these pies for your loved ones, share them at your next gathering, and create memories that will last a lifetime. And please, let me know how they turn out! Maybe pair it with a strong cup of coffee or a cold glass of milk for the perfect comforting treat.