
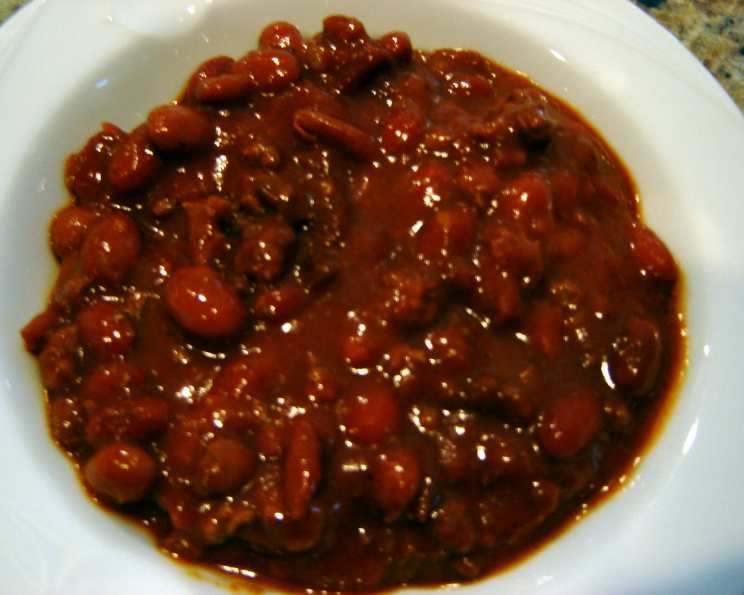
My Mom’s Best Chili: A Taste of Home
The scent of simmering chili always transports me back to my childhood kitchen. Mom, with her ever-present apron and a wooden spoon in hand, would be stirring a bubbling pot on the stove. The aroma, a comforting blend of warm spices and savory beef, promised a hearty and satisfying meal. This wasn’t just chili; it was love in a bowl, a symbol of family gatherings and cozy evenings. And now, I’m thrilled to share her cherished recipe with you.
Recipe Overview
- Prep Time: 15 minutes
- Cook Time: 1-2 hours
- Total Time: 1 hour 15 minutes to 2 hours 15 minutes
- Servings: 4-6
- Yield: Approximately 6-8 cups
- Dietary Type: Varies (see variations for gluten-free/dairy-free)
Ingredients
- 1 lb ground beef, cooked and drained
- ½ small onion, chopped
- 2 tablespoons chili powder
- ½ teaspoon garlic powder
- 1 can tomato soup
- 2 cans chili hot beans
- ½ soup can water
Equipment Needed
- Large saucepan
- Stirring spoon
- Can opener
- Measuring spoons
Instructions
-
Begin by ensuring your ground beef is fully cooked and thoroughly drained. This step is crucial for removing excess fat and preventing a greasy chili. Set the cooked beef aside in a bowl.
-
In a large saucepan, combine the cooked and drained ground beef, chopped onion, chili powder, and garlic powder. Give everything a good stir to ensure the spices are evenly distributed throughout the meat.
-
Pour in the can of tomato soup and stir to incorporate it into the mixture. The tomato soup acts as a base, adding richness and depth of flavor to the chili.
-
Add the two cans of chili hot beans, including the liquid from the cans, to the saucepan. The beans are the heart of this chili, providing texture and essential nutrients.
-
Measure out ½ of a soup can of water and add it to the saucepan. The water helps to thin the chili slightly and allows the flavors to meld together during the simmering process.
-
Bring the mixture to a simmer over medium heat, then reduce the heat to low. Cover the saucepan and let the chili cook for 1-2 hours, stirring occasionally to prevent sticking. The longer it simmers, the richer and more flavorful it becomes. Aim for the full two hours if you have the time.
-
Taste the chili and adjust seasonings as needed. You might want to add a pinch of salt, more chili powder for extra heat, or a touch of cumin for a deeper earthy flavor.
Expert Tips & Tricks
- Browning the Beef: For an even richer flavor, brown the ground beef in a pan before adding it to the saucepan. Be sure to drain any excess fat after browning.
- Onion Prep: Sautéing the chopped onion in a little olive oil before adding it to the other ingredients will mellow its sharpness and bring out its sweetness.
- Spice Control: If you’re sensitive to heat, start with a smaller amount of chili powder and gradually add more to taste. You can also use a mild chili powder instead of a hot one.
- Thickening the Chili: If you prefer a thicker chili, you can mix a tablespoon of cornstarch with a little cold water and stir it into the chili during the last 30 minutes of cooking.
- Make-Ahead Magic: Chili is a fantastic make-ahead dish. The flavors actually improve over time, so feel free to prepare it a day or two in advance and store it in the refrigerator.
- Salvaging a Salty Situation: If you accidentally add too much salt, try adding a peeled potato to the chili while it simmers. The potato will absorb some of the excess salt. Remember to remove the potato before serving!
Serving & Storage Suggestions
Serve this hearty chili hot, straight from the saucepan. It’s delicious on its own or served with your favorite toppings, such as shredded cheddar cheese, sour cream, chopped green onions, or a dollop of Greek yogurt. A side of cornbread or crusty bread is perfect for soaking up every last drop.
Leftover chili can be stored in an airtight container in the refrigerator for up to 3-4 days. For longer storage, freeze the chili in freezer-safe containers for up to 2-3 months. To reheat, thaw the chili in the refrigerator overnight and then warm it gently on the stovetop or in the microwave until heated through.
Nutritional Information
Please note that these are estimates and will vary based on specific ingredients used.
| Nutrient | Amount per Serving | % Daily Value |
|---|---|---|
| Calories | 320 kcal | 16% |
| Total Fat | 18 g | 28% |
| Saturated Fat | 7 g | 35% |
| Cholesterol | 77 mg | 25% |
| Sodium | 668 mg | 27% |
| Total Carbohydrate | 17 g | 5% |
| Dietary Fiber | 3 g | 10% |
| Sugars | 9 g | N/A |
| Protein | 23 g | 46% |
Variations & Substitutions
- Vegetarian Chili: Substitute the ground beef with plant-based ground meat or an extra can of beans.
- Spicy Chili: Add a pinch of cayenne pepper or a chopped jalapeño pepper to the chili for extra heat.
- Smoky Chili: Incorporate a teaspoon of smoked paprika or a splash of liquid smoke for a smoky flavor.
- Gluten-Free Chili: This recipe is naturally gluten-free, but be sure to check the labels of your tomato soup and chili beans to ensure they don’t contain any gluten-containing ingredients.
- Dairy-Free Chili: Omit the cheese and sour cream toppings to make this chili dairy-free.
- Bean Variety: Experiment with different types of beans, such as kidney beans, pinto beans, or black beans.
- Sweet Potato Chili: Add diced sweet potato for a touch of sweetness and added nutrients.
FAQs (Frequently Asked Questions)
Q: Can I use different types of meat in this chili?
A: Absolutely! Ground turkey, ground chicken, or even diced beef chuck can be used in place of ground beef. Adjust cooking times as needed to ensure the meat is fully cooked.
Q: Can I make this chili in a slow cooker?
A: Yes, this chili is perfect for the slow cooker! Simply combine all the ingredients in the slow cooker and cook on low for 6-8 hours or on high for 3-4 hours.
Q: How do I prevent the chili from sticking to the bottom of the saucepan?
A: Stir the chili frequently, especially during the last hour of cooking. You can also add a little bit of water or broth if it seems too dry.
Q: What’s the best way to reheat frozen chili?
A: Thaw the chili in the refrigerator overnight and then reheat it gently on the stovetop or in the microwave. You may need to add a little bit of water or broth to thin it out if it has thickened during freezing.
Q: Can I add other vegetables to this chili?
A: Of course! Diced bell peppers, corn, or zucchini would be great additions. Add them during the last 30 minutes of cooking so they don’t become too mushy.
Final Thoughts
My mom’s chili is more than just a recipe; it’s a warm hug in a bowl. It’s the taste of family, of comfort, and of home. I encourage you to try this simple yet incredibly satisfying recipe. Experiment with the variations, add your own personal touch, and create memories around this delicious dish. Don’t be afraid to share it with loved ones and pass on the tradition. And please, let me know what you think – I’d love to hear about your chili-making adventures! Perhaps pair this chili with a crisp side salad and a hearty dark beer for the ultimate comforting meal. Happy cooking!