
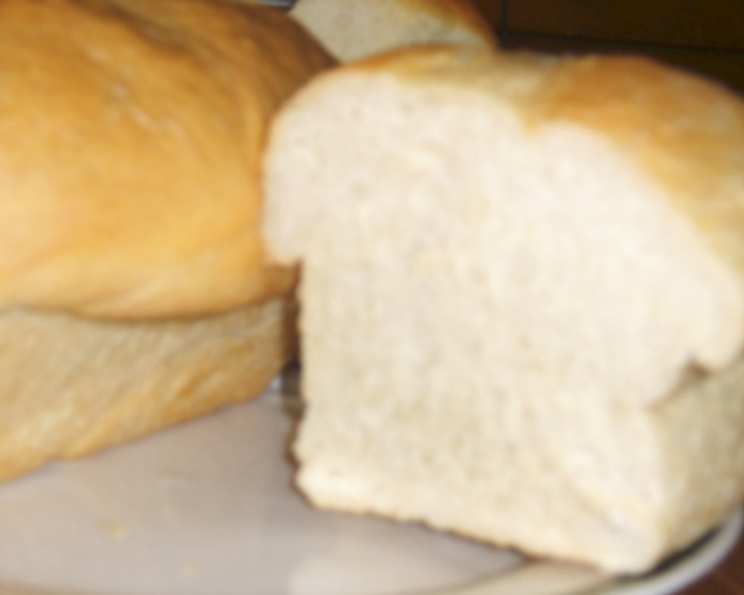
My Mom’s Homemade Bread & Bun Recipe (No Bread Maker)
The smell of yeast and warm dough is the scent of my childhood. I can still picture my mom, her hands dusted with flour, expertly kneading away at a large mound of dough on our kitchen counter. This wasn’t just bread; it was an act of love, a comforting ritual that filled our home with warmth and the promise of delicious meals to come. This recipe, passed down through generations, is more than just a set of instructions – it’s a piece of my heart, and I’m thrilled to share it with you.
Recipe Overview
- Prep Time: 4 hours 2 minutes
- Cook Time: 45 minutes
- Total Time: 4 hours 47 minutes
- Yields: 4 loaves or 2 dozen buns
- Serves: 6
- Dietary Type: Vegetarian
Ingredients
- 1 cup lukewarm water
- 2 tablespoons granulated sugar
- 4 tablespoons vegetable oil or margarine
- 1/2 teaspoon salt
- 3 tablespoons Fleischmann’s dry active yeast
- 8 cups lukewarm water
- 15-18 cups all-purpose flour, plus extra for dusting
- 2 tablespoons granulated sugar
- Optional: Melted butter for brushing
Equipment Needed
- Large mixing bowl
- Measuring cups and spoons
- Clean, flat surface for kneading
- Towels for covering dough
- Loaf pans or ungreased cookie sheets
Instructions
-
In a small bowl, combine 1 cup lukewarm water, yeast, and 2 tablespoons granulated sugar. Do not stir. Let stand for 10 minutes, allowing the yeast to activate and become foamy. This step is crucial; if the yeast doesn’t foam, it’s likely expired and your bread won’t rise.
-
In a large mixing bowl, add 8 cups lukewarm water, the remaining 2 tablespoons granulated sugar, 4 tablespoons vegetable oil or margarine, and salt.
-
Gradually add 6 cups of flour to the wet ingredients, one cup at a time, mixing thoroughly after each addition to ensure no lumps remain. The mixture should be smooth before adding the next cup of flour.
-
Pour the yeast mixture from the small bowl into the large mixing bowl with the flour mixture. Mix until smooth.
-
Continue to add flour, mixing thoroughly until the dough is sticky and begins to form a ball. Note that you will need to use your hands to mix it after it becomes too tough to mix with a spoon. Aim for a maximum of 17 cups of flour in total, but start with 15 and add more only if needed.
-
Sprinkle about 1/2 cup of flour onto a clean, flat, dry surface. Remove the dough from the bowl and place it on the floured surface.
-
Knead the dough with your hands for about 15 minutes. The dough should be soft and light to the touch. To prevent the dough from sticking to your hands, rub vegetable oil or margarine on them. Do not add more flour during kneading, as this will make your bread dough too heavy!
-
Divide the dough in half. Place each half in a separate bowl. Cover each bowl with a light towel and let the dough rise in a warm place for 1 hour, or until doubled in size. This rising time is essential for a light and airy bread.
-
For Buns: Take a portion of dough about the size of a baseball and roll it into a ball. Place the ball on an ungreased cookie sheet. Let rise for another 1/2 hour, or until the buns are doubled in size. For taller buns, place them close together, almost touching. Bake at 375°F (190°C).
-
For Loaves: Take a larger amount of dough and roll it into a roll. The dough should not take up more than half of the loaf pan. Ensure the roll is even; otherwise, you’ll end up with a lopsided loaf. Let rise for 1 to 2 hours, or until the dough is nicely formed above the rim of the loaf pan. Bake at 350°F (175°C) for 45 minutes, or until golden brown. To test for doneness, knock on the top of the loaf; if it sounds hollow, it’s done.
-
Remove the loaves from the oven and immediately remove them from the pans, placing them upside down on a cooling rack. This prevents the bottom crust from becoming soggy due to condensation.
-
Brush melted butter over the top of the loaves to prevent them from drying out and to add a touch of richness.
Expert Tips & Tricks
- Yeast Activation: Always check your yeast’s expiration date. If it doesn’t foam in the first step, it’s best to start over with fresh yeast.
- Kneading Technique: Kneading develops the gluten in the flour, which gives bread its structure. If you’re new to kneading, watch a few online tutorials to learn the proper technique. It’s a physical process, but you’ll get the hang of it!
- Rising Environment: A warm, draft-free environment is crucial for rising. If your kitchen is cold, try placing the dough in a slightly warmed oven (turned off!) or near a radiator.
- Oven Calibration: Ovens can vary in temperature. If your bread consistently burns on the outside before it’s cooked through, try lowering the oven temperature slightly or tenting the loaf with foil during the last part of baking.
- Bread Flour Boost: For a chewier texture, substitute 1-2 cups of the all-purpose flour with bread flour.
Serving & Storage Suggestions
This homemade bread is incredibly versatile. Serve warm slices with butter, jam, or alongside soups and stews. Use it for sandwiches, toast, or as a base for avocado toast. The buns are perfect for burgers, sliders, or breakfast sandwiches.
- Room Temperature: Store the bread at room temperature in a breadbox or tightly sealed plastic bag for up to 3 days.
- Refrigerator: For longer storage (up to a week), store the bread in the refrigerator. However, it will dry out faster, so ensure it’s well-wrapped.
- Freezer: For long-term storage (up to 3 months), slice the bread and freeze it in a freezer-safe bag. Thaw at room temperature or toast directly from frozen.
- Reheating: Reheat slices in a toaster or oven. For a whole loaf, wrap it in foil and bake at 350°F (175°C) for about 10-15 minutes to refresh its texture.
Nutritional Information
| Nutrient | Amount per Serving | % Daily Value |
|---|---|---|
| Calories | 1269.7 kcal | N/A |
| Calories from Fat | N/A | 9% |
| Total Fat | 12.6 g | 19% |
| Saturated Fat | 1.7 g | 8% |
| Cholesterol | 0 mg | 0% |
| Sodium | 213.8 mg | 8% |
| Total Carbohydrate | 249.3 g | 83% |
| Dietary Fiber | 10.1 g | 40% |
| Sugars | 9.2 g | 36% |
| Protein | 34.7 g | 69% |
Note: Nutritional information is an estimate and may vary based on specific ingredients and portion sizes.
Variations & Substitutions
- Whole Wheat Bread: Substitute up to half of the all-purpose flour with whole wheat flour for a nuttier flavor and increased fiber.
- Sweet Bread: Add 1/4 cup of honey or maple syrup to the dough for a sweeter loaf. Consider adding dried fruits and nuts for a festive touch.
- Herb Bread: Mix in 2 tablespoons of chopped fresh herbs (rosemary, thyme, oregano) into the dough for a savory twist.
- Garlic Bread: Add 2-3 cloves of minced garlic to the dough or brush the baked loaf with garlic butter.
- Dairy-Free: Ensure the margarine or vegetable oil used is dairy-free. You can also use olive oil for a slightly different flavor profile.
FAQs (Frequently Asked Questions)
Q: My dough isn’t rising. What could be the problem?
A: The most common reason is expired yeast. Make sure to check the expiration date and activate the yeast in lukewarm water (not too hot, not too cold) to ensure it’s alive. Also, ensure the rising environment is warm and draft-free.
Q: Can I use a stand mixer instead of kneading by hand?
A: Yes, you can use a stand mixer with a dough hook attachment. Knead on medium-low speed for about 8-10 minutes, or until the dough is smooth and elastic.
Q: My bread is too dense. What did I do wrong?
A: Over-kneading or using too much flour can result in dense bread. Be careful not to add too much flour during kneading, and ensure the dough has enough time to rise properly.
Q: Can I make this dough ahead of time?
A: Yes, you can prepare the dough ahead of time and store it in the refrigerator for up to 24 hours. Punch down the dough before refrigerating and allow it to come to room temperature before shaping and baking.
Q: How do I prevent the crust from becoming too dark?
A: If the crust is browning too quickly, tent the loaf with aluminum foil during the last 15-20 minutes of baking.
Final Thoughts
This recipe is a testament to the simple joys of home baking. It’s more than just bread; it’s a connection to my family, a symbol of warmth and comfort, and a delicious reminder that the best things in life are often made with love. Don’t be intimidated – even if you’re a beginner, this recipe is forgiving and yields wonderful results. So, gather your ingredients, dust off your apron, and get ready to fill your home with the irresistible aroma of freshly baked bread. I encourage you to try this recipe, make it your own, and share it with the people you love. And please, let me know how it turns out! Maybe serve it with a hearty bowl of tomato soup for the ultimate comforting meal.