
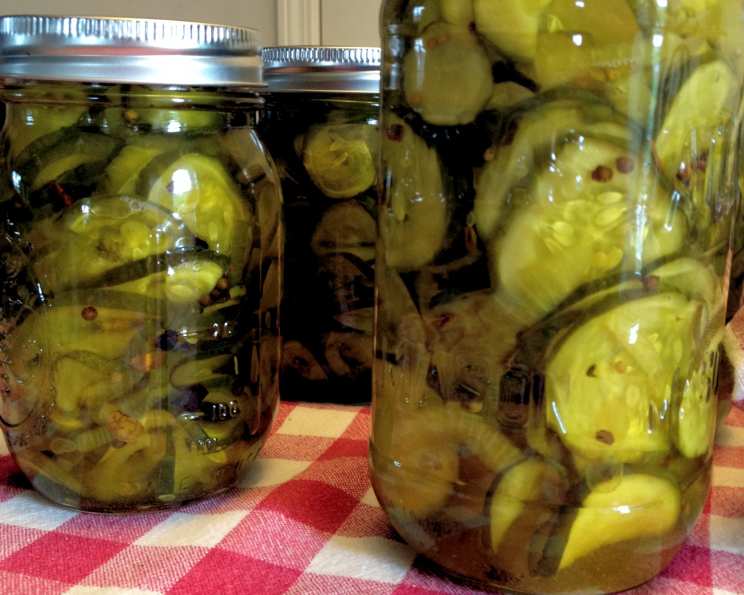
My Wonderful Bread and Butter Pickles!!!
The memory is as vivid as the crunch of the pickles themselves. I was a kid, probably no older than eight, standing next to my grandmother in her sun-drenched kitchen. The air was thick with the sweet-sour scent of vinegar and spices as she meticulously layered sliced cucumbers and onions into sterilized jars. It felt like a magic potion she was brewing, and the resulting bread and butter pickles? Pure sunshine in a jar, a taste of summer that lasted all year long. I’ve tweaked her recipe over the years, but the heart of it – that sweet, tangy, addictive flavor – remains the same. And trust me, once you taste these, you’ll understand why I panicked when I thought I lost this treasure!
Recipe Overview
- Prep Time: 3 hours 30 minutes
- Cook Time: 10 minutes
- Total Time: 3 hours 40 minutes
- Servings: Variable
- Yield: 7 pints
- Dietary Type: Vegetarian, Gluten-Free, Dairy-Free (Check sugar source for vegan suitability)
Ingredients
- 4 quarts cucumbers, medium size, sliced (about 6lbs)
- 1 1/2 cups onions, sliced (about 12-15 small white onions, about 1 lb)
- 2 large garlic cloves
- 1/3 cup salt
- 24 ice cubes
- 4 1/2 cups sugar
- 1 1/2 teaspoons turmeric
- 1 1/2 teaspoons celery seeds
- 2 tablespoons mustard seeds
- 3 cups white vinegar
Equipment Needed
- Large bowl
- Food processor or mandoline (optional, for slicing)
- Large pot
- Sterilized pint jars with lids and rings
- Jar lifter
- Boiling water bath canner
Instructions
-
Begin by thoroughly washing the cucumbers using a vegetable brush to remove any dirt or debris. Place them on a rack to drain completely. This step is crucial for ensuring the pickles are clean and free from any lingering soil.
-
Next, slice the unpeeled cucumbers into 1/8-1/4 inch thick slices. Consistency is key here! Aim for uniform slices so they pickle evenly. I personally love using a food processor with a slicing attachment for this step as it saves a tremendous amount of time. A mandoline slicer is also a great option. If you are using a knife, use a very sharp one and take your time.
-
Add the sliced onions and minced garlic to the sliced cucumbers in the large bowl.
-
Sprinkle the salt over the mixture. Ensure the salt is evenly distributed to properly draw out excess moisture from the cucumbers.
-
Mix the cucumber, onion, garlic, and salt mixture thoroughly. This step helps the salt penetrate the vegetables evenly, initiating the pickling process.
-
Cover the mixture completely with ice cubes. The ice will help keep the cucumbers crisp during the brining process.
-
Allow the mixture to sit for 3 hours. This allows the salt to draw out moisture from the cucumbers, which is essential for achieving the desired texture and flavor.
-
After 3 hours, drain the cucumber mixture thoroughly in a colander.
-
Remove the garlic cloves from the drained mixture and discard. The garlic has imparted its flavor, but leaving it in could lead to an overly strong garlic flavor.
-
In a large pot, combine the sugar, turmeric, celery seeds, mustard seeds, and white vinegar.
-
Heat the sugar and spice mixture just to a boil, stirring constantly to ensure the sugar dissolves completely and prevents burning.
-
Once the mixture reaches a boil, gently add the drained cucumbers and onions to the pot.
-
Heat the cucumber mixture for 5 minutes, stirring occasionally. The goal is to heat the cucumbers through without making them too soft.
-
Using a jar lifter, carefully pack the hot cucumber mixture loosely into clean, sterilized pint jars, leaving about 1/2 inch of headspace at the top.
-
Adjust the lids and rings on each jar, ensuring they are snug but not overly tight.
-
Process the filled jars in a boiling water bath canner for 5 minutes. Start counting the processing time as soon as the water returns to a rolling boil. Ensuring a proper seal is vital for long-term storage.
-
Remove the jars from the canner using a jar lifter and place them on a towel-lined surface to cool completely. You should hear a “pop” sound as the jars seal.
-
Once the jars are completely cooled, check the seals by pressing down on the center of each lid. If the lid does not flex, the jar is properly sealed.
Expert Tips & Tricks
- Crisp Pickles: For extra-crisp pickles, add a tablespoon of calcium chloride (Pickle Crisp) to the cucumber mixture before adding the ice.
- Spice It Up: If you prefer a spicier pickle, add a pinch of red pepper flakes or a small, thinly sliced jalapeño pepper to the brine.
- Onion Variety: Red onions can be substituted for white onions for a slightly different flavor and color.
- Vinegar Choice: While white vinegar is traditional, apple cider vinegar can be used for a slightly milder, fruitier flavor.
- Headspace: Maintaining the correct headspace is crucial for proper sealing. Too little headspace and the jar might not seal; too much and the food at the top could discolor.
- Jar Sterilization: Make sure to properly sterilize your jars! You can do this by boiling them in water for 10 minutes, or running them through a hot cycle in your dishwasher.
Serving & Storage Suggestions
These bread and butter pickles are incredibly versatile. They are the perfect accompaniment to sandwiches, burgers, or hot dogs. Serve them alongside grilled meats, as part of a charcuterie board, or even chop them up and add them to potato salad or tuna salad for a delightful tangy kick.
Properly sealed jars can be stored in a cool, dark place for up to a year. Once opened, refrigerate the pickles and consume them within a few weeks. Avoid leaving the pickles at room temperature for extended periods to maintain their quality and prevent spoilage.
Nutritional Information
Note: Nutritional information is an estimate and may vary based on specific ingredients and serving sizes.
| Nutrient | Amount per Serving | % Daily Value |
|---|---|---|
| Calories | 120 kcal | 6% |
| Total Fat | 0g | 0% |
| Saturated Fat | 0g | 0% |
| Cholesterol | 0mg | 0% |
| Sodium | 700mg | 29% |
| Total Carbohydrate | 30g | 10% |
| Dietary Fiber | 0g | 0% |
| Sugars | 28g | N/A |
| Protein | 0g | 0% |
Variations & Substitutions
- Spicy Bread and Butter Pickles: Add a few sliced jalapeños or a pinch of red pepper flakes to the brine for a kick of heat.
- Dill Bread and Butter Pickles: Include a few sprigs of fresh dill along with the other spices for a refreshing twist.
- No-Sugar Added Pickles: Use a sugar substitute like erythritol or stevia to reduce the sugar content (note that this may affect the texture).
- Bread and Butter Relish: Finely chop the cucumbers and onions before pickling to create a delicious relish perfect for topping burgers and hot dogs.
FAQs (Frequently Asked Questions)
Q: Why do I need to soak the cucumbers in salt and ice water?
A: The salt draws out excess moisture from the cucumbers, helping them stay crisp. The ice water keeps them cool during the process, further enhancing their texture.
Q: Can I use different types of cucumbers?
A: While Kirby cucumbers are ideal for pickling, other varieties can be used. Just be sure to choose cucumbers that are firm and have small seeds.
Q: How do I know if my jars are properly sealed?
A: After processing and cooling, the lid should be slightly concave and not flex when pressed down in the center. If the lid flexes, the jar is not properly sealed and should be refrigerated and consumed within a few weeks.
Q: Can I double this recipe?
A: Yes, you can easily double or triple this recipe. Just be sure to use a large enough pot and adjust the processing time accordingly.
Q: What can I do if my pickles are too sweet?
A: If your pickles are too sweet for your liking, reduce the amount of sugar in the brine next time you make them. You can also add a splash of lemon juice to balance the sweetness.
Final Thoughts
So there you have it – my treasured bread and butter pickle recipe! I sincerely hope you give it a try. These pickles are more than just a condiment; they’re a taste of home, a burst of sunshine, and a reminder of simpler times spent in the kitchen with loved ones. Don’t be afraid to experiment with the spices and make them your own. And please, let me know what you think! I’d love to hear about your pickling adventures and any variations you create. These pickles pair beautifully with a simple grilled cheese sandwich or a refreshing summer salad. Enjoy!