
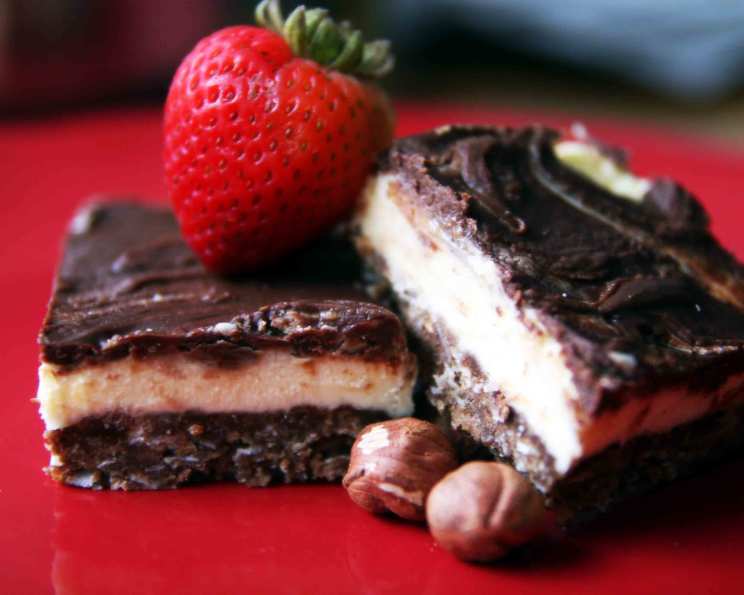
Nanaimo Bars: A Canadian Classic
The memory is etched in my mind: the church basement bake sale, rows of tables laden with every imaginable confection. But my eyes always darted to the corner, where Mrs. Henderson proudly displayed her Nanaimo Bars. Those perfect squares of chocolate, custard, and coconut were pure magic – a taste of home, warmth, and the simple joy of community. Even now, the aroma of cocoa and vanilla instantly transports me back to that bustling hall, filled with laughter and the promise of a sweet treat.
Recipe Overview
- Prep Time: 20 minutes
- Cook Time: 5 minutes
- Total Time: 35 minutes
- Servings: 12-16 squares (depending on size)
- Yield: 1 pan (9×9 inches)
- Dietary Type: Not Gluten-Free, Not Dairy-Free
Ingredients
Layer One (Base):
- ½ cup butter (1 stick)
- ¼ cup sugar
- 1 egg
- 1 teaspoon vanilla extract
- 1 tablespoon cocoa powder
- 2 cups graham wafer crumbs
- 1 cup shredded coconut
- ½ cup chopped nuts (walnuts, hazelnuts, or your preference)
Layer Two (Custard Filling):
- ¼ cup butter (½ stick)
- 3 tablespoons milk
- 2 cups icing sugar (powdered sugar)
- 2 tablespoons custard powder
Layer Three (Chocolate Topping):
- 4 ounces semi-sweet chocolate
- 1 tablespoon butter
Equipment Needed
- 9×9 inch square pan
- Double boiler (or heatproof bowl and saucepan)
- Mixing bowls
- Measuring cups and spoons
- Rubber spatula
- Whisk
- Knife for cutting
Instructions
-
Prepare Layer One (Base): In a double boiler, combine the butter, sugar, egg, vanilla extract, and cocoa powder. If you don’t have a double boiler, use a heatproof bowl set over a saucepan of simmering water, ensuring the bottom of the bowl doesn’t touch the water.
-
Cook Base Mixture: Stir the ingredients in the double boiler constantly until the mixture is slightly thickened and the butter is melted and fully incorporated. This should take about 3-5 minutes. Be careful not to overcook the egg.
-
Combine Dry and Wet Ingredients: Remove the double boiler from the heat. Add the graham wafer crumbs, shredded coconut, and chopped nuts to the mixture. Mix well until everything is evenly combined.
-
Press into Pan: Grease a 9×9 inch square pan with butter or cooking spray. Press the Layer One mixture firmly and evenly into the prepared pan, creating a compact base.
-
Chill the Base: Let the base stand at room temperature for 15 minutes to help it set slightly. This prevents the second layer from sinking into the base.
-
Prepare Layer Two (Custard Filling): In a mixing bowl, combine the butter, milk, icing sugar, and custard powder.
-
Mix Custard Filling: Using an electric mixer or a sturdy whisk, beat the ingredients together until smooth and creamy. This may take a few minutes. Ensure there are no lumps of icing sugar remaining.
-
Spread Custard Filling: Spread the Layer Two mixture evenly over the chilled Layer One base.
-
Refrigerate Filling: Refrigerate the pan for at least 15 minutes to allow the custard filling to firm up. This is crucial for preventing the chocolate topping from mixing with the filling.
-
Prepare Layer Three (Chocolate Topping): In a clean double boiler, melt the semi-sweet chocolate.
-
Add Butter to Chocolate: Once the chocolate is melted and smooth, very slowly and gently stir in the butter until it is just blended. This creates a glossy and easily spreadable topping.
-
Spread Chocolate Topping: Remove the pan from the refrigerator. Carefully spread the melted chocolate mixture evenly over the Layer Two custard filling.
-
Chill Completely: Refrigerate the entire pan for at least 1 hour, or preferably longer, to allow the chocolate to set completely. This will make it easier to cut into clean squares.
-
Cut into Squares: Once the Nanaimo Bars are fully chilled and set, use a sharp knife to cut them into squares. For neat squares, you can dip the knife in hot water and wipe it clean between each cut.
Expert Tips & Tricks
-
Preventing a Soggy Base: Ensure you press the graham wafer crumb mixture firmly into the pan. This creates a solid foundation and prevents the filling from seeping through.
-
Smooth Chocolate Topping: For a perfectly smooth chocolate topping, melt the chocolate slowly over low heat, and add the butter gradually. Avoid overheating the chocolate, as this can cause it to seize.
-
Clean Cuts: Chilling the bars completely before cutting is essential for achieving clean, professional-looking squares.
-
Nut Variety: Feel free to experiment with different types of nuts in the base. Walnuts, pecans, or even slivered almonds work well.
-
Custard Powder Substitute: If you can’t find custard powder, you can use cornstarch as a substitute. Add a drop or two of yellow food coloring to achieve the characteristic custard color.
Serving & Storage Suggestions
Serve Nanaimo Bars chilled for the best texture and flavor. They are a perfect addition to a dessert platter, a delightful treat with coffee or tea, or a satisfying afternoon snack.
Store leftover Nanaimo Bars in an airtight container in the refrigerator for up to a week. You can also freeze them for longer storage. To freeze, wrap the bars individually in plastic wrap and then place them in a freezer bag. They can be stored in the freezer for up to 2-3 months. Thaw in the refrigerator before serving. While they can be left at room temperature for a few hours, they are best enjoyed cold.
Nutritional Information
| Nutrient | Amount per Serving | % Daily Value |
|---|---|---|
| Calories | 403.6 kcal | N/A |
| Calories from Fat | 243 g | 60% |
| Total Fat | 27 g | 41% |
| Saturated Fat | 15.9 g | 79% |
| Cholesterol | 49.1 mg | 16% |
| Sodium | 227.9 mg | 9% |
| Total Carbohydrate | 41.4 g | 13% |
| Dietary Fiber | 3.8 g | 15% |
| Sugars | 29 g | N/A |
| Protein | 4.5 g | 9% |
Note: Nutritional information is an estimate and may vary based on specific ingredients and portion sizes.
Variations & Substitutions
-
Gluten-Free Nanaimo Bars: Substitute gluten-free graham crackers for regular graham crackers in the base. You may also need to adjust the amount of liquid slightly to achieve the right consistency.
-
Dairy-Free Nanaimo Bars: Use a dairy-free butter substitute and non-dairy milk in the filling and topping. Ensure your chocolate is also dairy-free.
-
Peanut-Free Nanaimo Bars: Omit the nuts entirely or substitute with sunflower seeds or pumpkin seeds.
-
Mint Chocolate Nanaimo Bars: Add a few drops of peppermint extract to the chocolate topping for a refreshing twist.
-
Espresso Nanaimo Bars: Add a teaspoon of instant espresso powder to the chocolate topping for a richer, more complex flavor.
FAQs (Frequently Asked Questions)
Q: Why is my base layer crumbly?
A: This usually happens when there isn’t enough moisture to bind the crumbs together. Make sure your butter and egg mixture is adequately thickened and evenly distributed throughout the graham cracker crumbs.
Q: How do I prevent the chocolate topping from cracking when I cut the bars?
A: Ensure the chocolate is melted smoothly and evenly. Also, chill the bars completely before cutting. Use a warm, clean knife for each cut.
Q: Can I use a different type of chocolate for the topping?
A: Absolutely! Milk chocolate or dark chocolate can be used depending on your preference. Keep in mind that different chocolates have different melting points.
Q: Can I make these ahead of time?
A: Yes, Nanaimo Bars are perfect for making ahead. They can be stored in the refrigerator for up to a week or frozen for longer storage.
Q: Why is my custard filling too soft?
A: Ensure you use the correct amount of custard powder and beat the filling until it is smooth and creamy. Proper refrigeration is also important for firming up the filling.
Final Thoughts
Nanaimo Bars are more than just a dessert; they are a culinary hug, a taste of nostalgia, and a celebration of simple pleasures. Don’t be intimidated by the multiple layers – this recipe is surprisingly straightforward and incredibly rewarding. I encourage you to gather your ingredients, embrace the process, and create your own batch of these iconic Canadian treats. Share them with loved ones, and watch as their faces light up with every bite. And don’t hesitate to experiment with variations to make them your own signature creation!