
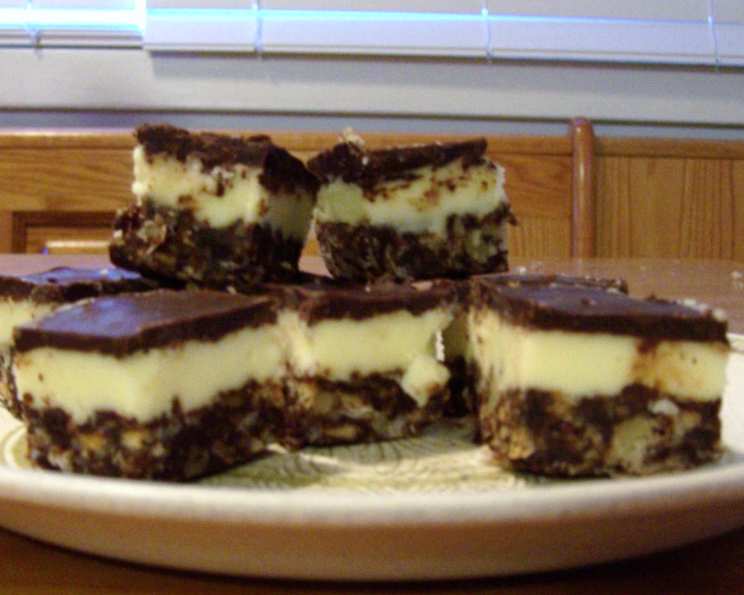
Nanaimo Bars: A Canadian Classic
The first time I tasted a Nanaimo Bar, I was at a bake sale in a small town in British Columbia. The squares, neatly arranged on a paper plate, beckoned with their contrasting layers of chocolate, custard, and crumbly base. One bite, and I was transported. The rich, buttery flavors, the textural interplay of soft filling and crisp chocolate, and the sheer decadence of it all were unlike anything I’d ever experienced. It was a taste of Canada, a sweet souvenir I’ve cherished ever since.
Recipe Overview
- Prep Time: 20 minutes
- Cook Time: 3 minutes
- Total Time: 23 minutes (plus cooling time)
- Servings: 16-25 squares (depending on size)
- Yield: One 9×9 inch pan
- Dietary Type: Not Gluten-Free
Ingredients
For the Crust:
- ½ cup butter
- ¼ cup sugar
- 5 tablespoons cocoa
- 1 teaspoon real vanilla extract
- 1 egg
- 1 ½ cups graham cracker crumbs
- 1 cup coconut
- ½ cup milk
For the Filling:
- ½ cup butter, softened
- 3 tablespoons milk
- 2 teaspoons vanilla pudding mix
- 2 cups powdered sugar
For the Chocolate Topping:
- 4 ounces Baker’s semi-sweet chocolate baking squares
- 1 tablespoon butter
Equipment Needed
- 9×9 inch baking pan
- Medium saucepan
- Mixing bowl
- Electric mixer (optional)
- Double boiler or heat-safe bowl and saucepan
- Measuring cups and spoons
- Spatula or offset spatula
Instructions
-
Prepare the Crust: In a medium saucepan, combine ½ cup butter, ¼ cup sugar, 5 tablespoons cocoa, 1 teaspoon vanilla extract, and 1 egg.
-
Cook the Crust Mixture: Place the saucepan over medium heat and cook for 3 minutes, stirring constantly, until the butter is melted and the mixture is smooth and slightly thickened. It’s important to stir constantly to prevent the egg from scrambling.
-
Combine Dry Ingredients: Remove the saucepan from the heat and add 1 ½ cups graham cracker crumbs, 1 cup coconut, and ½ cup milk. Stir well to combine, ensuring all ingredients are evenly distributed. The mixture should be moist and hold together when pressed.
-
Press into Pan: Transfer the crust mixture to a 9×9 inch baking pan. Use your fingers or the back of a spoon to press the mixture firmly and evenly into the bottom of the pan. A well-compacted crust is essential for a stable Nanaimo bar.
-
Cool the Crust: Place the pan in the refrigerator to cool completely while you prepare the filling. This will help the crust set properly.
-
Prepare the Filling: In a medium mixing bowl, combine ½ cup softened butter, 3 tablespoons milk, and 2 teaspoons vanilla pudding mix.
-
Cream the Filling: Using an electric mixer (or a sturdy whisk), cream the butter mixture until smooth and fluffy. Gradually add 2 cups powdered sugar, beating until the filling is light and airy. Be careful not to overmix, as this can make the filling tough.
-
Spread the Filling: Remove the cooled crust from the refrigerator. Spread the filling evenly over the crust, using a spatula or offset spatula. Ensure the filling is smooth and reaches all corners of the pan.
-
Chill the Filling: Return the pan to the refrigerator to chill the filling while you prepare the chocolate topping. This will help the filling set and prevent the chocolate from sinking in.
-
Melt the Chocolate: In a double boiler or heat-safe bowl set over a simmering pot of water, combine 4 ounces Baker’s semi-sweet chocolate squares and 1 tablespoon butter. Ensure the bottom of the bowl doesn’t touch the water.
-
Stir Until Smooth: Melt the chocolate and butter over low heat, stirring frequently, until the mixture is smooth and glossy. Be patient and avoid overheating the chocolate, as this can cause it to seize.
-
Spread the Chocolate: Remove the chilled pan from the refrigerator. Pour the melted chocolate evenly over the filling. Use a spatula or offset spatula to spread the chocolate into a thin, even layer.
-
Final Chill: Return the pan to the refrigerator and chill for at least 2 hours, or preferably overnight, to allow the chocolate to set completely.
-
Cut and Serve: Once the chocolate is firm, remove the pan from the refrigerator. Use a sharp knife to cut the Nanaimo bars into 1-inch squares (or desired size). For clean cuts, dip the knife in hot water and wipe it dry between each cut.
Expert Tips & Tricks
- Room Temperature Ingredients: For the filling, ensure the butter is softened to room temperature for a smoother, creamier texture.
- Press Firmly: When pressing the crust mixture into the pan, use a firm hand to ensure it’s compact and even. This will prevent it from crumbling when cut.
- Don’t Overheat Chocolate: When melting the chocolate, use low heat and stir frequently to prevent it from burning or seizing. If the chocolate seizes, try adding a teaspoon of vegetable oil to smooth it out.
- Clean Cuts: To get clean cuts, use a sharp knife and dip it in hot water before each cut. Wipe the knife dry to prevent water from getting on the bars.
- Dust with Cocoa: For a professional look, lightly dust the finished Nanaimo bars with cocoa powder before serving.
Serving & Storage Suggestions
Serve Nanaimo Bars chilled or at room temperature. They are a perfect treat for afternoon tea, desserts, or special occasions.
Store leftover Nanaimo Bars in an airtight container in the refrigerator for up to 1 week. They can also be frozen for up to 2 months. To thaw, place the frozen bars in the refrigerator overnight.
Nutritional Information
| Nutrient | Amount per Serving | % Daily Value |
|---|---|---|
| Calories | 290 kcal | 15% |
| Total Fat | 20g | 31% |
| Saturated Fat | 12g | 60% |
| Cholesterol | 40mg | 13% |
| Sodium | 100mg | 4% |
| Total Carbohydrate | 25g | 8% |
| Dietary Fiber | 1g | 4% |
| Sugars | 20g | – |
| Protein | 2g | 4% |
Note: Nutritional information is an estimate and may vary based on specific ingredients and serving size.
Variations & Substitutions
- Gluten-Free Nanaimo Bars: Substitute the graham cracker crumbs with gluten-free graham cracker crumbs or a gluten-free cookie crumb blend.
- Vegan Nanaimo Bars: Substitute the butter with vegan butter and the milk with plant-based milk (such as almond milk or oat milk). Ensure the pudding mix and chocolate are also vegan-friendly. Consider using a flax egg replacer.
- Mint Chocolate Nanaimo Bars: Add a few drops of peppermint extract to the chocolate topping for a refreshing twist.
- Coffee Flavored Nanaimo Bars: Add a teaspoon of instant coffee powder to the filling for a subtle coffee flavor.
- Nutty Nanaimo Bars: Add chopped walnuts or pecans to the crust for added texture and flavor.
FAQs (Frequently Asked Questions)
Q: Why is my crust crumbly?
A: The crust may be crumbly if it’s not pressed firmly enough into the pan or if there isn’t enough moisture. Ensure you press the mixture firmly and add a tablespoon or two of milk if needed.
Q: Can I use a different size pan?
A: Yes, but you may need to adjust the baking time. A larger pan will result in thinner bars, while a smaller pan will result in thicker bars.
Q: My chocolate is seizing. What should I do?
A: If your chocolate seizes, try adding a teaspoon of vegetable oil or shortening and stir until smooth. Avoid overheating the chocolate and ensure there is no water in the melting bowl.
Q: Can I make these ahead of time?
A: Absolutely! Nanaimo bars are a great make-ahead dessert. They can be stored in the refrigerator for up to a week or frozen for up to 2 months.
Q: Why is my filling grainy?
A: The filling may be grainy if the butter is not softened enough or if the powdered sugar is not fully incorporated. Ensure the butter is at room temperature and beat the filling until smooth and creamy.
Final Thoughts
Nanaimo Bars are more than just a dessert; they’re a taste of Canadian heritage, a sweet reminder of home. I encourage you to try this recipe and experience the delightful layers of flavor and texture for yourself. Don’t be afraid to experiment with variations and substitutions to create your own unique version. Share your creations with friends and family, and let the deliciousness of Nanaimo Bars spread joy and sweetness to those around you.