
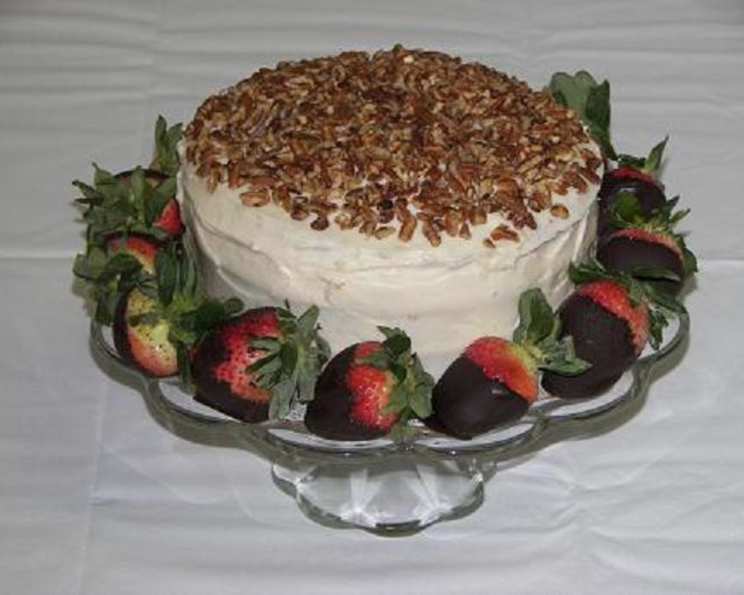
Nana’s Red Velvet Cake: A Slice of Southern Charm
The first time I tasted Red Velvet Cake, I was at a potluck held at my church. I remember seeing this striking cake on the dessert table and being drawn to its vibrant, almost magical hue. One bite, and I was hooked. The tangy, subtly chocolatey flavor combined with the rich cream cheese frosting was unlike anything I’d ever had. I got the recipe from one of the church’s matriarchs, affectionately known as Nana. This cake is more than just a dessert; it’s a taste of Southern hospitality and warmth, a reminder of shared meals and comforting traditions.
Recipe Overview
- Prep Time: 20 minutes
- Cook Time: 35 minutes
- Total Time: 55 minutes
- Servings: 10-12
- Yield: 1 cake
- Dietary Type: Classic Dessert
Ingredients
For the Cake:
- 2 cups Wesson vegetable oil
- 2 ½ cups all-purpose flour
- 1 ½ cups sugar
- 1 cup buttermilk (or 1 cup milk)
- 2 eggs
- 2 ounces red food coloring
- 2 teaspoons cocoa
- 1 teaspoon vinegar
- 1 teaspoon baking soda
- 1 teaspoon vanilla extract
- 1 teaspoon salt
For the Cream Cheese Icing:
- 1 (16 ounce) box powdered sugar
- 1 (8 ounce) package cream cheese, softened
- ½ cup butter, softened
- 1 teaspoon vanilla extract
- 1 cup chopped pecans (optional)
Equipment Needed
- Three 8-inch round cake pans
- Handheld mixer
- Mixing bowls
- Measuring cups and spoons
- Rubber spatula
- Toothpick
Instructions
-
Preheat your oven to 350°F (175°C). Grease and flour three 8-inch round cake pans. This step is crucial to prevent the cake from sticking, ensuring a clean release after baking. You can also line the bottoms of the pans with parchment paper for extra insurance.
-
Combine all cake ingredients in a large mixing bowl. This includes the vegetable oil, flour, sugar, buttermilk (or milk), eggs, red food coloring, cocoa, vinegar, baking soda, vanilla, and salt.
-
Mix well with a handheld mixer until the batter is smooth and evenly colored. Be careful not to overmix, as this can develop the gluten in the flour and result in a tough cake. Mix just until the ingredients are fully incorporated.
-
Divide the batter evenly among the prepared cake pans. Using a kitchen scale can help ensure that each layer is the same thickness, leading to a more uniform and visually appealing cake.
-
Bake for approximately 35 minutes, or until a toothpick inserted into the center comes out clean. Start checking for doneness around the 30-minute mark. If the tops of the cakes are browning too quickly, you can tent them loosely with aluminum foil.
-
Let the cakes cool completely in the pans before attempting to ice them. This is a critical step! Trying to ice a warm cake will result in a melted, messy disaster. Allow the cakes to cool for at least 15-20 minutes in the pans before inverting them onto a wire rack to cool completely.
-
While the cakes are cooling, prepare the cream cheese icing. In a large mixing bowl, cream together the softened butter and cream cheese with a handheld mixer until light and fluffy. Make sure your butter and cream cheese are truly softened to avoid lumps in the icing.
-
Gradually add the powdered sugar to the creamed mixture, mixing on low speed until incorporated. Then, add the vanilla extract and continue mixing until smooth.
-
If desired, stir in the chopped pecans into the icing.
-
Once the cakes are completely cool, assemble and ice the cake. Place one layer of cake on a serving plate or cake stand. Spread a generous amount of cream cheese icing evenly over the top. Repeat with the remaining cake layers.
-
Frost the entire cake with the remaining icing. You can create a smooth, even finish or add decorative swirls with a spatula or piping bag.
Expert Tips & Tricks
- Buttermilk Substitute: If you don’t have buttermilk on hand, you can make a quick substitute by adding 1 tablespoon of lemon juice or white vinegar to a liquid measuring cup, then filling the rest of the cup with milk. Let it sit for 5 minutes to curdle slightly before using.
- Cake Flour: For an even more tender cake, substitute 1/2 cup of the all-purpose flour with cake flour.
- Color Enhancement: For a deeper red color, use gel food coloring instead of liquid. Gel colors are more concentrated and won’t thin out the batter as much.
- Preventing a Dry Cake: Measure your flour accurately by spooning it into the measuring cup and leveling it off with a knife. Avoid scooping directly from the bag, as this can pack the flour and result in too much being used.
- Easy Layering: To make layering easier, trim the tops of the cakes with a serrated knife to create a flat, even surface.
Serving & Storage Suggestions
Serve Nana’s Red Velvet Cake chilled or at room temperature. It’s delicious on its own or paired with a scoop of vanilla ice cream or a cup of coffee.
- Storage: Store leftover cake in an airtight container in the refrigerator for up to 3 days.
- Freezing: For longer storage, you can freeze the cake layers (unfrosted) individually wrapped in plastic wrap and then placed in a freezer bag for up to 2 months. Thaw completely before frosting.
- Presentation: Dust the cake with cocoa powder or garnish with fresh berries for an elegant presentation.
Nutritional Information
Here’s an estimate of the nutritional information per serving:
| Nutrient | Amount per Serving | % Daily Value |
|---|---|---|
| Calories | 750 kcal | 38% |
| Total Fat | 45g | 69% |
| Saturated Fat | 25g | 125% |
| Cholesterol | 100mg | 33% |
| Sodium | 400mg | 17% |
| Total Carbohydrate | 80g | 27% |
| Dietary Fiber | 1g | 4% |
| Sugars | 60g | N/A |
| Protein | 5g | 10% |
Note: Nutritional information is an estimate and can vary based on specific ingredients and portion sizes.
Variations & Substitutions
- Chocolate Red Velvet: Add 1/4 cup of melted dark chocolate to the cake batter for a richer, more intense chocolate flavor.
- Gluten-Free: Substitute the all-purpose flour with a gluten-free all-purpose flour blend. Be sure to add a teaspoon of xanthan gum to help bind the ingredients.
- Vegan Red Velvet: Replace the buttermilk with non-dairy milk mixed with apple cider vinegar. Use a vegan egg replacement and vegan butter for the frosting.
- Naked Cake: For a rustic look, leave the sides of the cake unfrosted, exposing the beautiful red layers.
- Cupcakes: Bake the batter in cupcake liners for individual servings. Reduce the baking time to approximately 18-20 minutes.
FAQs (Frequently Asked Questions)
Q: Why is vinegar used in Red Velvet Cake?
A: The vinegar helps to activate the baking soda, creating a light and fluffy texture. It also contributes to the cake’s characteristic tang.
Q: Can I use a different type of oil?
A: While vegetable oil is recommended for its neutral flavor, you can use canola oil or even melted coconut oil as a substitute.
Q: What if my cake layers are domed?
A: If your cake layers are domed, you can trim the tops with a serrated knife after they have cooled to create a flat surface for layering.
Q: Why is my cream cheese frosting too soft?
A: Make sure your butter and cream cheese are cold before creaming them together. If the frosting is still too soft, add a tablespoon of powdered sugar at a time until it reaches the desired consistency.
Q: Can I make the cake ahead of time?
A: Yes, you can bake the cake layers ahead of time and store them in the refrigerator or freezer until you are ready to frost them.
Final Thoughts
Nana’s Red Velvet Cake is more than just a recipe; it’s an invitation to create lasting memories. Whether you’re baking it for a holiday celebration, a birthday party, or simply a cozy night in, this cake is sure to delight. Don’t be afraid to experiment with variations and make it your own. And most importantly, share it with the people you love. After all, a slice of cake is always better when enjoyed with good company!