
Unleashing the Magic of Nancy Silverton’s Grape Sourdough Starter
The scent of sourdough has always been synonymous with home for me. As a young chef, I remember being utterly mesmerized watching my grandmother coax life from a bubbling concoction of flour and water. It felt like alchemy, transforming simple ingredients into a tangy, chewy masterpiece. While her starter was a closely guarded family secret, discovering Nancy Silverton’s Grape Sourdough Starter felt like uncovering a similar treasure – a method so seemingly simple, yet capable of producing truly extraordinary results. The first loaf I made with it filled my kitchen with an aroma that transported me back to my grandmother’s kitchen, a testament to the enduring power of sourdough and the brilliance of Silverton’s approach.
Recipe Overview: Nancy Silverton’s Grape Sourdough Starter
- Prep Time: 10 minutes
- Fermentation Time: 6 days
- Feeding Time: 3 days
- Yield: Approximately 2 cups
- Dietary Type: Vegan
Ingredients
- 2 cups bread flour
- 2 1/2 cups un-chlorinated water
- 1/2 lb red grapes, unwashed organic stemmed
Equipment Needed
- Cheesecloth
- String
- Rolling pin
- Large container with lid or plastic wrap and rubber band
- Clean container for transfer
Instructions
-
First, prepare your grapes. Wrap the unwashed organic red grapes in well-washed cheesecloth. Tie the corners of the cheesecloth to form a bag.
-
Using a rolling pin, lightly crush the grapes inside the cheesecloth bag. The goal is to release the sugar to mix with the natural yeast on the skins, just like making wine. Be careful not to pulverize them completely; a gentle crushing is all that’s needed.
-
In a large container, combine the bread flour and un-chlorinated water. Mix well until a smooth batter forms.
-
Immerse the cheesecloth bag of crushed grapes into the flour-water mixture. Ensure the bag is fully submerged.
-
Cover the container tightly with a lid or plastic wrap secured with a rubber band.
-
Leave the covered container at room temperature for 6 days. Stir the mixture gently once or twice a day during these six days.
-
During the fermentation process, observe the changes in the mixture. The bag of grapes will eventually appear inflated. Liquid will begin to separate from the flour base. The mixture will develop a slightly fruity taste and smell, and the color might appear strange – this is all part of the natural fermentation process.
-
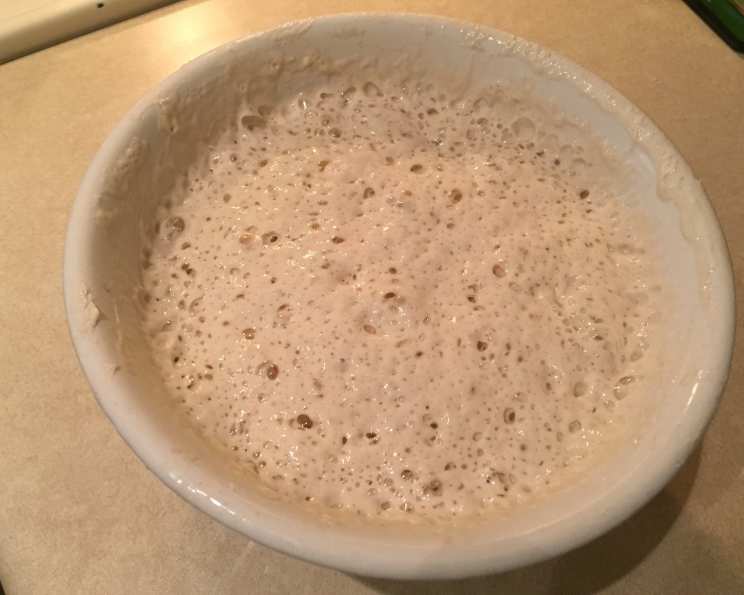
By the sixth day, the bag of grapes will have deflated, the color will have shifted to yellow, and the taste will be pleasantly sour. This indicates that fermentation is complete. The starter is now alive but still weak and needs to be fed.
-
Remove the cheesecloth bag of grapes from the container. Squeeze the juices from the grapes back into the starter. Discard the grape solids.
-
Stir the starter thoroughly and transfer it to a clean container.
-
Although you can use the starter after just one feeding, the starter will be stronger and healthier with the full treatment. You can refrigerate it until you’re ready to proceed with the feeding process.
-
Three days before you plan to use the starter for baking, begin the feeding process. Stir 1 cup of bread flour and 1 cup of un-chlorinated water into the container, blending well.
-
Let the mixture stand uncovered at room temperature until it bubbles up—this typically takes 3 to 4 hours.
-
Once it has bubbled up, cover the container and refrigerate.
-
Repeat this feeding process (1 cup flour + 1 cup water, 3-4 hours at room temperature, then refrigerate) on the second and third day. This will strengthen the starter and make it ready for baking.
-
To store the starter, keep it tightly covered in the refrigerator. It will keep perfectly for 4 to 6 months. After this period, it’s a good idea to pour off all but 2 cups and give it another full 3-day feeding.
-
Before using the stored starter for bread, give it the full 3-day feeding schedule once again to restore its activity and tone down any excess sourness.
Expert Tips & Tricks
- Temperature is key: Room temperature is crucial for the initial fermentation process. Aim for a temperature between 70-75°F (21-24°C). Colder temperatures will slow down fermentation, while warmer temperatures can accelerate it too much, potentially leading to off-flavors.
- Observe and adjust: The fermentation time may vary depending on your environment. Pay attention to the visual cues (inflation of the grape bag, separation of liquids) and the aroma to determine when the starter is ready.
- Don’t over-crush: When crushing the grapes, avoid crushing them into a pulp. Gentle pressure is enough to release the necessary sugars and yeasts.
- Discarding excess starter: When feeding your starter, you’ll often have more than you need. Don’t throw it away! You can use the discarded starter to make pancakes, waffles, or crackers.
- Troubleshooting slow activity: If your starter isn’t bubbling up as expected, try moving it to a slightly warmer location or using a different type of flour.
- Be patient: Sourdough baking is a process that requires patience. Don’t be discouraged if your first attempt isn’t perfect. Keep practicing and adjusting your technique, and you’ll eventually achieve amazing results.
Serving & Storage Suggestions
Sourdough bread made with this starter is best enjoyed fresh. Slice and serve it with butter, olive oil, or your favorite spreads. It also makes a fantastic base for sandwiches and toast.
Store leftover sourdough bread in a bread bag or airtight container at room temperature for up to 3 days. For longer storage, slice the bread and freeze it in a freezer-safe bag for up to 2 months. To reheat, thaw the bread at room temperature and then toast it or warm it in the oven.
Nutritional Information
Note: Nutritional information will vary depending on the flour used and the final bread recipe.
| Nutrient | Amount per Serving | % Daily Value |
|---|---|---|
| Calories | 533 kcal | N/A |
| Total Fat | 1.4g | 2% |
| Saturated Fat | 0.2g | 1% |
| Cholesterol | 0mg | 0% |
| Sodium | 13.7mg | 0% |
| Total Carbohydrate | 115.9g | 38% |
| Dietary Fiber | 4.4g | 17% |
| Sugars | 17.9g | N/A |
| Protein | 13.7g | 27% |
Variations & Substitutions
- Different fruits: While red grapes are traditional, you can experiment with other fruits, such as green grapes, raisins, or even apples. Keep in mind that different fruits will impart different flavors to the starter.
- Gluten-free starter: To make a gluten-free starter, use a blend of gluten-free flours, such as rice flour, tapioca flour, and sorghum flour.
- Whole wheat starter: Substitute some of the bread flour with whole wheat flour for a nuttier, more complex flavor.
FAQs (Frequently Asked Questions)
Q: Why do I need to use un-chlorinated water?
A: Chlorine can inhibit the growth of the beneficial yeasts and bacteria that are essential for sourdough fermentation. Use filtered or bottled water if your tap water contains chlorine.
Q: Can I use regular table salt in this recipe?
A: This recipe doesn’t use any salt.
Q: How do I know if my starter is ready to use?
A: A ready-to-use starter should be bubbly, active, and have a pleasant, slightly sour aroma. It should also double in size within a few hours after feeding.
Q: What if my starter develops mold?
A: If you see any signs of mold, discard the starter immediately. Mold can be harmful and should not be consumed.
Q: Can I freeze my sourdough starter?
A: Yes, you can freeze your sourdough starter for long-term storage. Thaw it in the refrigerator overnight and then feed it for a few days to reactivate it before using it.
Final Thoughts
Creating your own sourdough starter is an incredibly rewarding experience. It’s a journey that connects you to centuries of baking tradition and allows you to craft truly unique and flavorful breads. Nancy Silverton’s Grape Sourdough Starter is a fantastic starting point, offering a simple yet effective method for cultivating a thriving culture. So, embrace the process, experiment with different flours and fruits, and discover the magic of sourdough baking. Share your creations with friends and family, and don’t hesitate to reach out with any questions or feedback. Happy baking!