
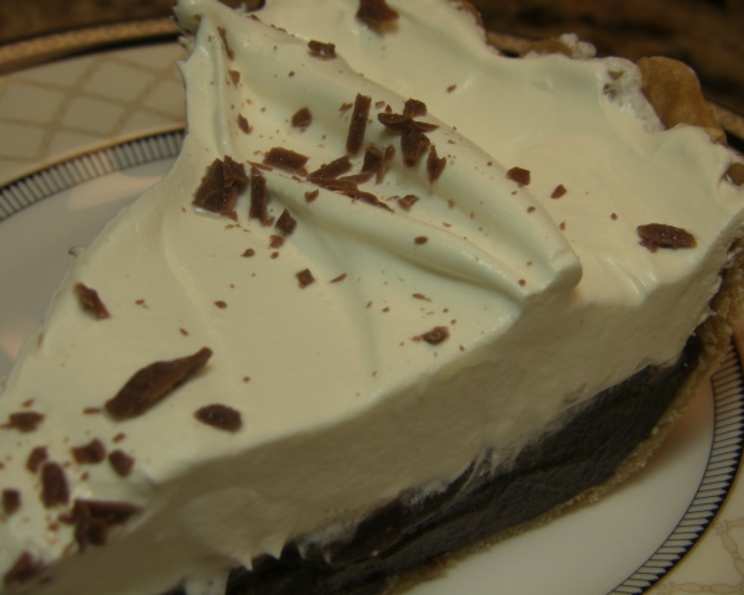
Nanny’s Chocolate Pie: A 5-Star Family Favorite
I can almost smell it now – that warm, comforting aroma of chocolate mingling with a hint of vanilla, the scent that always filled Nanny’s kitchen on Sunday afternoons. More than just a dessert, Nanny’s Chocolate Pie was a symbol of love, family, and the simple joys of life. Every bite was like a warm hug from her, a sweet reminder of cherished memories and a taste of pure happiness. It was the kind of dessert that made any day feel like a celebration.
Recipe Overview
- Prep Time: 15 minutes
- Cook Time: Varies (depending on meringue baking)
- Total Time: 40+ minutes
- Servings: 8
- Yield: 1 pie
- Dietary Type: Not specified (can be modified, see Variations section)
Ingredients
- 3 egg yolks
- 1 1⁄4 cups sugar
- 3 tablespoons cocoa
- 3 tablespoons cornstarch
- 1⁄4 teaspoon salt
- 2 cups milk
- 1 teaspoon vanilla extract
- 1 baked pie shell
Equipment Needed
- Medium saucepan
- Whisk
- Measuring cups and spoons
- Baked pie shell
- Oven
Instructions
- In a medium saucepan, combine the egg yolks, sugar, cocoa, cornstarch, and salt. Whisk together until well combined and no lumps remain.
- Gradually whisk in the milk, ensuring a smooth mixture.
- Place the saucepan over low heat. Cook, stirring constantly, until the mixture becomes very thick. This is crucial to prevent scorching, so be diligent with your stirring. The mixture should be thick enough to coat the back of a spoon.
- Remove the saucepan from the heat. Let it sit for a minute or two, then stir in the vanilla extract.
- Pour the chocolate filling into the baked pie shell.
- Top with your favorite meringue recipe. (Note: Nanny’s meringue recipe will be posted separately).
- Bake the pie as directed in your meringue recipe. Baking times and temperatures will vary depending on the meringue recipe used. Typically, this will involve baking at around 350°F (175°C) until the meringue is golden brown, usually about 12-15 minutes. Watch carefully to prevent burning.
Expert Tips & Tricks
- Preventing Scorching: The key to a perfect chocolate pie filling is preventing scorching. Low heat and constant stirring are essential. A heavy-bottomed saucepan can also help distribute the heat more evenly.
- Perfecting the Consistency: The filling should be thick enough to hold its shape when poured into the pie shell. If it seems too thin, continue cooking over low heat, stirring constantly, until it reaches the desired consistency.
- Blind Baking: Ensure your pie crust is fully baked before adding the filling. This is called “blind baking” and prevents a soggy bottom. If the crust edges brown too quickly during blind baking, cover them with foil.
- Meringue Matters: A stable meringue is key for a beautiful finish. Ensure your mixing bowl and whisk are clean and grease-free. Adding a pinch of cream of tartar can help stabilize the meringue.
- Tempering the Egg Yolks (optional): For an even smoother texture, temper the egg yolks before adding them to the hot milk. Whisk a small amount of the hot milk mixture into the egg yolks to gradually raise their temperature and prevent them from curdling when added to the rest of the milk mixture.
Serving & Storage Suggestions
Serve Nanny’s Chocolate Pie chilled or at room temperature. A dollop of whipped cream or a dusting of cocoa powder adds a touch of elegance.
- Room Temperature: Chocolate pie can be safely left at room temperature for up to 2 hours.
- Refrigeration: Store leftover pie in the refrigerator, covered, for up to 3-4 days.
- Freezing: While the filling freezes well, the meringue texture can suffer. It’s best to freeze the filling separately (before adding to the crust) for up to 2 months. Thaw overnight in the refrigerator before adding to a freshly baked pie shell and topping with meringue.
- Reheating: Reheating isn’t recommended, as it can affect the meringue and filling texture. Enjoy it chilled or at room temperature for the best flavor and consistency.
Nutritional Information
Note: Nutritional information is an estimate and will vary depending on specific ingredients and portion sizes.
| Nutrient | Amount per Serving | % Daily Value |
|---|---|---|
| Calories | 300 kcal | 15% |
| Total Fat | 12g | 18% |
| Saturated Fat | 5g | 25% |
| Cholesterol | 75mg | 25% |
| Sodium | 200mg | 8% |
| Total Carbohydrate | 45g | 15% |
| Dietary Fiber | 2g | 8% |
| Sugars | 30g | – |
| Protein | 5g | 10% |
Variations & Substitutions
- Gluten-Free: Use a gluten-free pie crust. Many store-bought options are available, or you can make your own using a gluten-free flour blend.
- Dairy-Free: Substitute the milk with almond milk, soy milk, or coconut milk. Be aware that this may slightly alter the flavor and texture of the filling.
- Vegan: In addition to using a dairy-free milk alternative and a vegan pie crust, replace the egg yolks with a cornstarch slurry. Mix 2 tablespoons of cornstarch with 1/4 cup of water for each egg yolk. Whisk well until smooth and add to the recipe as directed.
- Different Extracts: Experiment with different extracts, such as almond extract or peppermint extract, for a unique flavor twist.
- Chocolate Intensity: Adjust the amount of cocoa powder to control the chocolate intensity. Use Dutch-processed cocoa for a richer, smoother flavor.
FAQs (Frequently Asked Questions)
Q: Can I use a store-bought pie crust?
A: Absolutely! A store-bought crust is a great time-saver. Just make sure it’s a good quality crust that you enjoy.
Q: How do I prevent the meringue from weeping?
A: Ensure the meringue is applied to a warm filling and that it completely seals the edges of the crust. This creates a barrier and prevents moisture from seeping out.
Q: My filling is lumpy. What did I do wrong?
A: Lumps usually occur if the cornstarch isn’t fully incorporated or if the mixture wasn’t stirred constantly. Next time, whisk the cornstarch thoroughly with the sugar and cocoa before adding the milk, and be diligent about stirring. You can also try using an immersion blender to smooth out the filling after cooking.
Q: Can I make the filling ahead of time?
A: Yes, you can make the filling up to 2 days in advance. Store it in the refrigerator, covered with plastic wrap pressed directly onto the surface to prevent a skin from forming.
Q: What kind of cocoa powder is best for this recipe?
A: Both natural and Dutch-processed cocoa powders work well, but Dutch-processed cocoa will give a richer, smoother chocolate flavor.
Final Thoughts
Nanny’s Chocolate Pie is more than just a recipe; it’s a piece of family history, a spoonful of comfort, and a celebration of simple pleasures. I encourage you to try this recipe and create your own cherished memories with it. Feel free to experiment with variations and substitutions to make it your own. And most importantly, share it with the people you love. Happy baking!