
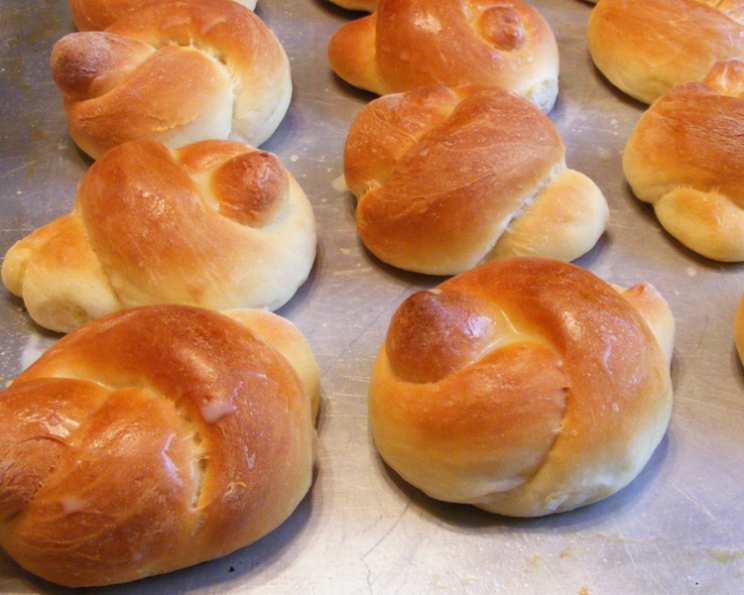
Nanny’s Famous Buns (Rolls)
The aroma still dances in my memory – that warm, yeasty perfume that would drift through Nanny Elaine’s house on baking day. It was a smell of pure love, a promise of something impossibly soft and comforting coming out of her oven. I remember perching on a stool in her sunny kitchen, mesmerized as she worked her magic, her hands dusted with flour, her brow furrowed in concentration. These weren’t just rolls; they were edible hugs, a legacy of warmth and generosity passed down through generations.
Recipe Overview
- Prep Time: 30 minutes
- Cook Time: 15-20 minutes
- Total Time: 3-4 hours (including rising time)
- Servings: 48 rolls
- Yield: 48 rolls
- Dietary Type: Vegetarian
Ingredients
- 8 ½ – 10 cups flour
- 2 cups boiling water
- ½ cup sugar
- 2 teaspoons sugar
- ½ cup butter (can use margarine, but butter is best)
- 1 cup warm water (no more than 105 degrees)
- ½ teaspoon salt
- 2 tablespoons traditional dry active yeast
- 4 eggs
Equipment Needed
- Large bowl
- Measuring cups and spoons
- Electric mixer
- Lightly floured surface
- Large greased bowl
- Clean cloth
- Cookie sheets
- Oven
- Optional: Thermometer
Instructions
-
In a large bowl, combine ½ cup of the flour, ½ cup sugar, butter, and salt. Pour in 2 cups boiling water. Stir until smooth and the butter is melted. This step gelatinizes some of the flour, which contributes to the soft texture of the rolls. Let the mixture cool completely; this is crucial because hot liquid will kill the yeast in the next step.
-
While the flour mixture cools, dissolve 2 teaspoons of sugar in 1 cup of warm water (no more than 105 degrees Fahrenheit). Sprinkle in 2 tablespoons of dry active yeast. Let stand for 10 minutes, or until it becomes good and foamy. This step proves that the yeast is alive and active. If it doesn’t foam, the yeast is no good, and you’ll need to start over with fresh yeast.
-
In a separate bowl, beat 4 eggs until foamy. This incorporates air and contributes to the light texture. Add the beaten eggs to the cooled flour mixture.
-
Stir the yeast mixture into the flour mixture. Make sure the flour mixture is cool enough before adding the yeast, or you risk killing the yeast.
-
Using an electric mixer, beat in 4 cups of flour, one cup at a time, until the mixture is smooth.
-
By hand, mix in enough of the remaining flour to make a firm, but not sticky dough. The amount of flour needed may vary depending on the humidity.
-
Turn the dough out onto a lightly floured surface and knead until smooth and elastic (about 10 minutes). Proper kneading develops the gluten, which gives the rolls their structure and chewiness. If the dough is too sticky, add a little more flour, a tablespoon at a time.
-
Grease a large bowl, place the dough inside, and turn it to grease the dough all over. This prevents the dough from drying out as it rises.
-
Cover the bowl with a clean cloth and let rise in a warm place until doubled in size (about one hour). A warm environment encourages the yeast to work its magic. You can place the bowl in a slightly warmed oven (turned off!) or near a sunny window.
-
Punch down the dough to release the air. This step redistributes the yeast and creates a more even texture in the final product.
-
Turn the dough out onto a lightly floured surface and knead it briefly. Then, divide the dough into 48 equal rolls. This can be done by dividing the dough in half, then each half in half again, and so on, until you have 48 pieces.
-
Place the rolls on well-greased cookie sheets, about 2 inches apart. The spacing allows the rolls to rise and bake evenly without sticking together too much.
-
Let the rolls rise for 1 ½ – 2 hours, or until they have more than doubled in size. The dough will be very light and airy. This second rise is crucial for achieving that signature soft texture.
-
Bake at 375°F (190°C) for 15-20 minutes, or until golden brown. Keep a close eye on the rolls to prevent them from burning.
-
Brush the hot roll tops with a little melted butter immediately after they come out of the oven. This adds shine and a rich flavor.
Expert Tips & Tricks
- Humidity is Key: The amount of flour you need will vary depending on the humidity. Rainy days require more flour than sunny, dry days. Adjust the flour accordingly to achieve a firm, but not sticky, dough.
- Temperature Matters: Ensure the boiling water is added to the initial mixture, and the warm water is under 105 degrees to prevent killing the yeast.
- Dough Thermometer: Use a thermometer to ensure bread rolls are baked through. They are done when an inserted thermometer reads 190°F (88°C).
- Over-Proofing: Be careful not to over-proof the dough, as this can lead to flat, dense rolls. If the dough seems to be rising too quickly, punch it down and let it rise again.
- Freezing: These rolls freeze beautifully. After baking, let them cool completely, then wrap them tightly in plastic wrap and place them in a freezer bag. To reheat, thaw at room temperature and warm them in a low oven (300°F/150°C) for about 10 minutes.
- Garlic Butter: Brush the rolls with garlic butter after baking for an extra layer of flavor. Mix melted butter with minced garlic and fresh parsley.
Serving & Storage Suggestions
Nanny’s rolls are best served warm, fresh from the oven, with a generous pat of butter. They’re the perfect accompaniment to any meal, from soups and stews to holiday dinners. Leftover rolls can be stored at room temperature in an airtight container for up to 2 days. For longer storage, wrap them tightly in plastic wrap and freeze for up to 2 months. To reheat, thaw at room temperature and warm in a low oven (300°F/150°C) for about 10 minutes.
Nutritional Information
| Nutrient | Amount per Serving | % Daily Value |
|---|---|---|
| Calories | 112.8 kcal | N/A |
| Calories from Fat | 22g | 20% |
| Total Fat | 2.5 g | 3% |
| Saturated Fat | 1.4 g | 6% |
| Cholesterol | 20.6 mg | 6% |
| Sodium | 47.8 mg | 1% |
| Total Carbohydrate | 19.2 g | 6% |
| Dietary Fiber | 0.6 g | 2% |
| Sugars | 2.3 g | 9% |
| Protein | 2.9 g | 5% |
Variations & Substitutions
- Whole Wheat: Substitute up to half of the all-purpose flour with whole wheat flour for a nuttier flavor and added fiber.
- Sweet Potato Rolls: Add ½ cup of mashed cooked sweet potato to the dough for a slightly sweet and moist roll.
- Herb Rolls: Mix in 2 tablespoons of chopped fresh herbs, such as rosemary, thyme, or oregano, to the dough for a savory twist.
- Dairy-Free: Substitute the butter with a dairy-free margarine or coconut oil.
- Vegan: Substitute the butter with a vegan butter alternative. Replace the eggs with a flax egg (1 tablespoon ground flaxseed mixed with 3 tablespoons water per egg).
- Cinnamon Rolls: Before the second rise, roll the dough out into a large rectangle. Spread with melted butter, sprinkle with cinnamon and sugar, roll up tightly, and slice into rolls. Place on a baking sheet and let rise before baking.
FAQs (Frequently Asked Questions)
Q: Why is it important to let the dough cool before adding the yeast?
A: Hot liquids will kill the yeast, preventing the dough from rising.
Q: How do I know if my yeast is still good?
A: Dissolve the yeast in warm water with a little sugar. If it doesn’t foam after 10 minutes, it’s no longer active.
Q: Can I make the dough ahead of time?
A: Yes, you can refrigerate the dough after the first rise. Punch it down and store it in a greased bowl, covered, for up to 24 hours. Let it come to room temperature before shaping and baking.
Q: My rolls are browning too quickly. What should I do?
A: Tent the rolls with foil during the last few minutes of baking to prevent them from burning.
Q: Why are my rolls dense and not fluffy?
A: This could be due to several factors, including using old yeast, not kneading the dough enough, or not letting the dough rise long enough.
Final Thoughts
These rolls are more than just a recipe; they’re a connection to family, a taste of tradition, and a testament to the simple pleasures in life. Baking Nanny Elaine’s famous buns is an act of love, a way to share a little piece of her warmth and generosity with your own family and friends. So, preheat your oven, gather your ingredients, and prepare to be transported to a kitchen filled with love and the irresistible aroma of freshly baked goodness. I encourage you to try this recipe and make it your own, adding your own personal touch to a classic. I would love to know if you made this recipe and share your experience, leave a comment below!