
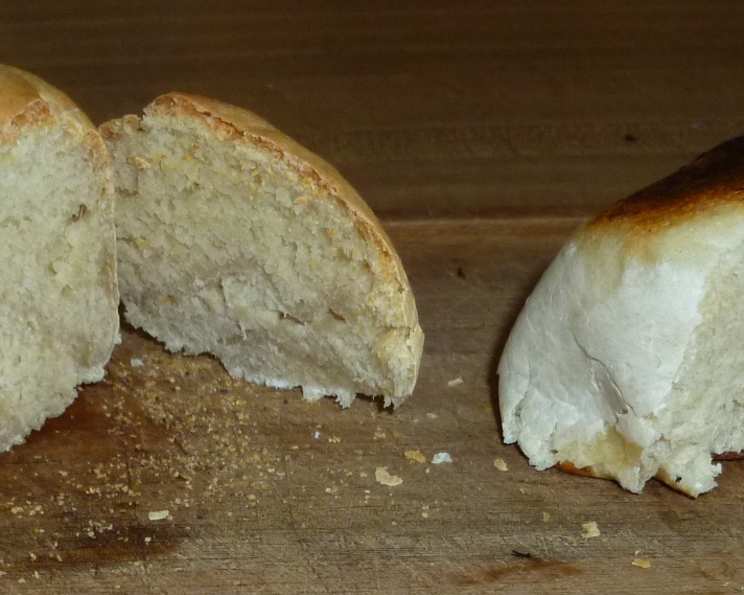
Native Biscuit Bread: A Taste of Tradition
The scent of baking bread is a powerful time machine. For me, it instantly transports me back to my grandmother’s cozy kitchen. I remember the warmth of the wood-burning stove, the flour dusting her apron, and the simple joy of watching her create something magical from just a few basic ingredients. This Native Biscuit Bread, or Bannock as it’s often called, evokes that same feeling of simple comfort. It’s more than just food; it’s a connection to heritage, a taste of home, and a reminder that the most satisfying meals are often the simplest.
Recipe Overview
- Prep Time: 10 minutes
- Cook Time: 30 minutes
- Total Time: 40 minutes
- Servings: Variable, depending on loaf size
- Yield: 1 loaf
- Dietary Type: Vegetarian (easily adaptable to vegan)
Ingredients
- 4 cups all-purpose flour
- 1/2 teaspoon salt
- 5 teaspoons baking powder
- 1 1/2 cups water
Equipment Needed
- Large mixing bowl
- Measuring cups and spoons
- Floured surface for kneading
- Greased baking sheet
- Oven
- (Optional) Frypan
Instructions
-
Begin by preheating your oven to 400°F (200°C). This ensures the bread will rise properly and bake evenly.
-
In a large mixing bowl, combine the flour, salt, and baking powder. Whisk these dry ingredients together thoroughly to ensure the baking powder is evenly distributed, which is crucial for a light and airy texture.
-
Gradually add the water to the dry ingredients, mixing until a stiff dough forms. Be careful not to overmix at this stage, as it can lead to a tough bread. The dough should come together easily without being overly sticky.
-
Turn the dough out onto a lightly floured surface. This will prevent it from sticking as you knead it.
-
Knead the dough for a few minutes, adding additional flour if necessary to prevent sticking. The goal is to create a smooth, elastic dough. Don’t overwork it; just knead until it comes together nicely.
-
Form the dough into a round or oblong loaf, approximately 1 inch in height. This thickness will ensure the bread bakes through properly.
-
Place the loaf on a greased baking sheet. Greasing the baking sheet prevents the bread from sticking and ensures easy removal after baking.
-
Bake in the preheated oven for approximately 30 minutes, or until golden brown. The bread is done when it sounds hollow when tapped on the bottom.
-
Alternative Cooking Method (Frying): If you prefer, you can also fry the dough in a frypan with a little hot oil. Cook over medium heat until golden brown and cooked through, flipping as needed. This method results in a crispy, flavorful bread.
-
Remove from the oven (or frypan) and let cool slightly before slicing and serving.
Expert Tips & Tricks
- For a slightly different flavor, try adding a tablespoon of sugar or honey to the dry ingredients.
- If you want a richer flavor, substitute milk or buttermilk for the water.
- For a healthier version, you can substitute up to half of the all-purpose flour with whole wheat flour. However, be aware that this will result in a denser loaf.
- Don’t overmix the dough. Overmixing develops the gluten too much, resulting in a tough bread.
- If you find the dough is too sticky to handle, add a little more flour, a tablespoon at a time, until it reaches the desired consistency.
- To test for doneness, insert a toothpick into the center of the loaf. If it comes out clean, the bread is done.
- For a crispier crust, brush the loaf with melted butter or oil before baking.
Serving & Storage Suggestions
Serve this Native Biscuit Bread warm with your favorite toppings. Traditional choices include margarine and jam, honey, or even a savory stew. It’s also delicious with just a simple pat of butter.
To store leftovers, wrap the bread tightly in plastic wrap or place it in an airtight container. It will keep at room temperature for 2-3 days, in the refrigerator for up to a week, or in the freezer for up to 2 months.
To reheat, you can warm it in the oven at 350°F (175°C) for 10-15 minutes, or microwave individual slices for a few seconds. For frozen bread, thaw completely before reheating.
Nutritional Information
(Estimated per serving – values will vary based on loaf size and ingredients)
| Nutrient | Amount per Serving | % Daily Value |
|---|---|---|
| Calories | 250 kcal | 13% |
| Total Fat | 2g | 3% |
| Saturated Fat | 0.5g | 3% |
| Cholesterol | 0mg | 0% |
| Sodium | 200mg | 9% |
| Total Carbohydrate | 50g | 18% |
| Dietary Fiber | 2g | 7% |
| Sugars | 1g | 2% |
| Protein | 6g | 12% |
Variations & Substitutions
- Vegan Bannock: Ensure your margarine is vegan or substitute with a plant-based butter alternative.
- Sweet Bannock: Add 1/4 cup of sugar and a teaspoon of cinnamon to the dry ingredients for a sweeter bread, perfect for breakfast or dessert. Raisins or dried cranberries would also be delicious additions.
- Savory Bannock: Incorporate herbs like rosemary, thyme, or sage into the dough for a savory twist. You can also add grated cheese, chopped onions, or garlic.
- Gluten-Free Bannock: Substitute a gluten-free all-purpose flour blend for the regular flour. Be sure to use a blend that contains xanthan gum or add it separately, as it helps to bind the dough.
- Fry Bread Variation: Instead of forming a loaf, divide the dough into smaller pieces and flatten them into circles. Fry in hot oil until golden brown and puffy for a delicious fry bread.
FAQs (Frequently Asked Questions)
Q: Can I use self-rising flour instead of all-purpose flour and baking powder?
A: No, it’s best to use all-purpose flour and baking powder separately. Self-rising flour contains salt and baking powder, but the proportions might not be ideal for this recipe.
Q: Why is my bannock so dense?
A: Overmixing the dough or using too much flour can result in a dense bannock. Be gentle when mixing and kneading, and only add enough flour to prevent the dough from sticking.
Q: Can I make this recipe ahead of time?
A: The dough can be made ahead of time and stored in the refrigerator for up to 24 hours. However, it’s best to bake the bannock fresh for the best texture and flavor.
Q: Can I cook this over a campfire?
A: Yes, you can wrap the dough in foil and cook it directly on the coals of a campfire. Just be sure to turn it frequently to prevent burning.
Q: How do I know when the bannock is done?
A: The bannock is done when it’s golden brown and sounds hollow when tapped on the bottom. You can also insert a toothpick into the center to check for doneness; it should come out clean.
Final Thoughts
This Native Biscuit Bread recipe is more than just a simple bread; it’s a connection to history and a celebration of simple, honest ingredients. Whether you bake it in the oven or fry it in a pan, the warm, comforting aroma and satisfying taste will surely bring a smile to your face. So, gather your ingredients, preheat your oven, and embark on a culinary journey that will transport you back to simpler times. Don’t be afraid to experiment with different flavors and toppings to create your own unique version of this classic bread. And most importantly, share your creation with loved ones and enjoy the warmth and connection that comes with sharing a meal together.