
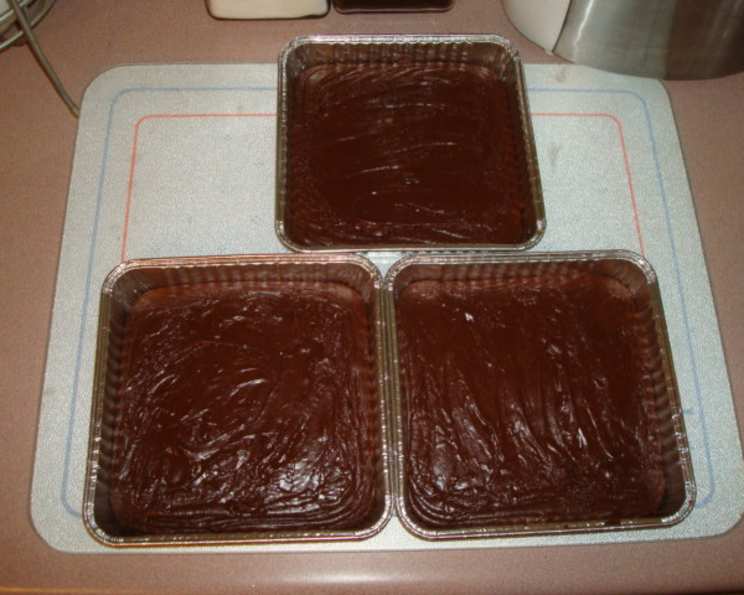
Nestle’ Holiday Fudge: A Timeless Treat
The scent alone is enough to transport me back to childhood Christmases. I can almost feel the chill of the December air nipping at my cheeks as I peered into the kitchen, mesmerized by my grandmother’s flurry of activity. Nestle’ Holiday Fudge was her signature confection, a guaranteed crowd-pleaser that vanished within minutes of being set out on the dessert table. The rich, chocolatey aroma mingled with the nutty fragrance of toasted pecans, creating a symphony of smells that defined the holiday season for me. It wasn’t just fudge; it was a tradition, a tangible piece of family history, and a symbol of the warmth and love that filled our home during the holidays.
Recipe Overview
- Prep Time: 10 minutes
- Cook Time: 5 minutes
- Total Time: 15 minutes (plus chilling time)
- Yields: Approximately 64 squares (1 1/2 inch squares)
- Dietary Type: Not Gluten-Free, Not Dairy-Free
Ingredients
- 2 tablespoons butter
- 2/3 cup undiluted evaporated milk
- 1 1/2 cups granulated sugar
- 1/4 teaspoon salt
- 2 cups miniature marshmallows
- 2 cups milk chocolate chips
- 1/2 cup chopped pecans or walnuts (optional, for added texture and flavor)
- 1 teaspoon vanilla extract
Equipment Needed
- Medium, heavy saucepan
- 8-inch square baking pan
- Aluminum foil
- Measuring cups and spoons
- Spatula or wooden spoon
Instructions
-
Prepare your baking pan by lining an 8-inch square baking pan with aluminum foil. This step is crucial, as it will make removing the fudge clean and easy later on. Make sure the foil extends over the edges of the pan to create “handles.”
-
In a medium, heavy saucepan, combine the butter, evaporated milk, granulated sugar, and salt. Using a heavy-bottomed pan will help prevent scorching and ensure even heating.
-
Place the saucepan over medium heat and bring the mixture to a boil, stirring constantly with a spatula or wooden spoon. Continuous stirring is essential to prevent the sugar from crystallizing and the mixture from sticking to the bottom of the pan.
-
Once the mixture is boiling, continue to boil for 4 to 5 minutes, stirring constantly. This cooking time is vital for achieving the correct consistency of the fudge. Use a timer to ensure accurate timing.
-
Remove the saucepan from the heat. Immediately stir in the miniature marshmallows, milk chocolate chips, chopped pecans (or walnuts), and vanilla extract.
-
Stir vigorously for 1 minute, or until the marshmallows are completely melted and the mixture is smooth and homogenous. Be thorough in your stirring to ensure all the ingredients are evenly distributed. The residual heat from the boiled mixture should melt the marshmallows effectively.
-
Pour the fudge mixture into the foil-lined 8-inch square baking pan. Spread the mixture evenly using a spatula to create a uniform thickness.
-
Chill the fudge in the refrigerator until it is firm. This process usually takes at least 2 hours, but preferably longer. Over night is ideal.
-
Once firm, use the foil “handles” to lift the fudge out of the pan. Place the fudge on a cutting board and carefully peel away the foil.
-
Cut the fudge into 1 1/2-inch squares using a sharp knife. For cleaner cuts, you can run the knife under hot water and wipe it dry between each cut.
Expert Tips & Tricks
- Use a candy thermometer (optional): If you have a candy thermometer, use it to ensure the sugar mixture reaches the soft-ball stage (235-240°F) for optimal fudge consistency.
- Don’t overcook: Overcooking the sugar mixture will result in dry, crumbly fudge.
- Don’t undercook: Undercooking the sugar mixture will result in fudge that doesn’t set properly and is too soft.
- Adjust nuts to preference: Feel free to toast your nuts before adding them to enhance their flavor. You can also substitute other types of nuts, such as almonds or macadamia nuts.
- Marshmallow Tip: If you are having trouble melting the marshmallows fully, put the pan back on very low heat and stir constantly until melted and then remove.
Serving & Storage Suggestions
Nestle’ Holiday Fudge is best served at room temperature, allowing its rich, creamy texture and flavors to fully develop. Arrange the squares on a platter for an elegant presentation.
Store leftover fudge in an airtight container at room temperature for up to 2 weeks, or in the refrigerator for up to 3 weeks. For longer storage, you can freeze the fudge for up to 3 months. Wrap the fudge tightly in plastic wrap and then place it in a freezer-safe container. Thaw the fudge in the refrigerator before serving.
Nutritional Information
Note: Nutritional information is an estimate and may vary based on specific ingredients and serving sizes.
| Nutrient | Amount per Serving | % Daily Value |
|---|---|---|
| Calories | 204.7 kcal | N/A |
| Calories from Fat | 78 g | 38% |
| Total Fat | 8.7 g | 13% |
| Saturated Fat | 4.4 g | 22% |
| Cholesterol | 9.3 mg | 3% |
| Sodium | 65.6 mg | 2% |
| Total Carbohydrate | 30.3 g | 10% |
| Dietary Fiber | 0.8 g | 3% |
| Sugars | 26.6 g | N/A |
| Protein | 2.2 g | 4% |
Variations & Substitutions
- Butterscotch Fudge: Substitute 2 cups (12oz package) butterscotch flavored morsels for the milk chocolate chips. This creates a delicious, caramel-like flavor profile.
- Mint Fudge: Substitute 1 1/2 cups (10 oz package) mint flavored chocolate morsels for the milk chocolate chips. This variation offers a refreshing and festive twist, perfect for the holidays.
- Semi-Sweet Fudge: Substitute 1 1/2 cups (9oz) semi-sweet morsels for the milk chocolate chips. This results in a slightly less sweet and richer chocolate flavor.
- Nut-Free: Omit the pecans or walnuts entirely for a nut-free version. You can replace them with dried cranberries or sprinkles for added texture and visual appeal.
- Dark Chocolate Fudge: Use dark chocolate chips for a more intense chocolate flavor.
FAQs (Frequently Asked Questions)
Q: Can I use a different type of milk?
A: Evaporated milk is recommended for its high concentration and creamy texture, but whole milk can be used in a pinch. The texture of the fudge may be affected.
Q: What if my fudge is too soft after chilling?
A: This could be due to undercooking the sugar mixture. Place the fudge back in the refrigerator for a longer period. If it remains too soft, unfortunately, it cannot be salvaged. Be more careful with cooking time in the future.
Q: Can I add other ingredients to the fudge?
A: Absolutely! Consider adding chopped dried fruit, such as cherries or cranberries, or even a swirl of peanut butter. Get creative and personalize your fudge!
Q: How do I prevent the fudge from sticking to the knife when cutting?
A: Run the knife under hot water and wipe it dry between each cut. You can also use a non-stick cooking spray on the knife.
Q: Can I make this recipe ahead of time?
A: Yes! Fudge is a great make-ahead dessert. Simply prepare it as directed and store it in an airtight container until you’re ready to serve it.
Final Thoughts
Nestle’ Holiday Fudge is more than just a recipe; it’s a portal to cherished memories and a symbol of festive traditions. I urge you to try this recipe and create your own lasting memories. Whether you stick to the classic recipe or experiment with variations, I’m confident that this fudge will become a holiday staple in your home, just as it has in mine for generations. Share your creations and feedback – I would love to hear about your experiences! Pair this delicious fudge with a warm mug of hot cocoa or a glass of dessert wine for the ultimate indulgence. Happy baking!