
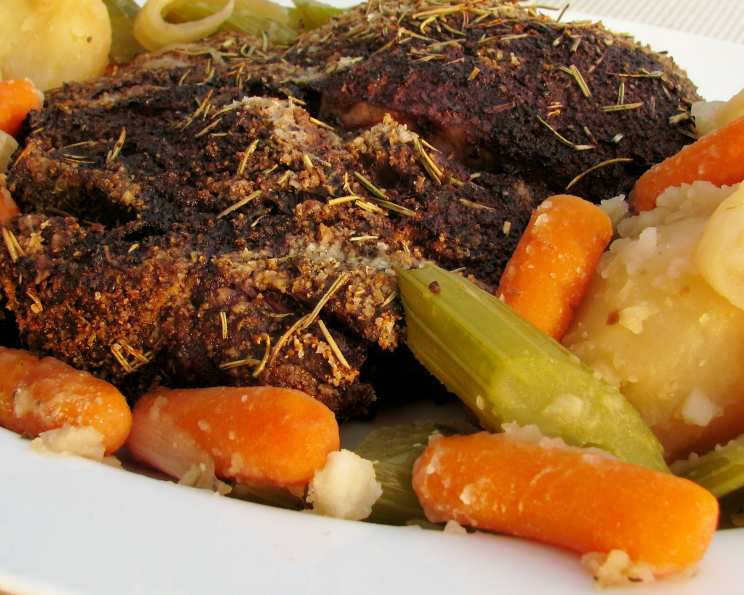
The Easiest, Most Foolproof Roast Beef: My Never-Fail Method
I remember the first time I attempted a roast beef. I was fresh out of culinary school, brimming with textbook knowledge but short on practical experience. I envisioned a perfectly seared, rosy-pink center, but what emerged from the oven was a leathery, grey disappointment. My grandmother, a woman whose wisdom was only surpassed by her delicious home cooking, took one look and chuckled. “Honey,” she said, “sometimes the simplest methods are the best.” This recipe, passed down through generations, is a testament to that – a nearly hands-off approach that guarantees a tender, juicy roast every single time. Forget complicated techniques; this is about letting the oven work its magic.
Recipe Overview
- Prep Time: 5 minutes
- Cook Time: 8 minutes per pound + 2 hours rest
- Total Time: 2 hours 30 minutes (approximate, varies with roast size)
- Servings: Varies, depends on roast size
- Yield: 1 roast
- Dietary Type: Generally suitable for Gluten-Free and Dairy-Free diets
Ingredients
- Sirloin tip roast (or any roast of your choice) or rump roast (any size)
- Salt
- Pepper
Equipment Needed
- Roasting pan
- Low rack for roasting pan
Instructions
-
Preheat your oven to 500°F (260°C). Ensure your oven rack is in the lower position.
-
Prepare the roast by liberally salting and peppering it on all sides. Don’t be shy with the seasoning! This is your chance to build flavor.
-
Place the seasoned roast in the roasting pan, positioning it on the low rack. There’s no need to add any water or other liquids to the pan. This is a dry-roasting method.
-
Cook in the preheated 500°F (260°C) oven for 8 minutes per pound of roast. For example, a 3-pound roast will cook for 24 minutes (3 x 8 = 24).
-
After the initial high-heat cooking time, turn the oven OFF. Critically important: DO NOT OPEN THE OVEN DOOR! Let the roast stand in the oven for 2 hours, undisturbed. The residual heat will gently finish cooking the roast to perfection. This low and slow “oven off” technique is key.
-
After the 2-hour rest period (without opening the oven), remove the roast from the oven. Let it rest for another 10-15 minutes before slicing.
-
Slice against the grain for maximum tenderness and serve immediately.
-
The drippings from the roast make wonderful gravy. See Serving & Storage Suggestions for more information.
Expert Tips & Tricks
- Choosing the Right Roast: While this method works well with sirloin tip or rump roast, you can adapt it for other cuts like chuck roast or eye of round. Keep in mind that leaner cuts will benefit from a shorter cooking time and may be slightly less tender.
- Doneness: This method generally yields a medium-rare to medium roast. If you prefer it more well-done, you can leave it in the turned-off oven for a longer period, but be careful not to overcook it.
- Seasoning: Don’t underestimate the power of simple seasoning! Use high-quality salt and freshly ground black pepper. For a more complex flavor profile, consider adding garlic powder, onion powder, dried herbs (like rosemary or thyme), or a pre-made steak rub.
- Resting is Key: Allowing the roast to rest after cooking is crucial for retaining its juices. This allows the muscle fibers to relax and reabsorb moisture, resulting in a more tender and flavorful roast.
- Oven Calibration: Oven temperatures can vary. If you know your oven runs hot or cold, adjust the initial cooking time accordingly.
- Searing (Optional): For a deeper, richer crust, sear the roast in a hot skillet with oil on all sides before placing it in the oven. This adds an extra layer of flavor and texture, but isn’t essential.
Serving & Storage Suggestions
Serve your beautifully roasted beef hot, sliced thinly against the grain. It’s delicious on its own, with a side of roasted vegetables (potatoes, carrots, and Brussels sprouts are excellent choices), mashed potatoes, or a crisp green salad.
The drippings left in the roasting pan make a fantastic gravy. To make gravy, skim off any excess fat from the pan drippings. Place the roasting pan over medium heat. Whisk in a tablespoon or two of flour (or cornstarch for a gluten-free option) until a paste forms. Gradually whisk in beef broth or water until you reach your desired consistency. Season with salt, pepper, and any other desired herbs or spices. Simmer until thickened, stirring occasionally.
Leftover roast beef can be stored in an airtight container in the refrigerator for up to 3-4 days. To reheat, slice the beef and gently warm it in a skillet with a little beef broth or gravy. Alternatively, you can reheat it in the microwave, but be careful not to overcook it, as it can become dry. Roast beef also freezes well for longer storage (up to 2-3 months). Wrap it tightly in plastic wrap and then in foil or place it in a freezer-safe bag. Thaw overnight in the refrigerator before reheating. Cold roast beef is also excellent in sandwiches, salads, or wraps.
Nutritional Information
Note: Nutritional information is an estimate and may vary based on the specific cut of beef and portion size.
| Nutrient | Amount per Serving | % Daily Value |
|---|---|---|
| Calories | 300 kcal | 15% |
| Total Fat | 18g | 28% |
| Saturated Fat | 7g | 35% |
| Cholesterol | 90mg | 30% |
| Sodium | 75mg | 3% |
| Total Carbohydrate | 0g | 0% |
| Dietary Fiber | 0g | 0% |
| Sugars | 0g | 0% |
| Protein | 30g | 60% |
Variations & Substitutions
- Herb Crust: Before roasting, rub the beef with a mixture of olive oil, minced garlic, rosemary, thyme, and parsley for a flavorful herb crust.
- Spicy Roast: Add a pinch of cayenne pepper or a dash of hot sauce to the salt and pepper mixture for a spicy kick.
- Garlic Infusion: Stud the roast with cloves of garlic before roasting for a deeper garlic flavor.
- Wine Reduction: Deglaze the roasting pan with red wine after removing the roast to create a rich and flavorful pan sauce.
- Vegetable Base: Place chopped onions, carrots, and celery in the bottom of the roasting pan to create a flavorful vegetable base for the roast. These vegetables will also add moisture and flavor to the drippings for gravy.
FAQs (Frequently Asked Questions)
Q: What if I accidentally open the oven door during the 2-hour resting period?
A: Resist the urge! Opening the door will release heat and affect the cooking process. If it happens, try to close it quickly and add an extra 30-60 minutes to the resting time.
Q: Can I use this method for a frozen roast?
A: No, this method is designed for thawed roasts. Cooking a frozen roast will result in uneven cooking and a less tender final product.
Q: How do I adjust the cooking time for a very large roast (e.g., over 8 pounds)?
A: While the 8 minutes per pound is a good starting point, for very large roasts, it’s best to use a meat thermometer to ensure the internal temperature reaches your desired doneness. Insert the thermometer into the thickest part of the roast, avoiding bone.
Q: What internal temperature should I aim for?
A: For medium-rare, aim for 130-135°F (54-57°C); for medium, 140-145°F (60-63°C); and for medium-well, 150-155°F (66-68°C). Remember that the temperature will continue to rise slightly during the resting period.
Q: Can I add vegetables to the roasting pan?
A: Yes! Hearty vegetables like potatoes, carrots, and onions roast beautifully alongside the beef. Add them to the pan during the last hour of the resting period to ensure they’re cooked through but not mushy.
Final Thoughts
This “Never Fail” roast beef method has become a staple in my kitchen, and I hope it will become one in yours too. It’s incredibly simple, virtually foolproof, and yields a delicious, tender roast that’s perfect for a Sunday dinner or any special occasion. Don’t be intimidated by the seemingly unorthodox technique – trust the process! Once you’ve tried it, I’m confident you’ll agree that this is the easiest and most reliable way to achieve roast beef perfection. Serve it with a robust red wine, some crusty bread, and good company for a truly memorable meal. And please, share your results and any creative variations you come up with – I’m always eager to learn from fellow cooks!