
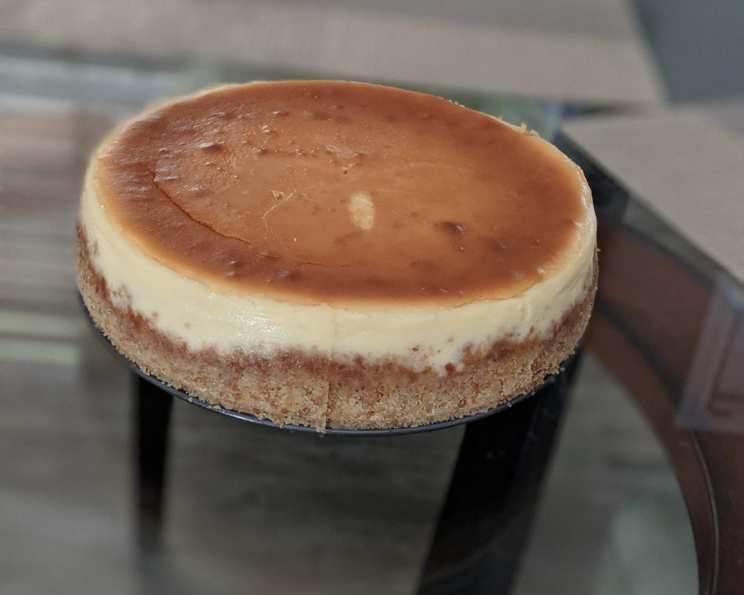
The Indulgent Secret of New York Style Crustless Cheesecake
My grandmother, Nana Rose, was a legend in our family for her baking. Her apple pie was unmatched, her chocolate chip cookies legendary, but it was her New York Style Cheesecake that truly captivated everyone. I remember being a little girl, perched on a stool in her kitchen, watching her carefully pour the creamy batter into a springform pan. The anticipation was almost unbearable. The rich aroma that filled the house during baking remains one of my fondest childhood memories, a testament to Nana Rose’s love and her magical cheesecake. I’ve spent years trying to recreate that same feeling, and this recipe, passed down through generations, comes closest to capturing that perfect taste of home.
Recipe Overview
- Prep Time: 20 minutes
- Cook Time: 1 hour
- Inactive Time: 2 hours
- Total Time: 3 hours 20 minutes
- Servings: 24
- Yield: 1 large cheesecake
- Dietary Type: Not Gluten-Free
Ingredients
- 5 (8 ounce) packages cream cheese, softened
- 2 cups sugar
- 2 tablespoons cream or milk
- 4 eggs
- 1 tablespoon vanilla extract
- ½ lemon, juice of
- 3 tablespoons flour
- 3 tablespoons cornstarch
- 1 pint sour cream
- ¼ lb (1 stick) butter, melted
- Fruit topping (optional)
Equipment Needed
- Large Springform pan (10-12 inch)
- Mixer (stand or hand mixer)
- Large pan for water bath
- Measuring cups and spoons
Instructions
-
Preheat your oven to 325°F (160°C). Ensure your oven rack is in the center position.
-
Prepare a large springform pan. This recipe makes a generous cake, so a 10-12 inch pan is ideal. Grease the bottom and sides of the pan to prevent sticking. Consider lining the bottom with parchment paper for easier removal.
-
In a large mixing bowl, cream together the softened cream cheese and sugar until the mixture is smooth and completely combined. There should be no lumps. This is a crucial step to achieving that silky-smooth texture.
-
Add the cream or milk to the cream cheese mixture and continue mixing until just combined.
-
Add the eggs one at a time, mixing well after each addition. It’s important to fully incorporate each egg before adding the next to ensure a smooth batter.
-
Stir in the vanilla extract and lemon juice. The lemon juice adds a subtle tang that balances the richness of the cream cheese.
-
Continue mixing, ensuring the mixer is constantly running to keep the batter smooth.
-
In a separate bowl, whisk together the flour and cornstarch. This prevents lumps and ensures even distribution in the batter.
-
Gradually add the flour and cornstarch mixture to the cream cheese mixture, mixing until just combined. Be careful not to overmix, as this can develop gluten and result in a tougher cheesecake.
-
Blend in the melted butter until fully incorporated into the mixture.
-
Lastly, gently fold in the sour cream until just combined. Avoid overmixing at this stage.
-
Pour the batter into the prepared springform pan.
-
Prepare a water bath. Place the springform pan inside a larger pan. Pour hot water into the larger pan, reaching about halfway up the sides of the springform pan. This helps to ensure even baking and prevents the cheesecake from cracking.
-
Carefully transfer the water bath and cheesecake to the preheated oven. Reduce the oven temperature to 300°F (150°C) and bake for 1 hour.
-
After 1 hour, shut off the oven and leave the cheesecake inside for 2 more hours. Never open the oven door during this time. This allows the cheesecake to cool slowly and prevents cracking.
-
Remove the cheesecake from the oven and the water bath. Let it cool completely at room temperature before refrigerating.
-
Refrigerate the cheesecake for at least 4 hours, or preferably overnight, to allow it to fully set.
-
Before serving, gently release the sides of the springform pan.
-
Top with your favorite fruit topping (optional). Glazed fresh strawberries are a classic choice.
Expert Tips & Tricks
- Room Temperature Ingredients: Ensure your cream cheese and eggs are at room temperature for a smoother batter and better incorporation.
- Preventing Cracks: The water bath is crucial for preventing cracks. Also, avoid opening the oven door during baking and cooling.
- Doneness Check: The cheesecake is done when the edges are set but the center still has a slight jiggle.
- Make-Ahead: This cheesecake can be made 1-2 days in advance. Store it tightly covered in the refrigerator.
- Mix-Ins: Get creative with mix-ins! Try swirling in fruit purees, chocolate, or caramel.
Serving & Storage Suggestions
Serve the New York Style Crustless Cheesecake chilled. A slice pairs beautifully with a dollop of whipped cream, fresh berries, or a drizzle of chocolate sauce.
Storage: Store leftover cheesecake in an airtight container in the refrigerator for up to 5 days. You can also freeze it for up to 2 months. To freeze, wrap the cheesecake tightly in plastic wrap and then in aluminum foil. Thaw overnight in the refrigerator before serving. It is best served cold so that the texture is not affected.
Nutritional Information
| Nutrient | Amount per Serving | % Daily Value |
|---|---|---|
| Calories | 322 kcal | N/A |
| Calories from Fat | N/A | 70% |
| Total Fat | 25 g | 38% |
| Saturated Fat | 14.3 g | 71% |
| Cholesterol | 104.6 mg | 34% |
| Sodium | 213.6 mg | 8% |
| Total Carbohydrate | 21 g | 7% |
| Dietary Fiber | 0 g | 0% |
| Sugars | 18.9 g | 75% |
| Protein | 4.4 g | 8% |
Note: Nutritional information is an estimate and may vary based on specific ingredients used.
Variations & Substitutions
- Lemon Zest: Add the zest of one lemon for a more pronounced citrus flavor.
- Different Extracts: Experiment with other extracts like almond or coconut.
- Chocolate Cheesecake: Swirl in melted chocolate or add cocoa powder to the batter.
- Berry Swirl: Swirl in a berry compote or puree.
- Lactose-Free: Use lactose-free cream cheese and sour cream, as well as a dairy-free milk alternative.
FAQs (Frequently Asked Questions)
Q: Why is a water bath necessary for cheesecake?
A: A water bath provides a humid environment that helps the cheesecake bake evenly and prevents it from cracking. It also results in a creamier texture.
Q: Can I use a different size springform pan?
A: Yes, but you may need to adjust the baking time. A smaller pan will require a longer baking time, while a larger pan will require a shorter time.
Q: What if my cheesecake still cracks even with a water bath?
A: Make sure your oven temperature is accurate and avoid opening the oven door during baking and cooling. Also, ensure your ingredients are at room temperature.
Q: Can I skip the cooling time in the oven?
A: It is not recommended. The slow cooling process helps to prevent cracking and allows the cheesecake to set properly.
Q: How do I know when the cheesecake is done?
A: The edges should be set, but the center should still have a slight jiggle. It will continue to set as it cools.
Final Thoughts
This New York Style Crustless Cheesecake recipe is a true classic, guaranteed to impress with its rich, creamy texture and decadent flavor. Don’t be intimidated by the water bath; it’s the secret to a perfect cheesecake every time. I encourage you to try this recipe and create your own cherished memories, just like I did with my Nana Rose. Experiment with different toppings and flavor combinations to make it your own. And please, share your creations and feedback – I’d love to hear how it turns out! Perhaps pair it with a light sparkling wine for a truly special occasion. Happy baking!