
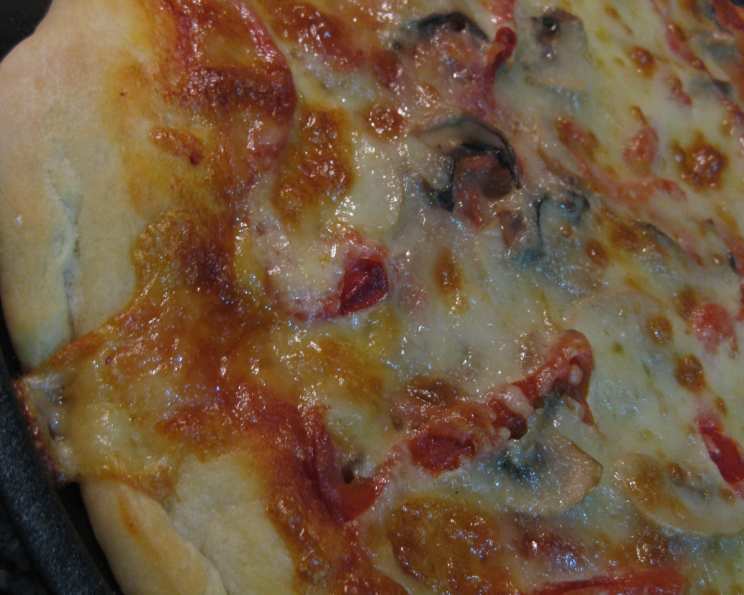
Mastering the New York Slice: Pizza and Calzone Crust
The aroma of baking pizza dough takes me back to my childhood. Every Friday night was pizza night, and the anticipation would build as my mother, a whirlwind in the kitchen, transformed simple ingredients into a feast. The best part wasn’t just the taste of that warm, cheesy slice, but the feeling of togetherness, of sharing something delicious and comforting with the people I loved. To this day, the scent of yeast activating is pure culinary nostalgia, a reminder of family, laughter, and the simple joy of a perfectly crafted pizza.
Recipe Overview
- Prep Time: 20 minutes
- Cook Time: 20-25 minutes
- Total Time: 1 hour 50 minutes (including rise time)
- Servings: Varies depending on pizza/calzone size
- Yield: 2 pizzas or calzones
- Dietary Type: Vegetarian (can be made vegan)
Ingredients
- 1 1/2 cups water (110 degrees F)
- 2 1/2 teaspoons sugar
- 1-2 tablespoons olive oil
- 4 1/2 cups flour, divided
- 2 1/2 teaspoons kosher salt
- 1 teaspoon active dry yeast
Optional additions (added with the second half of the flour):
- Parmesan cheese, grated
- Granulated garlic
- Italian herbs
Equipment Needed
- Large mixing bowl (or stand mixer)
- Measuring cups and spoons
- Lightly floured surface
- Oiled bowls
- Plastic wrap
- Baking sheet or pizza stone
Instructions
-
In the large bowl of a stand mixer (or a large bowl if mixing by hand), dissolve the sugar in the warm water. It’s crucial the water is the right temperature – too cold and the yeast won’t activate, too hot and you’ll kill it. Around 110 degrees F is perfect. I often use “sugar in the raw” for a slightly deeper flavour, but regular white sugar works just as well.
-
Add the olive oil and 2 cups of the flour to the water mixture. The olive oil contributes to the crust’s tenderness and flavor.
-
Mix on medium speed for 2 minutes using the dough hook attachment (or stir vigorously by hand if not using a mixer). This step begins the development of gluten, which is essential for a chewy crust.
-
Add the salt and yeast to the mixture, and combine well. Ensure the salt doesn’t directly touch the yeast in the initial stages, as it can inhibit its activity.
-
Gradually add the remaining flour, mixing until a slightly sticky dough forms. If adding Parmesan cheese, granulated garlic, or Italian herbs, incorporate them at this stage for even distribution.
-
Turn the dough out onto a lightly floured surface and knead for 5 minutes. Kneading develops the gluten further, resulting in a more elastic and structured dough.
-
Divide the dough into 2 equal balls. These will be enough for two medium-sized pizzas or calzones.
-
Place each dough ball in a separate, lightly oiled bowl. Cover each bowl tightly with plastic wrap. This prevents the dough from drying out during the rising process.
-
Allow the dough to rise for 1 1/2 hours in a warm location. The warmth encourages the yeast to ferment, creating air pockets and giving the dough its characteristic rise. A slightly warm oven (turned off!) or a sunny spot in the kitchen works well. While the recipe calls for 1 1/2 hours, a shorter rise time of around 45 minutes can sometimes work in a pinch, especially if the yeast is very active.
-
After rising, place the dough on a lightly floured surface and sprinkle a little flour over the top. This prevents it from sticking as you shape it.
-
Working from the edges to the center, gently press the dough into a circle (approximately 12 inches in diameter for a pizza). For calzones, you can roll out the dough to your desired shape.
-
Add your favorite pizza sauce and toppings. Remember to not overload the dough, otherwise it will be difficult to cook properly. For calzones, fold the dough over the filling to create a half-moon shape and crimp the edges to seal.
-
Bake in a preheated 500-degree F oven for 20-25 minutes, or until the crust is golden brown and the cheese is melted and bubbly. Keep a close eye on the pizza or calzone during baking, as oven temperatures can vary.
Expert Tips & Tricks
- High-Temperature Baking: The 500-degree F oven is key to achieving that classic New York-style crust – crisp on the outside, soft and chewy on the inside.
- Dough Handling: Be gentle when stretching the dough to avoid tearing it. If it resists stretching, let it rest for a few minutes to allow the gluten to relax.
- Pizza Stone Power: Using a pizza stone preheated in the oven provides an incredibly crisp crust. Place the shaped pizza directly onto the hot stone for baking.
- Make-Ahead Magic: Prepare the dough in advance and store it in the refrigerator for up to 2 days. This allows the dough to develop even more flavor. Just be sure to punch it down before using.
- Calzone Sealing: For calzones, ensure a tight seal along the edges to prevent the filling from leaking out during baking. A fork can be used to crimp the edges effectively.
- Flavor Infusion: Experiment with infusing the olive oil with garlic, herbs, or chili flakes for an extra layer of flavor in the crust. Simply heat the oil with your desired aromatics before adding it to the dough.
Serving & Storage Suggestions
Serve your freshly baked pizza or calzone immediately for the best taste and texture. Garnish with fresh herbs like basil or oregano for a pop of color and aroma. Leftover pizza and calzones can be stored in an airtight container in the refrigerator for up to 3 days. To reheat, warm them in a preheated oven or toaster oven until heated through. For longer storage, wrap individual slices or calzones tightly in plastic wrap and freeze for up to 2 months. Reheat frozen pizza or calzones directly from the freezer in a preheated oven.
Nutritional Information
Please note that the following table provides an estimated nutritional breakdown. Actual values may vary based on specific ingredients and serving sizes.
| Nutrient | Amount per Serving (1/8 of pizza) | % Daily Value |
|---|---|---|
| Calories | 277 kcal | 14% |
| Total Fat | 8.5 g | 11% |
| Saturated Fat | 1.2 g | 6% |
| Cholesterol | 0 mg | 0% |
| Sodium | 548 mg | 23% |
| Total Carbohydrate | 43.5 g | 16% |
| Dietary Fiber | 1.6 g | 6% |
| Sugars | 1.2 g | – |
| Protein | 8.4 g | 17% |
Variations & Substitutions
- Gluten-Free Crust: Substitute all-purpose flour with a gluten-free flour blend for a gluten-free version of this recipe. You might need to adjust the hydration slightly, as gluten-free flours can absorb liquid differently.
- Whole Wheat Crust: Replace up to half of the all-purpose flour with whole wheat flour for a nuttier flavor and added fiber.
- Vegan Option: Ensure your toppings are vegan-friendly by using plant-based cheese and avoiding meats. This crust recipe is naturally vegan if you don’t add the optional Parmesan cheese.
- Herb-Infused Crust: Incorporate finely chopped fresh herbs like rosemary, thyme, or oregano into the dough for an aromatic twist.
- Spicy Kick: Add a pinch of red pepper flakes to the dough or a drizzle of chili oil after baking for a spicy kick.
FAQs (Frequently Asked Questions)
Q: Can I use instant yeast instead of active dry yeast?
A: Yes, you can. Use the same amount of instant yeast as active dry yeast. You can add instant yeast directly to the flour without proofing it in water first.
Q: Why is my dough so sticky?
A: Sticky dough can be due to using too much water or not enough flour. Resist the urge to add too much flour, as this can result in a dry crust. A slightly sticky dough is ideal.
Q: Can I freeze the pizza dough?
A: Absolutely! Divide the dough into balls, wrap them individually in plastic wrap, and then place them in a freezer bag. Freeze for up to 2 months. Thaw in the refrigerator overnight before using.
Q: What’s the best way to prevent the crust from sticking to the baking sheet?
A: Lightly grease your baking sheet or pizza stone with olive oil or sprinkle it with cornmeal. You can also use parchment paper for easy cleanup.
Q: My pizza crust is tough. What did I do wrong?
A: Over-kneading the dough or using too much flour can result in a tough crust. Be gentle when kneading and avoid adding excessive flour.
Final Thoughts
Now, armed with this knowledge, it’s your turn to create your own pizza or calzone masterpiece! Don’t be afraid to experiment with different toppings and flavors to create a personalized culinary experience. Share your creations with friends and family, and enjoy the satisfaction of making something delicious from scratch. Whether you’re a seasoned chef or a kitchen novice, this recipe is sure to become a staple in your repertoire. So, go ahead, fire up that oven, and let the aroma of baking dough fill your home with warmth and happiness!