
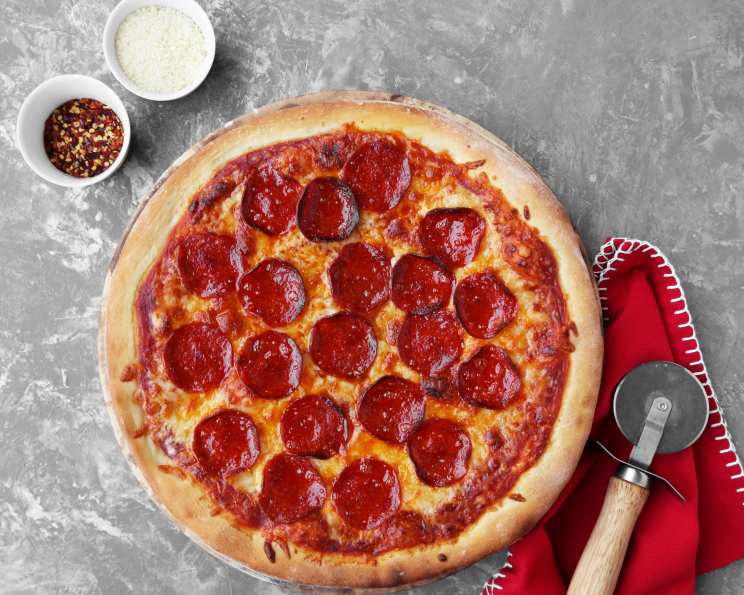
Mastering the New York-Style Pizza Crust: A Chef’s Guide
The aroma of a perfectly baked New York-style pizza, that yeasty, slightly charred fragrance mingling with the tangy sweetness of tomato sauce, instantly transports me back to my first culinary apprenticeship in Little Italy. I remember spending hours watching the pizzaiolos, their hands moving with balletic grace as they stretched and spun the dough, coaxing it into the perfect thin, yet pliable, circle. The sizzle of the pizza hitting the scorching hot stone oven, the satisfied sighs of customers biting into that first, foldable slice – it’s an experience etched in my memory, and one I’m thrilled to share with you.
Recipe Overview:
- Prep Time: 30 minutes
- Cook Time: 8-12 minutes (depending on toppings and oven)
- Rise Time: 30 minutes
- Total Time: 1 hour 30 minutes
- Yield: 1 twelve-inch crust
- Dietary Type: Vegetarian (easily adaptable to vegan)
Ingredients:
- 2⁄3 cup water (110°F to 115°F – lukewarm)
- 1 teaspoon sugar
- 1⁄8 ounce package fast-rise yeast (or 1/8 ounce package active dry yeast)
- 1 3⁄4 cups all-purpose flour (or bread flour)
- 1⁄2 teaspoon salt
- 1 tablespoon cornmeal (optional, for dusting the pan)
Equipment Needed:
- Small bowl
- Medium bowl
- Measuring cups and spoons
- Lightly floured surface
- Pizza pan (12- to 14-inch)
- Nonstick cooking spray
- Towel or plastic wrap
Instructions:
-
Activate the Yeast: In a small bowl, combine the 2/3 cup of lukewarm water (110°F to 115°F) and 1 teaspoon of sugar. Stir to dissolve the sugar completely.
-
Incorporate the Yeast: Sprinkle the 1/8 ounce package of fast-rise yeast (or active dry yeast) on top of the sugar-water mixture. Stir gently to combine.
-
Proof the Yeast: Let the yeast mixture stand for 5 to 10 minutes, or until it becomes foamy. This indicates that the yeast is active and ready to leaven the dough. If it doesn’t foam, your yeast may be old and should be replaced.
-
Combine Dry Ingredients: In a medium bowl, combine 1 3/4 cups of all-purpose flour (or bread flour) and 1/2 teaspoon of salt. Whisk the dry ingredients together to ensure even distribution.
-
Mix the Dough: Pour the foamy yeast mixture into the bowl with the flour and salt. Stir until the mixture forms a soft dough. It will likely be shaggy at first, but that’s perfectly normal.
-
Knead the Dough: Remove the dough to a lightly floured surface. Knead the dough for 5 minutes, or until it becomes smooth and elastic. If the dough is too sticky, add additional flour, 1 tablespoon at a time, as needed. Be careful not to add too much flour, as this can result in a tough crust. The dough should be tacky but not stick to your hands.
-
First Rise: Place the dough in a medium bowl that has been coated with nonstick cooking spray. Turn the dough in the bowl so that the top is also coated with cooking spray. This will prevent the dough from drying out during rising. Cover the bowl with a clean towel or plastic wrap.
-
Let the Dough Rise: Let the dough rise in a warm place for 30 minutes, or until it has doubled in bulk. A warm environment encourages the yeast to ferment, creating the characteristic airy texture of New York-style pizza.
-
Punch Down and Knead Again: Punch the dough down to release the excess air. Place it on a lightly floured surface and knead it for about 2 minutes, or until it is smooth again. This step helps to redistribute the yeast and develop the gluten structure.
-
Shape the Dough: Pat the dough into a flat disc about 7 inches in diameter. Let it rest for 2 to 3 minutes. This allows the gluten to relax, making it easier to stretch the dough without it snapping back.
-
Stretch the Dough (First Stage): Pat and gently stretch the dough from the edges until it seems to not stretch anymore. Let it rest for another 2 to 3 minutes. Patience is key here! Avoid tearing the dough by working slowly and evenly.
-
Final Stretch: Continue patting and stretching the dough until it is 12 to 14 inches in diameter. The thinner you stretch it, the crispier your crust will be.
-
Prepare the Pan: Spray a 12- to 14-inch pizza pan with nonstick cooking spray. Sprinkle with cornmeal, if desired. The cornmeal will add a subtle crunch and prevent the dough from sticking to the pan.
-
Press the Dough into the Pan: Press the stretched dough into the prepared pizza pan, ensuring it is evenly distributed.
-
Preheat the Oven: Preheat your oven to 500°F (260°C). This high temperature is crucial for achieving the signature char and crispy bottom of a New York-style pizza. If your oven doesn’t reach 500°F, preheat it to the highest temperature it can reach.
-
Bake the Pizza: Follow the directions for your individual pizza recipe, baking the pizza on the bottom rack of the oven. The bottom rack ensures that the crust cooks thoroughly and becomes nice and crispy. Baking time will vary depending on your toppings and oven, but typically it takes between 8 to 12 minutes.
Expert Tips & Tricks:
- Water Temperature is Key: Using water that is too hot will kill the yeast, while water that is too cold will not activate it properly. A temperature between 110°F and 115°F is ideal.
- Don’t Over-Knead: Over-kneading can result in a tough crust. Knead just until the dough is smooth and elastic.
- Stretch, Don’t Roll: Avoid using a rolling pin, as this can compress the dough and create a dense crust. Stretching by hand is the best way to achieve that airy, foldable texture.
- High Heat is Essential: The high temperature of the oven is crucial for achieving the characteristic char and crispy bottom of a New York-style pizza.
- Use a Pizza Stone or Steel: For even better results, preheat a pizza stone or steel in your oven before baking the pizza. This will help to create a crispier crust.
- Par-Bake for Extra Crispiness: If you prefer an extra crispy crust, par-bake the crust for 5 minutes before adding your toppings.
- Experiment with Flour: Bread flour will result in a chewier crust, while all-purpose flour will create a slightly more tender crust. Experiment to find your preferred texture.
Serving & Storage Suggestions:
Serve your New York-style pizza immediately after baking for the best flavor and texture. Cut into generous slices and enjoy! Leftover pizza can be stored in the refrigerator for up to 3 days. To reheat, place slices on a baking sheet and bake at 350°F (175°C) until warmed through and the crust is crispy. You can also reheat it in a skillet on the stovetop for a crispy bottom. Freezing is also an option; wrap individual slices tightly in plastic wrap and then place them in a freezer bag. Frozen pizza can be stored for up to 2 months. Reheat directly from frozen in the oven.
Nutritional Information:
| Nutrient | Amount per Serving | % Daily Value |
|---|---|---|
| Calories | 824 kcal | N/A |
| Calories from Fat | 21 g | N/A |
| Total Fat | 2.4 g | 3% |
| Saturated Fat | 0.4 g | 1% |
| Cholesterol | 0 mg | 0% |
| Sodium | 1173.7 mg | 48% |
| Total Carbohydrate | 172.6 g | 57% |
| Dietary Fiber | 6.9 g | 27% |
| Sugars | 4.8 g | 19% |
| Protein | 24 g | 48% |
Note: Nutritional information is an estimate and may vary based on specific ingredients and portion sizes.
Variations & Substitutions:
- Gluten-Free Crust: Substitute the all-purpose or bread flour with a gluten-free pizza flour blend. Follow the package instructions for best results.
- Vegan Crust: This recipe is naturally vegan-friendly. Ensure that any toppings you use are also vegan.
- Whole Wheat Crust: Substitute up to half of the all-purpose flour with whole wheat flour for a nuttier flavor and added fiber. You may need to add a little more water to achieve the desired dough consistency.
- Herb-Infused Crust: Add 1-2 teaspoons of dried herbs, such as oregano, basil, or rosemary, to the flour mixture for a more flavorful crust.
- Garlic Crust: Mix 1-2 cloves of minced garlic into the dough for a fragrant and savory crust.
FAQs (Frequently Asked Questions):
Q: Why is my pizza crust tough?
A: Over-kneading the dough or adding too much flour can result in a tough crust. Be sure to knead the dough just until it is smooth and elastic, and add flour sparingly.
Q: My dough isn’t rising. What did I do wrong?
A: Make sure your yeast is fresh and that you are using lukewarm water (110°F to 115°F) to activate it. If the water is too hot, it will kill the yeast. Also, ensure that the dough is rising in a warm place.
Q: How do I prevent the crust from sticking to the pan?
A: Spray the pizza pan with nonstick cooking spray and sprinkle it with cornmeal before pressing the dough into the pan.
Q: Can I make the dough ahead of time?
A: Yes, you can make the dough ahead of time and store it in the refrigerator for up to 24 hours. Punch down the dough before refrigerating and let it come to room temperature before stretching.
Q: What toppings go best with a New York-style pizza?
A: Classic New York-style toppings include tomato sauce, mozzarella cheese, pepperoni, sausage, mushrooms, and onions. But feel free to experiment and use your favorite toppings!
Final Thoughts:
Crafting a perfect New York-style pizza crust at home is an achievable feat, bringing the heart of the city’s culinary spirit right to your kitchen. Don’t be intimidated by the process; each step is designed to build the right texture and flavor. Gather your ingredients, embrace the hands-on technique, and prepare to be rewarded with a pizza that boasts a delightfully crispy yet pliable crust, the ideal canvas for your favorite toppings. I encourage you to give this recipe a try, share your creations, and most importantly, savor every delicious, foldable slice!