
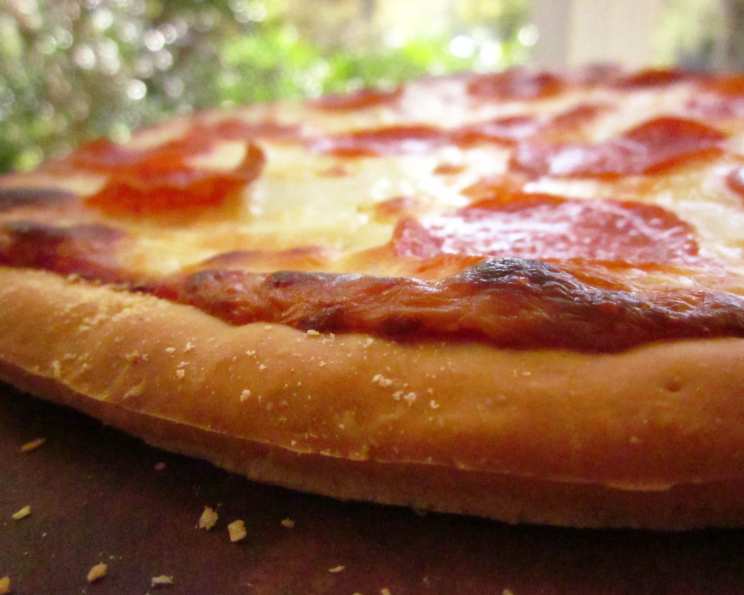
Mastering the New York Slice: A Journey to Perfect Pizza Dough
My earliest memories are filled with the aroma of yeast, flour, and simmering tomato sauce. My grandfather, a first-generation Italian immigrant, ran a small pizzeria in Brooklyn, and the magic always began with the dough. He taught me that a truly great pizza starts with a patient hand, quality ingredients, and a little bit of love. This New York-style pizza dough recipe is an homage to those early lessons, designed to bring that iconic foldable slice right to your own kitchen.
Recipe Overview
- Prep Time: 25 minutes
- Cook Time: 20-25 minutes
- Total Time: 2 hours 45 minutes (plus overnight refrigeration)
- Servings: 8
- Yield: 1 large or 2 small pizzas
- Dietary Type: Vegetarian (easily made vegan)
Ingredients
- 1 (2 1/4 teaspoon) package instant dry active yeast
- 1 cup warm water (not hot!)
- 1/2 tablespoon sugar
- 3 cups bread flour (or as needed)
- 2 tablespoons olive oil
- 1 1/2 teaspoons salt
Equipment Needed
- Mixing bowl
- Wooden spoon
- Clean work surface
- Large oiled bowl
- Kitchen towel
- Large zip-lock plastic bags
- Pizza stone or baking sheet
Instructions
-
In a mixing bowl, combine the warm water, yeast, sugar, and 1/2 cup of the bread flour. Stir well to combine, ensuring the yeast is dissolved. Let this mixture sit for 20 minutes. This step, often called “proofing the yeast,” allows you to ensure your yeast is active and will give your dough the rise it needs. You’ll know it’s ready when the mixture becomes bubbly and frothy.
-
After 20 minutes, add the olive oil, salt, and 2 cups of the bread flour to the yeast mixture. Mix with a wooden spoon until the dough begins to come together. It will be shaggy and sticky at this point, but that’s perfectly fine.
-
Turn the dough out onto a lightly floured work surface. Begin to knead the dough for about 10 minutes. As you knead, gradually add more flour, a little at a time, to prevent the dough from sticking to the work surface. The goal is to achieve a soft, elastic, and slightly sticky dough. Be careful not to add too much flour, as this can result in a tough, dry crust.
-
Form the kneaded dough into a ball. Place the ball in a large, oiled bowl, turning to coat all sides with the oil. This helps to prevent the surface of the dough from drying out during the rising process. Drizzle a few extra drops of olive oil over the top of the dough.
-
Cover the bowl with a clean kitchen towel and place it in a warm spot. Let the dough rise for 2 hours, or until it has doubled in size. A warm environment encourages the yeast to ferment, creating those characteristic air pockets that give pizza dough its light and airy texture.
-
Once the dough has doubled, gently punch it down to release the trapped air. Divide the dough into 2 equal balls. Place each ball in a large zip-lock plastic bag.
-
Refrigerate the dough overnight (or for up to 3 days). This cold fermentation process allows the flavors to develop and deepen, resulting in a more complex and delicious pizza crust.
-
When you’re ready to make your pizza, remove the dough from the refrigerator and let it come up to room temperature before using. This will make the dough more pliable and easier to stretch and shape. Allow about 1-2 hours for this step.
Expert Tips & Tricks
-
Water Temperature is Key: The water should be warm (around 105-115°F or 40-46°C), not hot, as hot water can kill the yeast.
-
Don’t Over-Knead: Over-kneading can result in a tough crust. Aim for a smooth, elastic dough that springs back when pressed.
-
Cold Fermentation is Your Friend: Refrigerating the dough overnight is crucial for developing flavor. Don’t skip this step!
-
Stretching, Not Rolling: For a true New York-style crust, gently stretch the dough by hand rather than using a rolling pin. This helps to maintain the air pockets and create a lighter, airier texture.
-
Preheat Your Baking Surface: If using a pizza stone, preheat it in the oven for at least 30 minutes before baking. This will help to create a crispy, golden-brown crust.
Serving & Storage Suggestions
Serve your homemade New York-style pizza immediately after baking. Garnish with fresh basil or a drizzle of olive oil for an extra touch. Leftover pizza can be stored in the refrigerator for up to 3 days. To reheat, warm in a preheated oven (350°F or 175°C) for a few minutes until heated through and the crust is crisp. You can also freeze cooked pizza slices. Wrap well in plastic wrap and foil, and freeze for up to 2 months. Reheat directly from frozen in a preheated oven.
Nutritional Information
(Estimated per serving, based on 8 servings)
| Nutrient | Amount per Serving | % Daily Value |
|---|---|---|
| Calories | 207 kcal | 10% |
| Total Fat | 5.4g | 8% |
| Saturated Fat | 0.8g | 4% |
| Cholesterol | 0mg | 0% |
| Sodium | 438mg | 18% |
| Total Carbohydrate | 35.9g | 12% |
| Dietary Fiber | 1.6g | 6% |
| Sugars | 0.9g | – |
| Protein | 5.3g | 11% |
Variations & Substitutions
-
Vegan Pizza Dough: This recipe is already easily adaptable to vegan diets. Ensure you use a vegan-friendly sugar source.
-
Whole Wheat Pizza Dough: Substitute up to half of the bread flour with whole wheat flour for a nuttier flavor and added fiber.
-
Gluten-Free Pizza Dough: Replace the bread flour with a gluten-free pizza flour blend, following the package instructions for best results. You may need to adjust the amount of water depending on the blend used.
-
Herb-Infused Dough: Add 1-2 tablespoons of dried herbs, such as Italian seasoning, oregano, or basil, to the flour mixture for a flavorful twist.
FAQs (Frequently Asked Questions)
Q: Can I use all-purpose flour instead of bread flour?
A: While you can, bread flour is recommended for its higher protein content, which results in a chewier, more elastic crust. All-purpose flour will work in a pinch, but the texture may be slightly different.
Q: How do I know if my yeast is still good?
A: If your yeast doesn’t bubble and froth after 20 minutes in the warm water and sugar mixture, it’s likely expired and should be replaced.
Q: Can I freeze the pizza dough?
A: Yes! After dividing the dough into balls, wrap each ball tightly in plastic wrap and then place in a freezer bag. Freeze for up to 3 months. Thaw in the refrigerator overnight before using.
Q: My dough is too sticky. What should I do?
A: Add a little more flour, a tablespoon at a time, while kneading until the dough is manageable. Be careful not to add too much, as this can result in a tough crust.
Q: Why is my pizza crust not crispy?
A: Ensure your oven and pizza stone (if using) are preheated to a high temperature. Also, avoid overloading the pizza with too many toppings, which can make the crust soggy.
Final Thoughts
There’s something undeniably satisfying about creating a pizza from scratch, from the initial mixing of the dough to that first delicious bite. This New York-style pizza dough recipe is a labor of love, but the results are well worth the effort. Don’t be afraid to experiment with different toppings and sauces to create your own signature pie. And please, share your creations and feedback – I’d love to see how you make it your own! Grab your apron, turn on some music, and let’s bring a little piece of New York to your kitchen.