
New Zealand Pavlova: A Cloud of Sweetness
The first time I tasted pavlova was at a summer potluck, held in my friend’s garden under a canopy of fairy lights. I remember being instantly captivated by its whimsical appearance – a snowy meringue cloud, adorned with vibrant berries and a swirl of whipped cream. That initial bite was pure magic; the crisp shell yielding to a soft, marshmallowy interior, the sweetness balanced by the tartness of the fruit. It felt like a celebration on a plate, and from that moment on, pavlova held a special place in my heart.
Recipe Overview
- Prep Time: 15 minutes
- Cook Time: 1 hour
- Cooling Time: Several Hours
- Servings: 8-10
- Yield: 1 Pavlova
- Dietary Type: Gluten-Free
Ingredients
- 4 egg whites
- 1 pinch salt
- 1 teaspoon cornflour (cornstarch)
- 1⁄4 teaspoon vanilla essence
- 3⁄4 cup caster sugar (superfine sugar or berry sugar)
- 1 teaspoon vinegar
Optional Toppings:
- Thick whipped cream (sweetened with vanilla and sugar)
- Fresh seasonal fruit (strawberries, raspberries, kiwi, passionfruit, etc.)
- Pastry cream
Equipment Needed
- Electric mixer (stand mixer or hand mixer)
- Large, clean mixing bowl
- Baking sheet
- Parchment paper
- Rubber spatula or offset spatula
- Knife
Instructions
-
Begin by preheating your oven to a low temperature of 250°F (120°C). This gentle heat is key to creating the perfect pavlova texture.
-
Ensure your mixing bowl is impeccably clean and completely dry. Even a trace of grease can prevent the egg whites from whipping properly. Separate the eggs, placing the egg whites into the clean bowl. Reserve the yolks for another use, like crème brûlée or homemade mayonnaise.
-
Using an electric mixer, begin to beat the egg whites on medium speed. Continue until soft peaks form. This means the whites will hold their shape but the tips will gently curl over.
-
Now comes the crucial part: adding the sugar. Gradually add the caster sugar, a spoonful at a time, while continuously beating the egg whites. This slow incorporation is essential for creating a stable meringue.
-
Increase the mixer speed to high and beat until the meringue is very stiff and glossy. The mixture should hold its shape firmly and have a beautiful sheen. This process can take several minutes, so be patient.
-
Reduce the mixer speed to low. Add the salt, vinegar, and vanilla essence one at a time, mixing well after each addition. The vinegar helps stabilize the meringue and adds a subtle tang, while the vanilla enhances the sweetness.
-
Finally, beat in the cornstarch until it is fully incorporated. The cornstarch contributes to the soft, marshmallowy interior of the pavlova. Continue beating until the mixture is really glossy and will stand when cut with a knife.
-
Line a baking sheet with a sheet of parchment paper. This prevents the pavlova from sticking and makes it easy to transfer later.
-
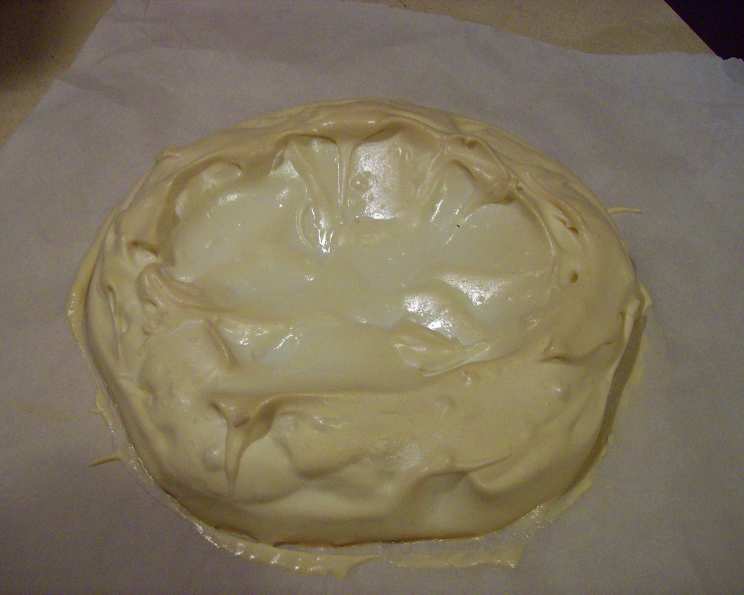
Gently tip the pavlova mixture onto the center of the prepared baking sheet. Use a rubber spatula or offset spatula to spread the mixture into a circle approximately 8-9 inches across. Create a slight depression in the center – this will form a natural bowl for your toppings.
-
Place the baking sheet on the center rack of the preheated oven. Bake for one hour. The pavlova should be pale and slightly firm to the touch.
-
After one hour, turn off the oven and leave the pavlova inside to cool completely. Do not open the oven door during this time. This slow cooling process is critical for preventing cracks and ensuring the meringue sets properly.
-
Ideally, leave the pavlova in the oven until it is completely cold – this could take several hours or even overnight. If you are unsure, it is better to leave it in too long than to open the oven too early.
-
Once the pavlova is completely cool, carefully remove it from the oven. The outside should be slightly crisp, while the inside should be soft and marshmallowy.
-
To serve, gently transfer the pavlova to a serving plate. Decorate generously with a layer of thick whipped cream (sweetened with a touch of vanilla and sugar) or pastry cream. Top with an abundance of fresh seasonal fruit, such as strawberries, raspberries, sliced kiwi, or passionfruit. The choice is yours!
Expert Tips & Tricks
- Achieving Stiff Peaks: The key to a successful pavlova is achieving stiff peaks with your egg whites. Make sure your bowl and beaters are spotlessly clean and free of any grease. A tiny pinch of cream of tartar can also help stabilize the meringue.
- The Low and Slow Bake: Resist the urge to increase the oven temperature. A low and slow bake is crucial for creating the perfect texture. A higher temperature will cause the pavlova to crack and become brittle.
- Don’t Open the Oven! This is perhaps the most important tip. Opening the oven while the pavlova is cooling can cause it to collapse. Patience is key!
- Preventing Cracks: While some cracks are inevitable, you can minimize them by cooling the pavlova slowly in the oven.
- Rescuing a Cracked Pavlova: Don’t despair if your pavlova cracks! The toppings will hide any imperfections. You can also strategically arrange the fruit to cover the cracks.
- Flavor Infusions: Experiment with adding different extracts to the meringue, such as almond, lemon, or peppermint.
Serving & Storage Suggestions
Pavlova is best served immediately after decorating to prevent the meringue from becoming soggy. However, the plain baked pavlova base can be stored in an airtight container at room temperature for up to 2 days. Do not refrigerate the undecorated pavlova, as the moisture will cause it to become sticky.
Once decorated, pavlova is best eaten within a few hours. Leftovers can be stored in the refrigerator, but the meringue will soften over time.
Nutritional Information
Please note that this is an estimate, and the actual nutritional value will vary based on specific ingredients and portion sizes.
| Nutrient | Amount per Serving | % Daily Value |
|---|---|---|
| Calories | 250 kcal | 13% |
| Total Fat | 2g | 3% |
| Saturated Fat | 1g | 5% |
| Cholesterol | 0mg | 0% |
| Sodium | 50mg | 2% |
| Total Carbohydrate | 55g | 20% |
| Dietary Fiber | 0g | 0% |
| Sugars | 50g | N/A |
| Protein | 3g | 6% |
Variations & Substitutions
- Mini Pavlovas: Create individual pavlovas by spooning the meringue onto the baking sheet in smaller portions. Adjust the baking time accordingly.
- Chocolate Pavlova: Add a tablespoon of cocoa powder to the meringue mixture for a chocolate-flavored pavlova.
- Lemon Curd Topping: Substitute whipped cream with a layer of tangy lemon curd for a refreshing twist.
- Tropical Pavlova: Top with a medley of tropical fruits, such as mango, pineapple, and passionfruit.
- Berry Compote: Instead of fresh fruit, top with a homemade berry compote.
- Vegan Pavlova: Substitute the egg whites with aquafaba (the liquid from canned chickpeas). You may need to adjust the whipping time and baking temperature.
FAQs (Frequently Asked Questions)
Q: Why did my pavlova crack?
A: Cracking is common due to temperature fluctuations. Cool the pavlova slowly in the oven and avoid opening the door during cooling.
Q: My pavlova is sticky, what did I do wrong?
A: This usually happens if the pavlova isn’t baked long enough or if it’s stored in a humid environment. Ensure proper baking time and store in an airtight container.
Q: Can I make pavlova ahead of time?
A: Yes, the plain baked pavlova base can be made up to 2 days in advance and stored at room temperature in an airtight container.
Q: What is caster sugar and can I use regular sugar instead?
A: Caster sugar is superfine sugar that dissolves more easily, creating a smoother meringue. While you can use regular granulated sugar, the texture may be slightly grainy.
Q: What kind of vinegar should I use?
A: White vinegar or apple cider vinegar works best. Avoid using flavored vinegars like balsamic.
Final Thoughts
Now that you’re armed with this recipe and a wealth of tips, I encourage you to embark on your pavlova-making journey! It might seem intimidating at first, but with a little patience and attention to detail, you’ll be rewarded with a truly spectacular dessert. Don’t be afraid to experiment with different toppings and flavor combinations to create your own signature pavlova. And most importantly, share your creations with friends and family – pavlova is meant to be enjoyed and celebrated! Consider pairing this delightful treat with a glass of chilled Moscato or a refreshing sparkling wine. Happy baking!