
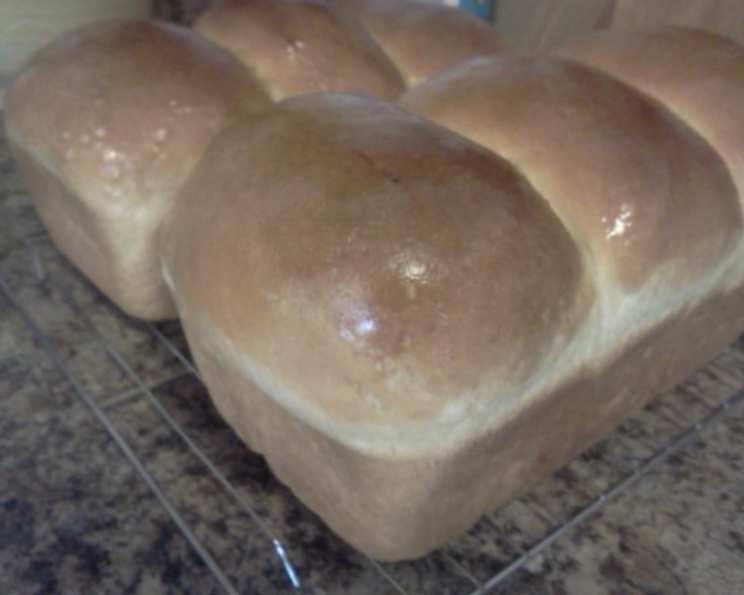
Newfoundland White Bread: A Taste of Home
The aroma of baking bread – it’s a scent that instantly transports me back to my grandmother’s cozy kitchen in St. John’s. She always had a loaf of Newfoundland white bread cooling on the counter, its golden crust crackling softly. The warmth of the oven seemed to permeate everything, filling the air with comfort and love. Every slice, slathered with butter and homemade partridgeberry jam, was a little piece of Newfoundland sunshine.
Recipe Overview
- Prep Time: 3 hours 15 minutes
- Cook Time: 30-40 minutes
- Total Time: 4 hours 15 minutes
- Yields: 2 loaves
- Serves: 16
- Dietary Type: Vegetarian
Ingredients
- 5 cups flour
- 1 (5 g) package instant yeast
- 2 teaspoons salt
- 2 tablespoons sugar
- 3 tablespoons unsalted butter, melted
- 2 cups milk, warm
Equipment Needed
- Large bowl or electric mixer with dough hook
- Measuring cups and spoons
- Countertop or bread board
- Clean tea towel
- 2 medium loaf pans
- Wire rack
Instructions
- In a large bowl or the bowl of a large electric mixer fitted with the dough hook, combine 3 cups of the flour with the sugar, instant yeast, and salt.
- Add the melted butter and warm milk.
- Using a wooden spoon or the regular paddle attachment of your electric mixer, beat for 4-5 minutes until the mixture is smooth and free of lumps. If using an electric mixer, switch to the dough hook at this point and begin to slowly incorporate the remaining 2 cups of flour. If mixing by hand, gradually mix in the flour until a soft dough forms that pulls away from the sides of the bowl.
- Turn the dough out onto a lightly floured countertop or bread board. Be prepared to use a little less or a little more flour to achieve the right consistency, as this can vary depending on humidity.
- Knead the dough for an additional 10 minutes, either in the electric mixer or on the bread board. The dough should be smooth and elastic.
- Cover the dough and let it rest and rise for one hour in a warm place. The dough should roughly double in size.
- Punch the dough down to release the air and knead it for a few minutes by hand.
- Let it rest for another 10 minutes. This second rest allows the gluten to relax further, resulting in a more tender crumb.
- Grease two medium loaf pans thoroughly with butter or cooking spray.
- Divide the dough into 6 equal portions, forming each portion into a ball.
- Place 3 balls of dough in each loaf pan, arranging them evenly.
- Cover the loaf pans with a clean tea towel and allow the dough to rise until it is about 2 inches above the rim of the pan. This proofing process will take about 2 hours, depending on the room temperature. A warmer environment will speed up the rise, while a cooler environment will slow it down.
- Bake in a preheated oven at 375 degrees F (190 degrees C) for 30-40 minutes, depending on the size of the pans used. The loaves should be golden brown on top and sound hollow when tapped. Use an instant-read thermometer to ensure the internal temperature reaches 200-210°F (93-99°C).
- When baked, immediately turn the loaves out onto a wire rack to cool.
- If desired, brush the tops with melted butter to soften the crust and add a touch of richness. This step is optional but highly recommended for a softer, more appealing crust.
Expert Tips & Tricks
- Warm Milk is Key: Ensure the milk is warm, not hot. Hot milk can kill the yeast. Aim for a temperature around 110-115°F (43-46°C).
- The Poke Test: To check if the dough has risen enough during proofing, gently poke it with your finger. If the indentation slowly springs back, it’s ready to bake. If it springs back immediately, it needs more time. If the indentation doesn’t spring back at all, it may have over-proofed.
- Even Baking: To ensure even baking, rotate the loaf pans halfway through the baking time.
- Preventing a Soggy Bottom: Let the loaves cool completely on a wire rack to prevent the bottoms from becoming soggy.
- Dough Too Sticky? If your dough is too sticky to handle, gradually add a tablespoon of flour at a time until it reaches a manageable consistency. Be careful not to add too much, or the bread will be dense.
- Room Temperature Impact: Remember that rising times are greatly affected by the temperature of your kitchen. On a warm day, the dough will rise much faster than on a cold day.
Serving & Storage Suggestions
Newfoundland white bread is incredibly versatile. Serve it warm with butter, jam, or honey for breakfast. It’s also fantastic for sandwiches, toast, or grilled cheese. For a truly authentic Newfoundland experience, enjoy it with a bowl of toutons (fried bread dough) drizzled with molasses.
To store, allow the bread to cool completely before wrapping it tightly in plastic wrap or placing it in a bread bag. It will keep at room temperature for 2-3 days. For longer storage, freeze the loaves, tightly wrapped, for up to 3 months. To thaw, simply leave at room temperature for several hours. You can also reheat slices in a toaster or oven.
Nutritional Information
| Nutrient | Amount per Serving | % Daily Value |
|---|---|---|
| Calories | 187.9 kcal | N/A |
| Calories from Fat | 33 g | 18% |
| Total Fat | 3.7 g | 5% |
| Saturated Fat | 2.1 g | 10% |
| Cholesterol | 10 mg | 3% |
| Sodium | 306.9 mg | 12% |
| Total Carbohydrate | 32.9 g | 10% |
| Dietary Fiber | 1.1 g | 4% |
| Sugars | 1.7 g | N/A |
| Protein | 5.2 g | 10% |
Note: Nutritional information is an estimate and may vary based on specific ingredients and portion sizes.
Variations & Substitutions
- Whole Wheat Variation: Substitute up to 2 cups of the all-purpose flour with whole wheat flour for a nuttier flavor and added fiber.
- Dairy-Free: Use your favorite non-dairy milk alternative, such as almond milk, soy milk, or oat milk. Ensure the butter is also replaced with a vegan alternative.
- Sweet Bread: Add 1/4 cup of honey or maple syrup to the dough for a sweeter loaf. You can also incorporate dried fruits like raisins or cranberries.
- Herbed Bread: Mix in 1-2 tablespoons of chopped fresh herbs, such as rosemary, thyme, or oregano, for a savory twist.
- Cheese Bread: Add 1 cup of shredded cheddar or parmesan cheese to the dough during the final kneading stage.
FAQs (Frequently Asked Questions)
Q: Why is my bread so dense?
A: Several factors can contribute to dense bread, including using too much flour, not kneading enough, or not allowing the dough to rise sufficiently. Ensure you measure the flour accurately, knead the dough until it’s smooth and elastic, and give it ample time to rise in a warm place.
Q: Can I use active dry yeast instead of instant yeast?
A: Yes, but you’ll need to proof the active dry yeast first. Dissolve the yeast in the warm milk with the sugar and let it sit for 5-10 minutes until it becomes foamy before adding it to the other ingredients.
Q: How do I know when the bread is done baking?
A: The bread is done when it’s golden brown on top and sounds hollow when you tap the bottom. You can also use an instant-read thermometer to ensure the internal temperature reaches 200-210°F (93-99°C).
Q: Can I make the dough ahead of time?
A: Yes, you can make the dough ahead of time and let it rise in the refrigerator for up to 24 hours. This slow fermentation can enhance the flavor of the bread. When ready to bake, bring the dough to room temperature for about 30 minutes before shaping and baking.
Q: What if my dough doesn’t rise?
A: Several factors could prevent the dough from rising, including using expired yeast, milk that’s too hot or too cold, or a room that’s too cold. Ensure your yeast is fresh, the milk is warm but not hot, and the room is warm enough for the yeast to activate.
Final Thoughts
There’s something truly magical about the simple act of baking bread. This Newfoundland white bread recipe is more than just a set of instructions; it’s a connection to a place, a culture, and a history. I encourage you to try this recipe and experience the joy of creating something delicious and comforting from scratch. Whether you’re a seasoned baker or a complete novice, don’t be intimidated – just follow the steps, trust your instincts, and let the aroma of freshly baked bread fill your home. And when you take that first bite, remember the warmth of a Newfoundland kitchen and the love that goes into every slice. Now go on, bake a batch and share the joy!