
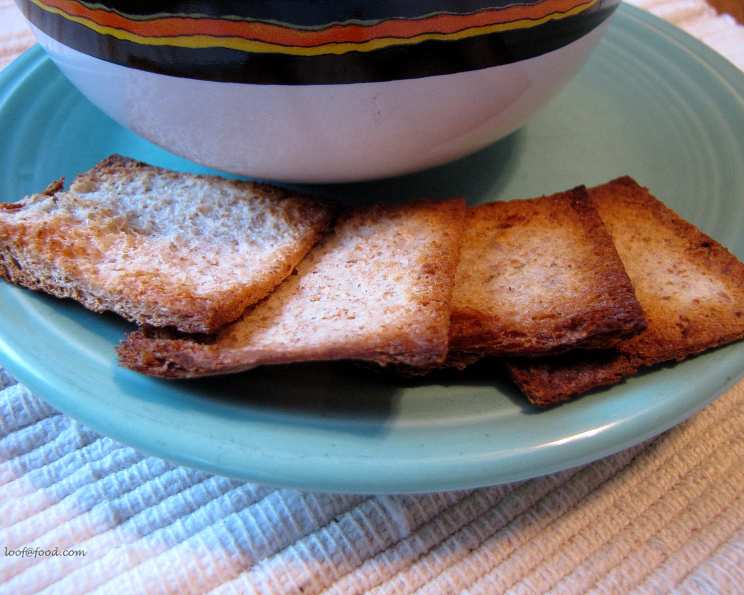
Nif’s Bread Crackers in a Pinch
I still remember the sheer panic I felt that day. My sister, usually the hostess with the mostest, had come down with a nasty cold just hours before her annual summer garden party. Suddenly, I was in charge of appetizers for fifty people! I raced to her kitchen, feeling utterly unprepared. Surveying the pantry, I spotted a nearly-stale loaf of sourdough. Inspiration struck! I remembered a similar recipe my grandmother used to make, and with a little improvisation, I transformed that ordinary bread into the most surprisingly delicious crackers. They were a hit, especially with a dollop of creamy goat cheese and a drizzle of honey. Now, whenever I need a quick and elegant appetizer, these simple bread crackers are my go-to!
Recipe Overview
- Prep Time: 10 minutes
- Cook Time: 10-12 minutes
- Total Time: 22 minutes
- Servings: Varies depending on bread loaf size, approximately 20
- Yield: Varies depending on bread loaf size, approximately 20 crackers
- Dietary Type: Vegetarian (can be made vegan with vegan butter)
Ingredients
- 1 loaf bread, sliced (I prefer whole wheat or sourdough)
- ⅓ cup butter, melted (or vegan butter alternative)
- 1-2 garlic cloves, minced (depending on your garlic preference)
Equipment Needed
- Cookie sheet
- Silicone pad, parchment paper, or tin foil
- Cookie cutter (optional, but recommended for uniform shapes)
- Large knife
- Microwave-safe bowl
- Pastry brush or spoon
Instructions
- Preheat your oven to 400°F (200°C). Ensure your oven rack is positioned in the center. This will promote even baking.
- Line a cookie sheet with a silicone pad, parchment paper, or tin foil. This will prevent the crackers from sticking and makes cleanup a breeze.
- Using a cookie cutter, cut out shapes from your slices of bread. You can use any shape you like – circles, squares, stars – get creative! If you don’t have cookie cutters, you can simply cut the bread into smaller squares or rectangles with a knife.
- Pick up the cutouts and gently press them flat with your fingers, making them very thin like a cracker. The thinner you make them, the crispier they will be. Be careful not to tear the bread.
- Crush the garlic clove(s) with the flat side of a large knife. This helps release the maximum amount of flavor. Then, finely mince the garlic.
- Place the butter in a microwave-safe bowl and add the minced garlic. Melt the butter in the microwave in 20-second intervals, stirring in between, until completely melted. This process infuses the butter with the garlic flavor. Avoid overheating the butter, as it can cause the garlic to burn and become bitter.
- Brush each “cracker” generously with the garlic butter using a pastry brush. Alternatively, you can drizzle the garlic butter over the crackers and then use the back of a spoon to spread it evenly.
- Place the brushed crackers on the prepared cookie sheet, ensuring they are not overlapping. Overlapping can cause them to steam instead of crisping up.
- Place the cookie sheet in the preheated oven. Bake for 5 minutes, then carefully flip each cracker over.
- Bake for another 5-7 minutes, or until the crackers are golden brown and crispy. Keep a close eye on them, as baking times may vary depending on your oven. Thinner crackers will bake faster. If some crackers are browning faster than others, you can remove them from the oven and continue baking the rest.
- Remove the crackers from the oven and let them cool completely on the cookie sheet. They will crisp up further as they cool.
- Top with your favorite toppings and serve!
Expert Tips & Tricks
- Day-old bread works best: Slightly stale bread is easier to flatten and will result in crispier crackers.
- Don’t overcrowd the pan: Bake in batches if necessary to ensure even browning.
- Garlic butter variations: Add a pinch of red pepper flakes to the garlic butter for a little heat, or mix in some chopped fresh herbs like rosemary or thyme for added flavor.
- Make ahead: The crackers can be made ahead of time and stored in an airtight container at room temperature for up to 3 days.
- Rescue slightly burnt crackers: If your crackers get a little too dark, you can try lightly scraping off the burnt edges with a paring knife.
- Even garlic distribution: To ensure even garlic flavor, you can let the minced garlic steep in the melted butter for about 10-15 minutes before brushing the crackers. This will allow the garlic flavor to fully infuse the butter.
- Extra crispy crackers: After flattening the bread, lightly brush each cracker with a thin layer of olive oil before applying the garlic butter. This will help them crisp up even further.
Serving & Storage Suggestions
Serve these bread crackers immediately after cooling for the best texture. They are delicious on their own as a snack or appetizer, or they can be paired with a variety of toppings. Some popular choices include:
- Cream cheese or goat cheese with a drizzle of honey
- Sliced tomatoes and mozzarella with balsamic glaze
- Pesto and sun-dried tomatoes
- Hummus and roasted vegetables
- Tapenade
Store leftover crackers in an airtight container at room temperature for up to 3 days. If they lose their crispness, you can re-crisp them in a low oven (250°F/120°C) for a few minutes. Avoid storing them in the refrigerator, as this will make them soggy. Freezing is not recommended.
Nutritional Information
(Note: Values are approximate and will vary depending on the type of bread and butter used.)
| Nutrient | Amount per Serving | % Daily Value |
|---|---|---|
| Calories | 75 kcal | 4% |
| Total Fat | 4g | 6% |
| Saturated Fat | 2.5g | 13% |
| Cholesterol | 10mg | 3% |
| Sodium | 120mg | 5% |
| Total Carbohydrate | 8g | 3% |
| Dietary Fiber | 0.5g | 2% |
| Sugars | 1g | – |
| Protein | 1.5g | 3% |
Variations & Substitutions
- Vegan: Use vegan butter and ensure your bread is vegan-friendly.
- Gluten-Free: Use gluten-free bread slices. Note that gluten-free bread can be more delicate, so handle with care when flattening.
- Herb-Infused: Add dried herbs like rosemary, thyme, or oregano to the garlic butter.
- Cheese Crackers: Sprinkle grated Parmesan cheese on top of the crackers before baking.
- Spicy Crackers: Add a pinch of red pepper flakes or cayenne pepper to the garlic butter.
- Sweet Crackers: Use cinnamon sugar instead of garlic butter for a sweet treat. Serve with fresh fruit or a dollop of whipped cream.
FAQs (Frequently Asked Questions)
Q: Can I use any type of bread for these crackers?
A: Yes, you can use almost any type of sliced bread. Whole wheat, sourdough, Italian, and even sandwich bread work well. Avoid very soft or fluffy breads, as they may not crisp up as well.
Q: How thin should I make the bread slices?
A: The thinner you make the bread slices, the crispier the crackers will be. Aim for about 1/8 inch thickness.
Q: Can I use pre-minced garlic instead of fresh garlic?
A: While fresh garlic is preferred for its flavor, you can use pre-minced garlic in a pinch. Use about 1/2 teaspoon of pre-minced garlic for every clove of fresh garlic.
Q: My crackers are burning on the edges. What am I doing wrong?
A: Your oven may be running hot. Try lowering the temperature by 25 degrees or reducing the baking time. Also, make sure the crackers are not too close to the heating element.
Q: How do I store these crackers to keep them crispy?
A: Store the cooled crackers in an airtight container at room temperature. Avoid storing them in the refrigerator, as this will make them soggy. If they lose their crispness, you can re-crisp them in a low oven for a few minutes.
Final Thoughts
These Nif’s Bread Crackers are a testament to the fact that deliciousness doesn’t always require hours in the kitchen or a long list of ingredients. With just a few simple ingredients and a little creativity, you can transform an ordinary loaf of bread into an elegant and flavorful appetizer that is sure to impress. So, gather your ingredients, preheat your oven, and get ready to enjoy the delightful crunch and garlicky goodness of these easy bread crackers. Don’t be afraid to experiment with different toppings and flavors to create your own signature version! I’d love to hear how they turned out, so please share your feedback and variations with me. Cheers to simple, satisfying snacks!