
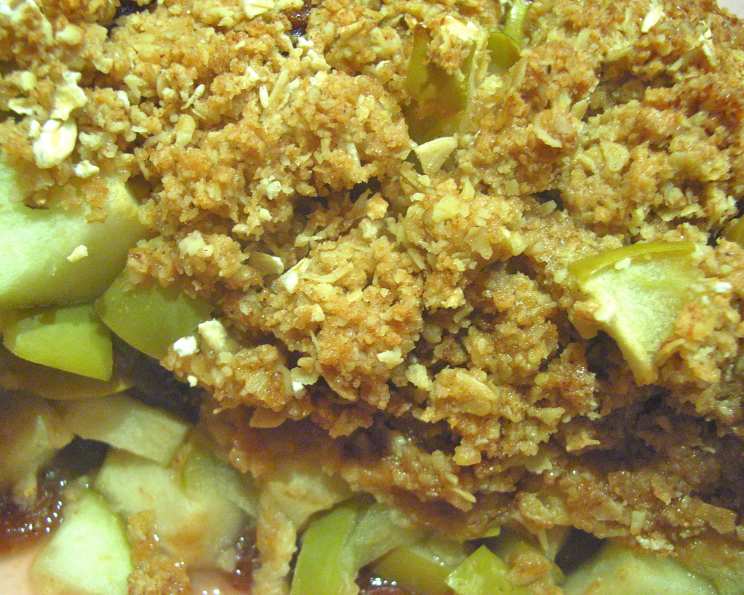
Nilla Apple Crisp: A Taste of Nostalgia
The scent of cinnamon and baked apples always takes me back to my grandmother’s kitchen. She wasn’t a fancy cook, but her apple crisp was legendary. It wasn’t just the taste – the tender apples, the sweet and crumbly topping – it was the warmth of her kitchen, the laughter shared around the table, and the feeling of being utterly and completely loved. This Nilla Apple Crisp, with its unique twist, reminds me of those cherished moments, offering a comforting embrace in every bite.
Recipe Overview
- Prep Time: 25 minutes
- Cook Time: 35 minutes
- Total Time: 60 minutes
- Servings: 10-12
- Dietary Type: Vegetarian
Ingredients
- 8 cups Granny Smith apples, peeled and thinly sliced
- ½ cup firmly packed brown sugar, divided
- 2 teaspoons ground cinnamon, divided
- ⅓ cup old fashioned oats or ⅓ cup quick-cooking oats
- ¼ cup cold margarine
- 25 reduced-fat vanilla wafers, crushed (about 1 cup)
Equipment Needed
- 8- or 9-inch baking dish
- Large bowl
- Medium bowl
- Pastry blender or two knives
- Oven
Instructions
- Preheat your oven to 350 degrees Fahrenheit (175 degrees Celsius). This ensures the apples bake evenly and the topping becomes perfectly golden.
- In a large bowl, gently toss the sliced apples with ¼ cup of the brown sugar and 1 teaspoon of the cinnamon. Ensure the apples are well coated for optimal flavor distribution.
- Spoon the apple mixture into your 8- or 9-inch baking dish. Arrange the apples evenly to promote even baking.
- In a medium bowl, combine the oats, the remaining ¼ cup of brown sugar, and the remaining 1 teaspoon of cinnamon. Whisk together to blend the dry ingredients.
- Cut in the cold margarine with a pastry blender or two knives. This process incorporates the fat into the dry ingredients, creating a crumbly texture. Continue until the mixture resembles coarse crumbs. The margarine must be cold to prevent it from melting too quickly and creating a greasy topping.
- Add the crushed vanilla wafers to the oat mixture and mix well. The Nilla wafers provide a delightful sweetness and a subtle vanilla flavor that complements the apples beautifully. Make sure the wafers are thoroughly crushed but not powdered; you want to maintain some texture.
- Spread the crumb mixture evenly over the apples in the baking dish. Gently press the topping down to ensure it adheres to the apples during baking.
- Bake for 30 to 35 minutes, or until the apples are tender and the topping is golden brown. You can test the tenderness of the apples by inserting a fork into the center of the crisp. If the fork slides in easily, the apples are done.
- Remove from the oven and let cool slightly. Serve warm or cooled. A slightly cooled crisp is easier to cut and serve.
Expert Tips & Tricks
- For a deeper, richer flavor, try browning the butter before adding it to the oat mixture. This adds a nutty complexity to the topping.
- If your apple slices are particularly thick, consider par-baking them for 10 minutes before adding the topping. This will ensure they are perfectly tender.
- To prevent the topping from browning too quickly, cover the baking dish loosely with foil during the last 10 minutes of baking.
- If you prefer a smoother apple filling, you can lightly saute the apples in a pan with a bit of butter and brown sugar before baking. This will soften them and release their juices.
- A squeeze of lemon juice over the apples before adding the topping can brighten the flavor and prevent them from browning too much during baking.
Serving & Storage Suggestions
Serve the Nilla Apple Crisp warm with a scoop of vanilla ice cream, a dollop of whipped cream, or a drizzle of caramel sauce. It’s equally delicious on its own!
Leftovers can be stored in an airtight container at room temperature for up to 2 days, or in the refrigerator for up to 5 days. To reheat, warm in the oven at 350°F (175°C) for 10-15 minutes, or microwave in short intervals until heated through. The crisp can also be frozen for up to 2 months. Thaw completely in the refrigerator before reheating.
Nutritional Information
| Nutrient | Amount per Serving | % Daily Value |
|---|---|---|
| Calories | 169.7 kcal | N/A |
| Calories from Fat | 37 kcal | N/A |
| Total Fat | 4.2 g | 6% |
| Saturated Fat | 0.9 g | 4% |
| Cholesterol | 5.1 mg | 1% |
| Sodium | 69.7 mg | 2% |
| Total Carbohydrate | 34.2 g | 11% |
| Dietary Fiber | 3.1 g | 12% |
| Sugars | 24.9 g | N/A |
| Protein | 1.2 g | 2% |
Variations & Substitutions
- Gluten-Free: Use gluten-free oats and vanilla wafers to make this recipe gluten-free.
- Dairy-Free: Substitute the margarine with coconut oil or a dairy-free butter alternative.
- Different Fruits: Experiment with other fruits like pears, peaches, or berries. You can even create a mixed fruit crisp.
- Nutty Topping: Add chopped nuts like pecans or walnuts to the oat mixture for extra crunch and flavor.
- Spice Variations: Add a pinch of nutmeg, cloves, or ginger to the apple mixture for a warmer, more complex flavor.
- Maple Syrup: Substitute the brown sugar with maple syrup for a more natural sweetness.
- Citrus Zest: Adding lemon or orange zest to the apple mixture adds brightness.
FAQs (Frequently Asked Questions)
Q: Can I use a different type of apple?
A: Absolutely! While Granny Smith apples provide a nice tartness, you can use other varieties like Honeycrisp, Fuji, or Gala. Just be mindful of their sweetness level and adjust the amount of sugar accordingly.
Q: Can I make this apple crisp ahead of time?
A: Yes, you can assemble the crisp ahead of time and store it in the refrigerator for up to 24 hours before baking. This is a great way to save time when preparing for a gathering.
Q: My topping is browning too quickly. What should I do?
A: If the topping is browning too quickly, loosely cover the baking dish with aluminum foil during the last 10-15 minutes of baking.
Q: Can I freeze apple crisp?
A: Yes, you can freeze apple crisp before or after baking. Wrap it tightly in plastic wrap and then in foil, or store it in an airtight container. Thaw completely before reheating.
Q: How do I know when the apple crisp is done?
A: The apple crisp is done when the apples are tender and the topping is golden brown. You can test the tenderness of the apples by inserting a fork into the center; it should slide in easily.
Final Thoughts
This Nilla Apple Crisp is more than just a dessert; it’s a comforting hug in a baking dish. The combination of tart apples, sweet cinnamon, and the unique crunch of Nilla wafers creates a symphony of flavors and textures that will delight your senses. Whether you’re sharing it with loved ones or savoring a quiet moment alone, I encourage you to try this recipe and create your own cherished memories. Feel free to experiment with variations and make it your own. And please, share your feedback – I’d love to hear how it turns out! Pair it with a warm cup of coffee or a scoop of vanilla ice cream for the perfect ending to any meal.