
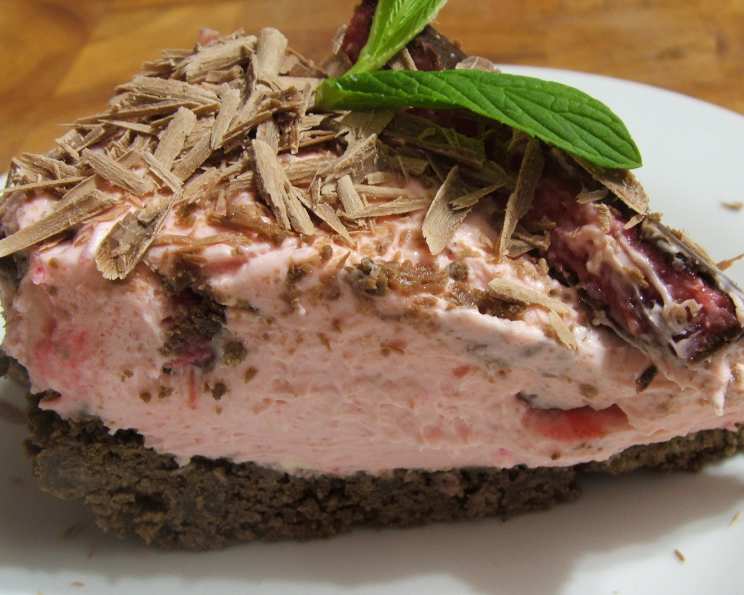
No-Bake Cherry Ripe Cheesecake: A Slice of Nostalgia
I remember summer holidays at my grandmother’s. The air, thick with the scent of frangipani, and the evenings were filled with cicada song and the promise of a sweet treat after dinner. One dessert that always made an appearance was a simple jelly slice, often adorned with diced Cherry Ripe bars. This no-bake cheesecake is my grown-up homage to those carefree days, a sophisticated twist on a childhood favorite, capturing that same joyful combination of chocolate, cherry, and creamy indulgence.
Recipe Overview
- Prep Time: 20 minutes
- Chill Time: 2 hours (or overnight for best results)
- Total Time: 2 hours 20 minutes
- Servings: 6-8
- Yield: 1 cheesecake
- Dietary Type: Not specified
Ingredients
- 250g chocolate biscuits
- 125g butter, melted
- 85g raspberry jelly crystals
- 1/3 cup boiling water
- 500g cream cheese
- 2 cups thickened cream
- 170g Cherry Ripe candy bars, diced
Equipment Needed
- Food processor
- 22cm springform pan
- Electric beater (or stand mixer)
- Cling wrap
Instructions
- Prepare the Crust: Begin by crushing the chocolate biscuits. The easiest way to achieve this is by using a food processor. Pulse until the biscuits are reduced to fine crumbs, resembling sand.
- Bind the Crust: Pour the melted butter into the food processor with the biscuit crumbs. Blend until the mixture is thoroughly combined and the crumbs are evenly moistened. This will form the base of your cheesecake.
- Press the Crust: Lightly grease a 22cm springform pan. You can line the base with baking paper for easier removal of the cheesecake later. Press the biscuit mixture firmly and evenly into the base of the prepared pan. Use the back of a spoon or a measuring cup to ensure a compact and smooth surface.
- Dissolve the Jelly: In a heatproof bowl, dissolve the raspberry jelly crystals in the boiling water. Stir well until all the crystals have completely dissolved and the mixture is clear. Set aside to cool slightly.
- Soften the Cream Cheese: In a large bowl, soften the cream cheese using an electric beater. Beat until the cream cheese is smooth and creamy, free from any lumps. This is crucial for a smooth cheesecake filling.
- Incorporate the Jelly: Gradually add the cooled (but not set!) raspberry jelly mixture to the softened cream cheese. Continue to beat with the electric beater until the jelly is fully incorporated and the mixture is smooth and homogenous.
- Whip the Cream: In a separate bowl, whip the thickened cream until soft peaks form. Be careful not to overwhip, as this can cause the cream to curdle.
- Combine the Filling: Gently fold the whipped cream into the cream cheese and jelly mixture. Be patient and use a light hand to avoid deflating the cream. The mixture should be light and airy.
- Add the Cherry Ripe: Gently fold in the diced Cherry Ripe candy bars. Distribute them evenly throughout the filling, ensuring every slice gets a generous portion of chocolatey, cherry goodness.
- Pour and Chill: Pour the cheesecake filling over the prepared biscuit crust in the springform pan. Smooth the top with a spatula to create an even surface. Cover the pan tightly with cling wrap, ensuring the cling wrap touches the surface of the cheesecake filling to prevent a skin from forming.
- Chill to Set: Place the cheesecake in the refrigerator and chill for at least 2 hours, or preferably overnight. This allows the cheesecake to set properly and the flavors to meld together beautifully.
Expert Tips & Tricks
- For an extra chocolatey crust, use chocolate-flavored biscuits or add a tablespoon of cocoa powder to the biscuit crumb mixture.
- Ensure the cream cheese is at room temperature before beating, as this will help it to soften more easily and prevent lumps from forming.
- Don’t let the jelly cool down too much – if it starts to set it will be difficult to combine with the cream cheese.
- If you’re short on time, you can speed up the chilling process by placing the cheesecake in the freezer for about an hour, but be careful not to freeze it completely.
- To easily slice the cheesecake, run a hot knife under hot water and dry it before each slice. This will create clean, even cuts.
Serving & Storage Suggestions
To serve, carefully remove the cheesecake from the springform pan. You can garnish it with extra diced Cherry Ripe pieces, shaved chocolate, or a dusting of cocoa powder for an elegant presentation. A dollop of whipped cream or a scoop of vanilla ice cream also complements the flavors beautifully.
Leftover cheesecake should be stored in an airtight container in the refrigerator. It will keep well for up to 3 days. While you could freeze this cheesecake, the texture of the cream cheese may change slightly upon thawing. If you do freeze it, wrap it tightly in plastic wrap and then foil, and thaw it in the refrigerator overnight.
Nutritional Information
Please note that the following nutritional information is an estimate and may vary based on specific ingredients used.
| Nutrient | Amount per Serving | % Daily Value |
|---|---|---|
| Calories | 650 kcal | 33% |
| Total Fat | 45g | 69% |
| Saturated Fat | 30g | 150% |
| Cholesterol | 150mg | 50% |
| Sodium | 300mg | 13% |
| Total Carbohydrate | 50g | 17% |
| Dietary Fiber | 2g | 8% |
| Sugars | 35g | N/A |
| Protein | 8g | 16% |
Variations & Substitutions
- Gluten-Free: Use gluten-free chocolate biscuits for the crust.
- Vegan: This recipe would need significant alterations to become vegan. You would need to substitute the butter for a vegan butter alternative, the cream cheese for a vegan cream cheese alternative, and the thickened cream for a vegan whipping cream alternative. Finding a suitable vegan alternative for the Cherry Ripe candy bars may prove challenging.
- Other Candy Bars: While this recipe is specifically for Cherry Ripe, you could experiment with other chocolate bars like Mars Bars, Snickers, or even Peppermint Crisp. Adjust the amount of candy bar to your liking.
- Fruit Variation: Add a layer of fresh or canned cherries to the top of the crust before pouring in the filling for an extra burst of cherry flavor.
FAQs (Frequently Asked Questions)
Q: Can I use a different size springform pan?
A: A 22cm springform pan is ideal, but you can use a slightly larger or smaller pan. Keep in mind that a larger pan will result in a thinner cheesecake, while a smaller pan will result in a thicker cheesecake.
Q: Do I have to use raspberry jelly crystals?
A: Raspberry jelly enhances the cherry ripe flavour but if you dislike it you can try another berry flavour, or even leave it out completely. If you omit the jelly, be sure to add a little extra thickened cream to the mixture.
Q: Can I make this cheesecake ahead of time?
A: Absolutely! In fact, this cheesecake is best made a day in advance to allow the flavors to fully develop. Just make sure to store it covered in the refrigerator.
Q: My crust is crumbling. What did I do wrong?
A: The crust may be too dry if it’s crumbling. Ensure you use enough melted butter to properly bind the biscuit crumbs together. You can add a little more melted butter if necessary.
Q: How do I prevent a skin from forming on the top of the cheesecake while it’s chilling?
A: To prevent a skin from forming, press cling wrap directly onto the surface of the cheesecake filling before chilling. This will create an airtight seal and prevent moisture from evaporating.
Final Thoughts
This No-Bake Cherry Ripe Cheesecake is a delightful and easy-to-make dessert that is sure to impress. With its creamy texture, rich chocolate flavor, and bursts of cherry goodness, it’s the perfect treat for any occasion. Whether you’re looking for a simple dessert to whip up on a hot summer day or a show-stopping centerpiece for a special gathering, this cheesecake is guaranteed to be a hit. So go ahead, indulge in a slice of nostalgia and share the joy with your loved ones. And please, let me know how it turns out! Perhaps you’ll find yourself transported back to your own sweet childhood memories with every delicious bite.