
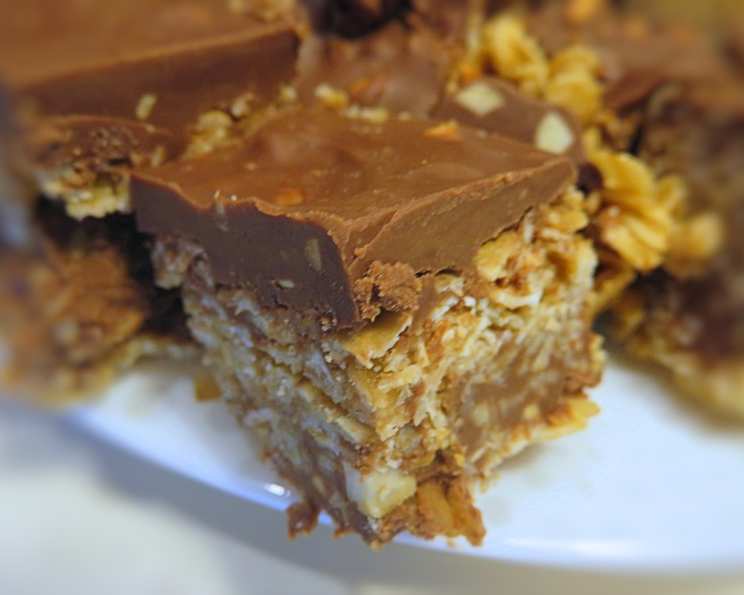
No-Bake Chocolate Oat Bars: The Sweet Treat That Practically Makes Itself
I remember being utterly captivated by the aroma that filled my grandmother’s kitchen whenever she made her famous oat bars. It wasn’t just the sweetness, but a comforting blend of toasted oats, warm butter, and the promise of chocolate. The best part was that it was a treat that she would often make with me, the simple stirring and melting a special type of magic. These no-bake chocolate oat bars are a testament to the simplicity and satisfaction of creating something delicious with minimal effort. This recipe captures that same feeling of warmth and deliciousness, without ever turning on the oven.
Recipe Overview
- Prep Time: 15 minutes
- Cook Time: 5 minutes
- Total Time: 4 hours 20 minutes
- Servings: 16
- Yields: 16 bars
- Dietary Type: Vegetarian
Ingredients
- 1 cup butter
- ½ cup brown sugar, packed
- 1 teaspoon pure vanilla extract
- 3 cups rolled oats
- ½ teaspoon ground cinnamon
- ¼ teaspoon kosher salt
- 1 cup dark chocolate chips
- ¾ cup chunky peanut butter
Equipment Needed
- 8-inch-by-8-inch baking dish
- Parchment paper
- Medium saucepan
- Small microwave-safe bowl
Instructions
- Line an 8-inch-by-8-inch baking dish with parchment paper, ensuring it overhangs the sides for easy removal, and set aside. This prevents sticking and makes clean-up a breeze.
- In a medium saucepan, combine the butter, brown sugar and vanilla extract. Use medium heat until the butter has melted and the sugar has dissolved. Stir continuously to prevent burning, and to ensure that the sugar dissolves evenly. The mixture should be smooth and consistent.
- Add the rolled oats, cinnamon and kosher salt to the saucepan. Cook, stirring constantly, for 4 to 5 minutes. This step is crucial as it lightly toasts the oats, bringing out their nutty flavor and adding depth to the bars. The mixture should be fragrant and slightly browned.
- Pour half of the oat mixture into the prepared baking dish. Spread out the mixture evenly, pressing down firmly to create a compact base. Use the back of a spoon or a spatula to ensure a consistent layer.
- In a small microwave-safe bowl, combine the dark chocolate chips and the chunky peanut butter. Heat on high in the microwave, in increments of 40 seconds, stirring in between each increment, until melted and fully combined. Be patient and stir well after each interval to prevent the chocolate from seizing. The mixture should be smooth and glossy.
- Pour ⅘ of the chocolate mixture into the pan over the pressed oats, reserving about ¼ cup for drizzling. Spread it evenly over the oat base.
- Top with the remaining oats and gently press them into the chocolate layer.
- Drizzle with the remaining ¼ cup chocolate mixture. Create a decorative pattern or simply spread it randomly for a rustic look.
- Refrigerate for 4 hours, or until set. The longer they chill, the firmer they will become and the easier they will be to cut.
Expert Tips & Tricks
- Use high-quality ingredients: The better the chocolate and peanut butter, the richer the flavor of the bars. Splurge on your favorites!
- Toast the oats beforehand: For an even deeper, nuttier flavor, toast the rolled oats in a dry skillet over medium heat for 5-7 minutes, stirring frequently, before adding them to the butter mixture. Let cool slightly before incorporating.
- Don’t overcook the butter mixture: Overheating can make the bars too hard. Keep the heat low and stir frequently to ensure even melting without scorching.
- Press firmly: Pressing the oat base firmly is crucial for holding the bars together. Use the bottom of a measuring cup or a flat spatula to get a nice, even layer.
- Adjust sweetness: If you prefer less sweetness, reduce the amount of brown sugar slightly. You can also use unsweetened chocolate chips.
- Add a pinch of sea salt: A sprinkle of flaky sea salt on top of the finished bars enhances the sweetness and creates a delightful contrast.
- For a smoother chocolate layer: If you prefer a less chunky texture, use creamy peanut butter instead of chunky.
Serving & Storage Suggestions
To serve, remove the bars from the refrigerator and lift them out of the baking dish using the parchment paper overhang. Cut into squares of your desired size. These bars are best served chilled or at room temperature. They make a delightful snack, dessert, or addition to a lunchbox.
Store leftover bars in an airtight container in the refrigerator for up to a week. They can also be frozen for up to 2 months. To freeze, wrap the bars individually in plastic wrap and then place them in a freezer-safe bag or container. Thaw in the refrigerator before serving.
Nutritional Information
| Nutrient | Amount per Serving | % Daily Value |
|---|---|---|
| Calories | 308 kcal | N/A |
| Calories from Fat | 195 g | 63% |
| Total Fat | 21.7 g | 33% |
| Saturated Fat | 10.3 g | 51% |
| Cholesterol | 30.5 mg | 10% |
| Sodium | 200.4 mg | 8% |
| Total Carbohydrate | 26.4 g | 8% |
| Dietary Fiber | 3.2 g | 12% |
| Sugars | 13.6 g | 54% |
| Protein | 5.5 g | 10% |
Variations & Substitutions
- Gluten-Free: Ensure you use certified gluten-free rolled oats to make this recipe gluten-free.
- Nut-Free: Substitute the peanut butter with sunflower seed butter (sunbutter) for a nut-free version.
- Vegan: Replace the butter with a vegan butter alternative and ensure the chocolate chips are dairy-free.
- Spice it up: Add a pinch of cayenne pepper to the chocolate mixture for a subtle kick.
- Add-ins: Get creative with add-ins! Consider chopped nuts, dried cranberries, shredded coconut, or mini marshmallows.
- Different Chocolate: Experiment with milk chocolate, white chocolate, or even a combination of different chocolates.
- Seasonal Flavors: Add pumpkin spice in the fall or peppermint extract during the holidays for festive variations.
FAQs (Frequently Asked Questions)
Q: Why are my oat bars crumbly?
A: This could be due to not pressing the oat base firmly enough. Make sure to really pack it down to create a solid foundation. Also, ensure the butter mixture isn’t overcooked, as this can lead to dryness.
Q: Can I use quick oats instead of rolled oats?
A: While you can, rolled oats are recommended for their texture. Quick oats will result in a softer, less chewy bar.
Q: How do I prevent the chocolate from seizing when melting?
A: Use short bursts in the microwave, stirring well between each interval. Adding a small amount of vegetable oil to the chocolate can also help prevent seizing.
Q: Can I make these bars ahead of time?
A: Absolutely! These bars are perfect for making ahead of time. Store them in the refrigerator for up to a week, or freeze them for longer storage.
Q: My bars are too hard to cut. What can I do?
A: Let them sit at room temperature for about 15-20 minutes before cutting. Using a sharp knife and wiping it clean between each cut can also help.
Final Thoughts
These no-bake chocolate oat bars are a simple yet satisfying treat that’s perfect for any occasion. Whether you’re looking for a quick and easy snack, a crowd-pleasing dessert, or a nostalgic reminder of childhood memories, this recipe is sure to deliver. So gather your ingredients, put on some music, and enjoy the process of creating something delicious. Don’t be afraid to experiment with variations and make it your own! I encourage you to try these bars and let me know what you think. I hope you’ll discover the joy of creating this comforting and delicious treat!