
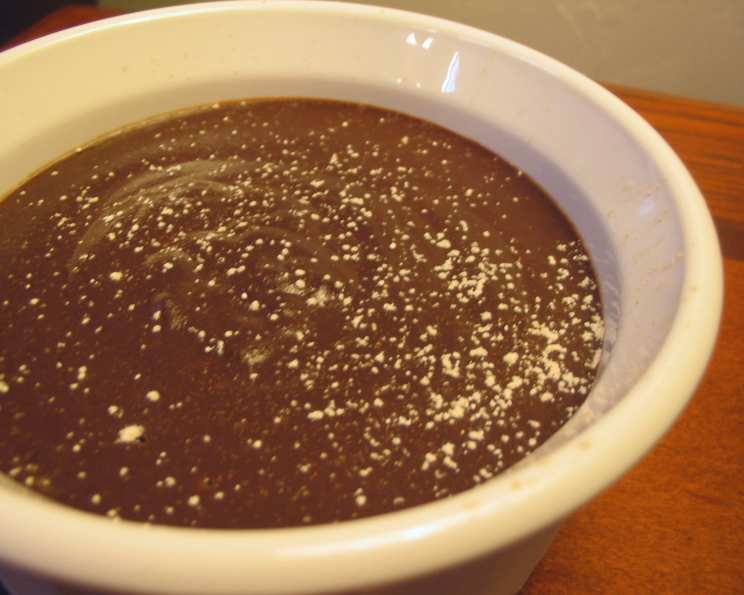
No-Bake Chocolate Pôts De Crème: A Decadent Delight
I remember the first time I made pots de crème. It was years ago, during a particularly sweltering summer in Paris, and the thought of turning on the oven was simply unbearable. I craved something rich, chocolatey, and utterly decadent, but without the fuss of traditional baking. These No-Bake Chocolate Pôts de Crème were the answer. The velvety smooth texture, the intense chocolate flavor, and the sheer ease of preparation instantly made them a favorite. Now, whenever I need a quick yet impressive dessert, these little pots of heaven are my go-to.
Recipe Overview
- Prep Time: 15 minutes
- Cook Time: 10 minutes
- Total Time: 25 minutes (plus 4 hours chilling)
- Servings: 6
- Yield: 6 ramekins
- Dietary Type: Not Gluten-Free (naturally), Not Vegan, Not Dairy-Free
Ingredients
- 6 ounces bittersweet chocolate, chopped fine
- 7 large egg yolks
- 1/3 cup sugar
- 1/8 teaspoon salt
- 1 1/2 cups heavy cream
- 1/2 cup whole milk
- 1 teaspoon vanilla extract
Equipment Needed
- Large bowl
- Whisk
- Medium saucepan
- Fine-mesh strainer
- Instant-read thermometer
- Six 6-ounce ramekins
- Plastic wrap
Instructions
- Begin by preparing the chocolate. Place the finely chopped bittersweet chocolate in a large bowl and set it aside. This will allow the chocolate to be ready when the hot cream mixture is poured over it. Chopping the chocolate finely ensures it melts evenly and quickly.
- In a separate bowl, whisk together the egg yolks, sugar, and salt until the mixture is smooth and slightly pale. Whisking is crucial to incorporate air and create a lighter texture. This step is essential to create the creamy texture.
- In a medium saucepan, combine the heavy cream and whole milk. Bring the mixture to a simmer over medium heat, stirring occasionally to prevent scorching. You’ll see small bubbles forming around the edges of the pan, but avoid letting it boil vigorously.
- Remove the saucepan from the heat. This is an important step to prevent the egg yolks from cooking too quickly and curdling. Slowly whisk about 1 cup of the hot cream mixture into the egg yolks. This process is called tempering. Tempering gradually raises the temperature of the egg yolks, preventing them from scrambling when added to the hot cream.
- Slowly whisk the tempered yolk mixture back into the remaining cream mixture in the saucepan. Ensure you whisk constantly to prevent any lumps from forming.
- Return the saucepan to low heat and cook, whisking constantly, until the mixture thickens slightly. It should be just enough to coat the back of a spoon with a thin film. Use an instant-read thermometer to monitor the temperature. The mixture should register between 175°F and 180°F (79°C and 82°C). This process usually takes about 7 to 9 minutes. Be patient and continue whisking to achieve the desired consistency. If the mixture boils, it will curdle.
- Strain the hot cream mixture through a fine-mesh strainer into the bowl with the chopped chocolate. This step removes any cooked egg particles and ensures a perfectly smooth final product.
- Let the mixture stand, undisturbed, for 2 minutes. This allows the heat from the cream to melt the chocolate.
- Slowly whisk the mixture until the chocolate is thoroughly combined and the mixture is smooth and glossy. If there are still unmelted pieces of chocolate, you can place the bowl over a double boiler or in the microwave for very short intervals, stirring in between, until the chocolate is completely melted.
- Stir in the vanilla extract. The vanilla enhances the chocolate flavor and adds a subtle layer of complexity.
- Divide the chocolate mixture evenly among six 6-ounce ramekins.
- Cover each ramekin tightly with plastic wrap, pressing it directly onto the surface of the pôts de crème. This prevents a skin from forming during chilling.
- Refrigerate the pôts de crème until firm, at least 4 hours, or preferably overnight. This chilling period allows the flavors to meld and the texture to set properly.
Expert Tips & Tricks
- Quality Matters: Use high-quality bittersweet chocolate for the best flavor. The better the chocolate, the more intense and satisfying the final product will be.
- Tempering is Key: Tempering the egg yolks slowly is crucial to prevent them from scrambling. This ensures a smooth and creamy texture.
- Strain for Smoothness: Don’t skip the straining step! It removes any small bits of cooked egg and guarantees a silky-smooth pots de crème.
- Adjust Sweetness: If you prefer a less sweet dessert, reduce the amount of sugar slightly. If you want a sweeter dessert, use milk chocolate rather than bittersweet.
- Make Ahead: These pots de crème can be made up to 2 days in advance. Just keep them tightly covered in the refrigerator.
Serving & Storage Suggestions
Serve the No-Bake Chocolate Pôts de Crème chilled, straight from the refrigerator. For an extra touch of elegance, garnish with fresh raspberries, a dollop of whipped cream, or a sprinkle of cocoa powder. A drizzle of raspberry sauce complements the rich chocolate flavor beautifully.
Leftover pots de crème can be stored in the refrigerator, tightly covered, for up to 3 days. Due to the delicate nature of the custard, they are not suitable for freezing.
Nutritional Information
| Nutrient | Amount per Serving | % Daily Value |
|---|---|---|
| Calories | 326 kcal | 16% |
| Total Fat | 28g | 43% |
| Saturated Fat | 16g | 80% |
| Cholesterol | 328mg | 109% |
| Sodium | 89mg | 4% |
| Total Carbohydrate | 15g | 5% |
| Dietary Fiber | 0g | 0% |
| Sugars | 12g | N/A |
| Protein | 5g | 10% |
Note: Nutritional information is an estimate and may vary based on specific ingredients used.
Variations & Substitutions
- Dairy-Free Version: While this recipe relies heavily on dairy, you could experiment with full-fat coconut milk and dairy-free chocolate for a vegan version. Be aware that the texture and flavor will be different.
- Flavor Infusions: Infuse the cream with other flavors by adding a cinnamon stick, orange zest, or coffee beans while simmering. Remove the flavorings before straining the cream over the chocolate.
- Liqueur Boost: Add a tablespoon of your favorite liqueur, such as Kahlua, Frangelico, or Grand Marnier, to the chocolate mixture for an extra layer of flavor.
- Different Chocolate: Experiment with different types of chocolate, such as milk chocolate or dark chocolate, to adjust the intensity of the flavor.
FAQs (Frequently Asked Questions)
Q: Can I use chocolate chips instead of chopped chocolate?
A: Yes, you can substitute high-quality chocolate chips, such as Ghirardelli bittersweet chips, for the chopped chocolate. Ensure the chips are fully melted when the hot cream mixture is added.
Q: What happens if the mixture curdles while cooking?
A: If the mixture curdles, immediately remove it from the heat and whisk vigorously. You can also try straining it through a fine-mesh strainer to remove the curdled bits. While it might not be perfectly smooth, it will still be delicious.
Q: Can I make these without an instant-read thermometer?
A: While an instant-read thermometer is recommended for accuracy, you can also judge the doneness by observing the consistency. The mixture should be thick enough to coat the back of a spoon with a thin film.
Q: How long do these need to chill in the refrigerator?
A: The pots de crème need to chill for at least 4 hours, or preferably overnight, to allow them to set completely.
Q: Can I freeze these?
A: Freezing is not recommended, as it can alter the texture of the custard. The pots de crème are best enjoyed fresh or within a few days of making them.
Final Thoughts
These No-Bake Chocolate Pôts de Crème are a testament to the fact that incredible desserts don’t always require hours in the kitchen. With just a handful of ingredients and a few simple steps, you can create a truly decadent and unforgettable treat. So, go ahead, indulge your inner chocophile and experience the pure bliss of these velvety smooth, intensely chocolatey pots of perfection. Don’t hesitate to experiment with variations and make this recipe your own. Serve it with a glass of dessert wine or a strong cup of coffee for the ultimate indulgence. Enjoy!