
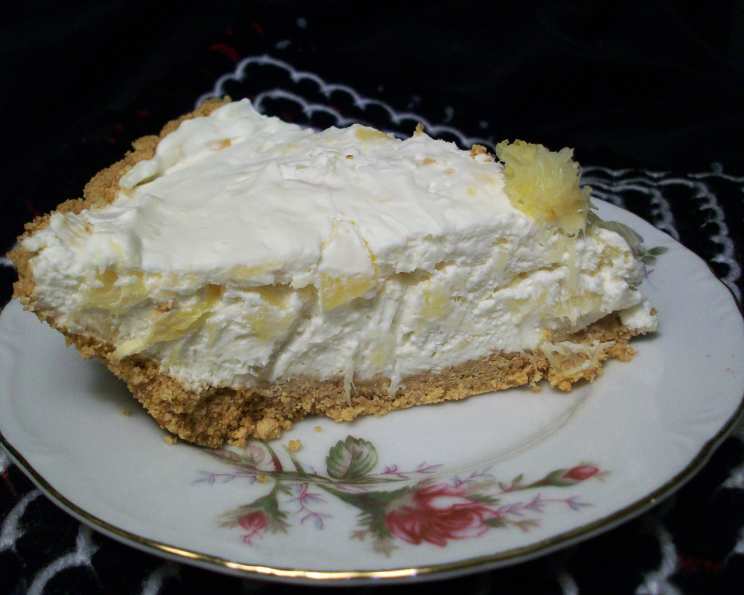
No-Bake Diabetic Pineapple Dream Cheesecake
There’s a certain magic to a simple dessert, especially when it brings back a rush of childhood memories. I remember summer afternoons spent at my grandmother’s, the air thick with the scent of sun-ripened pineapples. While she wasn’t diabetic herself, she always had a knack for making treats that everyone could enjoy. This no-bake pineapple cheesecake reminds me of those carefree days – a light, refreshing, and guilt-free indulgence that always brings a smile. It’s a taste of summer and love, all in one delicious bite.
Recipe Overview
- Prep Time: 15 minutes
- Cook Time: 3 hours (chill time)
- Total Time: 3 hours 15 minutes
- Servings: 8
- Yield: 1 pie
- Dietary Type: Diabetic-Friendly
Ingredients
- 2 cups graham cracker crumbs
- 1/3 cup butter, melted
- 8 ounces cream cheese
- 1 tablespoon artificial sweetener (liquid form)
- 2 tablespoons vanilla extract
- 2 tablespoons lemon juice
- 1 liter whipped Nutriwhip
- 1 (19 ounce) can crushed pineapple (well drained)
Equipment Needed
- 9-inch pie pan
- Mixing bowl
- Electric mixer or whisk
- Measuring cups and spoons
- Spatula
- Can opener
- Colander or fine-mesh sieve
Instructions
- Prepare the Crust: In a mixing bowl, combine the graham cracker crumbs and melted butter. Mix thoroughly until all the crumbs are moistened and the mixture resembles wet sand.
- Press into Pan: Press the crumb mixture firmly and evenly into the bottom of a 9-inch pie pan. You can use the bottom of a measuring cup to help create a smooth and even surface.
- Prepare the Filling: In a separate mixing bowl, cream together the cream cheese, artificial sweetener, vanilla extract, and lemon juice using an electric mixer or a whisk until smooth and creamy. Be sure to scrape down the sides of the bowl occasionally to ensure everything is well combined.
- Drain the Pineapple: Thoroughly drain the canned crushed pineapple. You want to remove as much liquid as possible to prevent the cheesecake from becoming soggy. Using a colander or pressing the pineapple through a fine-mesh sieve works well.
- Fold in Pineapple: Gently fold the drained crushed pineapple into the cream cheese mixture. Be careful not to overmix, as this can deflate the whipped topping.
- Fold in Nutriwhip: Gently fold in the Nutriwhip. Again, be gentle to prevent deflating the topping.
- Pour into Crust: Pour the pineapple cheesecake filling into the prepared graham cracker crust, spreading it evenly with a spatula.
- Chill: Cover the pie pan with plastic wrap and chill in the refrigerator for at least 3 hours, or preferably overnight, to allow the cheesecake to set completely.
Expert Tips & Tricks
- Crust Perfection: For a more intense graham cracker flavor, toast the graham cracker crumbs in a dry skillet over medium heat for a few minutes, stirring constantly, before mixing with the butter. Be careful not to burn them.
- Cream Cheese Temperature: Ensure your cream cheese is at room temperature for easy mixing and a smooth, lump-free filling.
- Pineapple Drainage: Thoroughly draining the pineapple is crucial for preventing a soggy cheesecake. Press the pineapple gently with a spoon to extract excess juice.
- Sweetness Adjustment: Adjust the amount of artificial sweetener to your personal preference. Taste the filling before adding it to the crust and add more sweetener if needed.
- Whipped Topping: If you can’t find Nutriwhip, use any other sugar-free whipped topping alternative. You can also make your own sugar-free whipped cream.
- Even Slices: For clean slices, run a thin knife under hot water and wipe it clean between each cut.
Serving & Storage Suggestions
Serve the No-Bake Diabetic Pineapple Cheesecake chilled, straight from the refrigerator. Garnish with a few extra pieces of crushed pineapple or a sprinkle of graham cracker crumbs for an elegant presentation. You can also add a sugar-free chocolate drizzle.
Leftovers can be stored in the refrigerator, covered tightly with plastic wrap, for up to 3 days. While it’s best enjoyed fresh, you can also freeze individual slices for longer storage. To freeze, wrap each slice tightly in plastic wrap and then place them in a freezer-safe container. Thaw in the refrigerator before serving.
Nutritional Information
Please note that the following nutritional information is an estimate and may vary depending on the specific brands and ingredients used.
| Nutrient | Amount per Serving | % Daily Value |
|---|---|---|
| Calories | 304 kcal | 15% |
| Total Fat | 19.6 g | 30% |
| Saturated Fat | 10.7 g | 53% |
| Cholesterol | 51.6 mg | 17% |
| Sodium | 259.8 mg | 10% |
| Total Carbohydrate | 28.5 g | 9% |
| Dietary Fiber | 1.1 g | 4% |
| Sugars | 17.7 g | 70% |
| Protein | 3.5 g | 7% |
Variations & Substitutions
- Gluten-Free Crust: Substitute the graham cracker crumbs with gluten-free graham cracker crumbs or a mixture of almond flour and gluten-free oats.
- Dairy-Free Version: Use a dairy-free cream cheese alternative and a coconut-based whipped topping.
- Different Fruit: Substitute the pineapple with other fruits like strawberries, blueberries, or peaches. Adjust sweetness as needed.
- Spice It Up: Add a pinch of cinnamon or nutmeg to the graham cracker crust for a warm, comforting flavor.
- Citrus Zest: Add some lime zest for an extra zing and a refreshing flavor.
FAQs (Frequently Asked Questions)
Q: Can I use regular sugar instead of artificial sweetener?
A: While you can, this recipe is designed to be diabetic-friendly. Using regular sugar will significantly increase the sugar content and may not be suitable for those managing diabetes.
Q: What if I don’t have Nutriwhip?
A: Any sugar-free whipped topping alternative will work. You can also make your own sugar-free whipped cream using heavy cream and a sugar substitute.
Q: Can I use a different size pie pan?
A: A 9-inch pie pan is ideal, but you can use an 8-inch pan. The filling will be slightly thicker, so you may need to chill it for a longer period.
Q: How do I prevent the crust from becoming soggy?
A: Make sure the pineapple is thoroughly drained. Also, chilling the crust before adding the filling can help prevent it from absorbing excess moisture.
Q: Can I freeze the entire cheesecake?
A: Yes, you can freeze the entire cheesecake. Wrap it tightly in plastic wrap and then in foil to prevent freezer burn. Thaw in the refrigerator overnight before serving.
Final Thoughts
This No-Bake Diabetic Pineapple Cheesecake is more than just a dessert; it’s a reminder that everyone deserves a little indulgence, regardless of dietary restrictions. The refreshing pineapple combined with the creamy cheesecake filling and the buttery graham cracker crust creates a symphony of flavors and textures that will tantalize your taste buds. Don’t be afraid to experiment with different fruits and flavors to create your own unique twist. I encourage you to try this recipe and share the joy with your loved ones. And please, let me know what you think! Happy baking (or rather, no-baking)!