
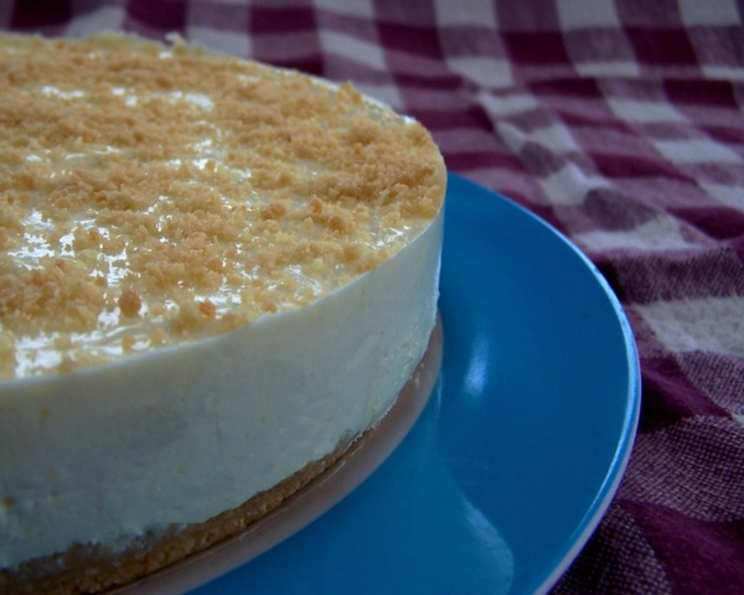
No-Bake Lemon Cheesecake: A Zesty Slice of Sunshine
There’s something magical about the way a lemon dessert can brighten even the gloomiest of days. I remember my grandmother, a woman whose kitchen always smelled of citrus and love, used to whip up a lemon delight whenever I felt under the weather. It wasn’t just the tangy sweetness that comforted me, but the feeling of her warm hands carefully folding ingredients, a simple act that somehow made everything feel better. This no-bake lemon cheesecake carries that same comforting nostalgia, a taste of sunshine and simple joys in every bite.
Recipe Overview
- Prep Time: 45 minutes
- Cook Time: 30 minutes (for crust)
- Total Time: 4 hours 45 minutes
- Servings: 10
- Yield: 1 pie
- Dietary Type: Not specified, but can be adapted to gluten-free
Ingredients
-
For the Crust:
- 250 g biscuits (such as Graham Crackers, Digestive Biscuits, or similar)
- 125 g butter, melted
-
For the Filling:
- 250 g cream cheese (Philadelphia recommended, at room temperature)
- 400 g condensed milk
- 2 teaspoons lemon rind, grated (optional)
- 80 ml lemon juice (approximately 1/3 cup)
- 1 teaspoon gelatin powder
- 1 tablespoon water
- 1/2 teaspoon nutmeg, grated (optional)
Equipment Needed
- 25 cm (10 inch) deep pie plate
- Aluminum foil
- Food processor (optional, for crushing biscuits)
- Mixing bowl
- Electric mixer or whisk
- Measuring cups and spoons
- Refrigerator
Instructions
- Prepare the Pie Plate: Line a 25cm (10 inch) deep pie plate with aluminum foil, ensuring the foil overlaps around the edges. This will make it easier to remove the cheesecake later.
- Crush the Biscuits: Crush the biscuits into fine crumbs. A food processor works exceptionally well for this, but you can also use a rolling pin and a zip-top bag.
- Combine Crust Ingredients: In a medium bowl, mix the crushed biscuit crumbs with the melted butter. Stir until the crumbs are evenly moistened and the mixture resembles wet sand.
- Reserve Crumbs (Optional): If desired, reserve about 2 tablespoons of the crumb mixture for decoration later. Alternatively, you can use the grated nutmeg for decoration.
- Press Crust into Pie Plate: Press the remaining crumb mixture firmly and evenly into the bottom and up the sides of the prepared pie plate. Use the back of a spoon or your fingers to create a smooth, compact crust.
- Chill the Crust: Place the pie plate with the crust in the refrigerator and chill for at least 30 minutes. This will help the crust to set and become firm.
- Prepare the Filling: In a large mixing bowl, combine the room temperature cream cheese, condensed milk, lemon juice, and grated lemon rind (if using).
- Mix the Filling: Using an electric mixer or a whisk, thoroughly mix the ingredients until they are well blended and smooth. This should take about 5 minutes. Ensure there are no lumps of cream cheese remaining.
- Dissolve the Gelatin: In a small bowl, combine the gelatin powder and water. Stir well until the gelatin is completely dissolved. This is essential for ensuring the cheesecake sets properly.
- Add Gelatin to Filling: Add the dissolved gelatin mixture to the cream cheese mixture. Mix well to combine.
- Pour into Crust: Pour the cream cheese filling into the prepared and chilled biscuit crust. Spread the filling evenly with a spatula.
- Decorate (Optional): Decorate the top of the cheesecake with the reserved biscuit crumbs or grated nutmeg.
- Chill to Set: Cover the pie plate with plastic wrap and chill in the refrigerator for at least 4 hours, or preferably overnight, to allow the cheesecake to fully set.
- Remove from Pie Plate: To remove the cheesecake from the pie plate, gently lift it out using the overhanging edges of the aluminum foil. Transfer the cheesecake to a serving plate.
Expert Tips & Tricks
- Room Temperature Cream Cheese: Ensure your cream cheese is at room temperature for the smoothest filling. Cold cream cheese will result in a lumpy mixture.
- Crust Perfection: For an extra-firm crust, you can bake it in a preheated oven at 180°C (350°F) for 8-10 minutes before chilling. However, this is optional and not required.
- Lemon Zest Power: Don’t be afraid to add more lemon zest if you want a more intense lemon flavor. Just be sure to zest the lemon before juicing it!
- Gelatin Alternatives: If you prefer not to use gelatin, you can try agar-agar, a vegetarian alternative. Follow the instructions on the agar-agar package for proper substitution.
- Avoiding a Soggy Crust: Ensure the biscuit crumbs are finely crushed and pressed firmly into the pie plate to create a barrier against the moist filling.
Serving & Storage Suggestions
Serve the no-bake lemon cheesecake chilled, straight from the refrigerator. It’s delicious on its own, but you can also enhance it with fresh berries, a dollop of whipped cream, or a drizzle of lemon curd.
Store any leftover cheesecake in the refrigerator, covered tightly with plastic wrap, for up to 3-4 days. You can also freeze individual slices for longer storage. Wrap each slice tightly in plastic wrap and then place them in a freezer-safe container. Frozen cheesecake slices can be stored for up to 2 months. Thaw in the refrigerator overnight before serving.
Nutritional Information
(Estimated values – will vary based on specific ingredients)
| Nutrient | Amount per Serving | % Daily Value |
|---|---|---|
| Calories | 394 kcal | 20% |
| Total Fat | 26 g | 33% |
| Saturated Fat | 15 g | 75% |
| Cholesterol | 69 mg | 23% |
| Sodium | 366 mg | 15% |
| Total Carbohydrate | 35 g | 12% |
| Dietary Fiber | 0 g | 0% |
| Sugars | 23 g | N/A |
| Protein | 7 g | 14% |
Variations & Substitutions
- Gluten-Free: Use gluten-free biscuits for the crust to make this recipe gluten-free.
- Chocolate Lemon: Add a layer of melted dark chocolate to the bottom of the crust before adding the filling for a delightful chocolate-lemon combination.
- Berry Swirl: Swirl in a berry compote or jam into the filling before chilling for a burst of fruity flavor.
- Lime Cheesecake: Substitute lime juice and lime zest for the lemon for a refreshing twist.
- Vegan Cheesecake: Substitute vegan cream cheese and condensed milk alternatives. For the crust, ensure your biscuits and butter alternative are also vegan. Agar-agar can be used in place of gelatin.
FAQs (Frequently Asked Questions)
Q: Can I use a different type of biscuit for the crust?
A: Absolutely! Graham crackers, Digestive Biscuits, or any similar dry biscuit will work well. Just ensure they are crushed into fine crumbs.
Q: My cheesecake isn’t setting properly. What did I do wrong?
A: The most common reason is not enough chilling time or not dissolving the gelatin completely. Ensure you chill the cheesecake for at least 4 hours and that the gelatin is fully dissolved in water before adding it to the filling.
Q: Can I freeze the entire cheesecake?
A: Yes, you can freeze the entire cheesecake. Wrap it tightly in plastic wrap and then in foil. Thaw in the refrigerator overnight before serving.
Q: Can I reduce the amount of sugar in this recipe?
A: Since condensed milk is a key ingredient, reducing it significantly will affect the texture and sweetness. You might try using a “light” version of condensed milk, but the results may vary.
Q: Can I make this recipe without gelatin?
A: Yes, you can use agar-agar powder as a vegetarian substitute. Follow the instructions on the agar-agar package for proper substitution ratios.
Final Thoughts
This no-bake lemon cheesecake is more than just a dessert; it’s a little piece of sunshine on a plate. Whether you’re looking for a simple treat to brighten your day or a show-stopping dessert to impress your guests, this recipe is sure to deliver. So, gather your ingredients, put on some cheerful music, and let the zesty aroma of lemon fill your kitchen. Don’t hesitate to experiment with variations and make it your own. And most importantly, share it with someone you love. I’d love to hear about your experiences and any creative twists you add!