
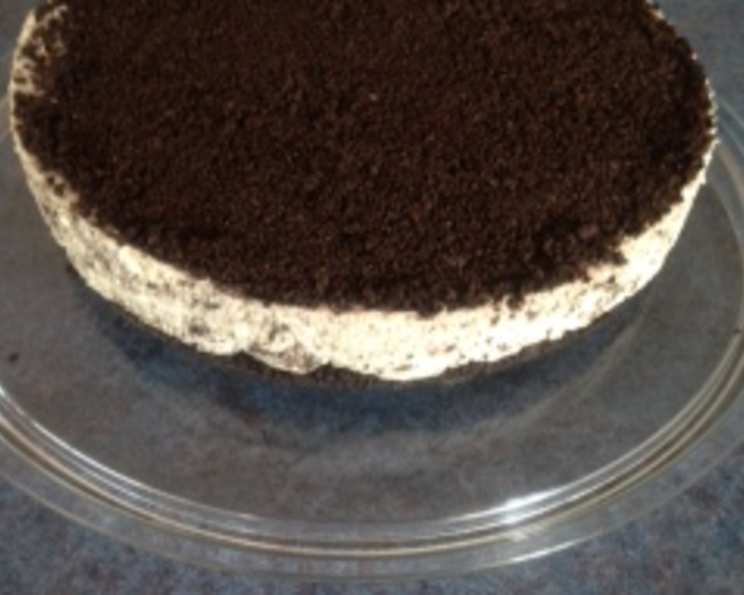
Decadent No-Bake Oreo Cheesecake: A Dreamy Dessert
My earliest memory of cheesecake isn’t some fancy, baked New York-style creation. It’s this very no-bake Oreo cheesecake, crafted by my aunt for every family gathering. The sight of that Oreo-studded surface always sparked instant joy, and the first bite—cool, creamy, and bursting with Oreo goodness—was pure bliss. It was the ultimate crowd-pleaser, disappearing within minutes. This recipe remains a nostalgic favorite, a guaranteed hit whenever I need a quick, impressive, and utterly irresistible dessert.
Recipe Overview
- Prep Time: 30 minutes
- Cook Time: 0 minutes
- Total Time: 5 hours 30 minutes (includes chilling time)
- Servings: 12
- Yields: 1 cake
- Dietary Type: Vegetarian (check Oreo ingredients for vegan compliance)
Ingredients
For the Crust:
- 2 cups Oreo cookie crumbs (from about 20 Oreos)
- 1/4 cup butter, melted
For the Filling:
- 24 ounces cream cheese, room temperature
- 1/2 cup icing sugar
- 1 teaspoon vanilla
- 8 ounces Cool Whip (or 1 1/4 cups homemade whipped heavy cream with 1/2 cup icing sugar)
- 1 1/2 cups Oreo cookie crumbs (from about 16 Oreos)
- 7-10 Oreo cookies, chopped
- 5-7 Oreo cookies, processed into crumbs (optional, for topping)
Equipment Needed
- 9-inch springform pan
- Large mixing bowl
- Electric mixer
- Rubber spatula
- Food processor (optional, for crushing Oreos)
Instructions
- Prepare the Crust: In a medium bowl, combine the Oreo cookie crumbs and the melted butter. Ensure the crumbs are evenly coated with butter. This step is crucial for a sturdy crust that won’t crumble when slicing.
- Press the Crust: Press the crumb mixture firmly into the bottom and halfway up the sides of a 9-inch springform pan. Use the bottom of a measuring cup or your fingers to create a compact and even layer. This will form the foundation of your cheesecake, so take your time to get it right. Refrigerate the crust to firm up while you prepare the filling. This prevents the filling from seeping into the crust and making it soggy.
- Make the Filling: In a large bowl, beat the cream cheese, icing sugar, and vanilla together with an electric mixer until smooth and well combined. It’s essential to use room-temperature cream cheese to avoid lumps in your filling. Beat the mixture on medium speed until light and fluffy, usually about 2-3 minutes.
- Fold in the Cool Whip: Gently fold in the Cool Whip (or homemade whipped cream) into the cream cheese mixture using a rubber spatula. Be careful not to overmix, as this can deflate the whipped cream and result in a denser cheesecake. The goal is to incorporate the whipped cream evenly while maintaining its airy texture.
- Add the Oreo Pieces: Add the Oreo cookie crumbs and chopped Oreos to the filling and gently mix until well combined. Again, be gentle to avoid crushing the Oreo pieces too much. Distribute the Oreos evenly throughout the filling for the best flavor and texture in every bite.
- Assemble the Cheesecake: Spread the filling evenly into the prepared crust and smooth the top with a spatula. Ensure the filling reaches all the way to the edges of the crust. If desired, top the cake with the optional crushed Oreos, pressing them down lightly into the filling. This adds a visually appealing finish and an extra burst of Oreo flavor.
- Chill to Set: Set the cheesecake in the refrigerator until firm, for at least 4-5 hours, or preferably overnight. This chilling time allows the cheesecake to set properly and develop its signature creamy texture.
- Release and Serve: Before serving, carefully remove the cheesecake from the springform pan. Run a thin knife around the edge of the cake to loosen it from the pan, then gently release the spring mechanism. Transfer the cheesecake to a serving plate and slice into desired portions.
Expert Tips & Tricks
- Room Temperature Cream Cheese: This is the single most important tip for a smooth, lump-free cheesecake filling. Plan ahead and allow your cream cheese to soften fully before starting.
- Gentle Mixing: Overmixing can lead to a dense, less airy cheesecake. Fold in the Cool Whip and Oreo pieces with a light hand to maintain a delicate texture.
- Crust Perfection: For a more intense Oreo flavor in the crust, consider using double-stuffed Oreos.
- Presentation Matters: Get creative with your Oreo toppings! Use mini Oreos, Oreo halves, or even drizzles of chocolate sauce for a more visually appealing dessert.
- Preventing a Soggy Crust: If you live in a humid environment, you might want to brush the inside of the crust with melted chocolate before adding the filling. This creates a barrier that prevents moisture from seeping in.
Serving & Storage Suggestions
Serve the no-bake Oreo cheesecake chilled. A dollop of whipped cream or a drizzle of chocolate syrup makes a lovely accompaniment. Leftovers should be stored in an airtight container in the refrigerator for up to 3-4 days. For longer storage, you can freeze the cheesecake. Wrap it tightly in plastic wrap and then in foil, and it will keep in the freezer for up to 2 months. Thaw it overnight in the refrigerator before serving. Note that the texture may change slightly after freezing and thawing.
Nutritional Information
| Nutrient | Amount per Serving | % Daily Value |
|---|---|---|
| Calories | 340 kcal | N/A |
| Calories from Fat | 264 g | 78% |
| Total Fat | 29.4 g | 45% |
| Saturated Fat | 17.9 g | 89% |
| Cholesterol | 72.7 mg | 24% |
| Sodium | 254.7 mg | 10% |
| Total Carbohydrate | 16.4 g | 5% |
| Dietary Fiber | 0.2 g | 0% |
| Sugars | 13.9 g | 55% |
| Protein | 4 g | 8% |
Note: Nutritional information is an estimate and may vary based on specific ingredients used.
Variations & Substitutions
- Gluten-Free Option: Use gluten-free Oreo cookies (if available) or substitute the crust with a gluten-free graham cracker crust.
- Vegan Version: While Oreos themselves may be vegan-friendly (always check the label), you’ll need to substitute the cream cheese with a plant-based alternative and use vegan whipped cream.
- Chocolate Lover’s Dream: Add a layer of chocolate ganache between the crust and the filling, or drizzle melted chocolate over the finished cheesecake.
- Peanut Butter Twist: Swirl peanut butter into the cream cheese filling for a delicious peanut butter and Oreo combination.
- Mint Chocolate Chip: Substitute some of the Oreo crumbs with mint chocolate chips for a refreshing twist.
FAQs (Frequently Asked Questions)
Q: Can I use regular whipped cream instead of Cool Whip?
A: Yes, you can use homemade whipped heavy cream sweetened with icing sugar. Just make sure to whip it to stiff peaks before folding it into the cream cheese mixture.
Q: My cheesecake filling is too runny. What did I do wrong?
A: This usually happens when the cream cheese isn’t at room temperature or when the mixture is overmixed. Make sure your cream cheese is soft and avoid overmixing after adding the whipped cream.
Q: How do I prevent the crust from sticking to the pan?
A: Press the crust firmly into the pan and chill it well before adding the filling. You can also lightly grease the bottom of the pan with cooking spray before adding the crust.
Q: Can I make this cheesecake ahead of time?
A: Absolutely! This cheesecake is perfect for making ahead of time. In fact, it needs at least 4-5 hours to chill and set properly. You can make it a day or two in advance and store it in the refrigerator.
Q: Is it possible to freeze this cheesecake?
A: Yes, you can freeze this cheesecake for up to 2 months. Wrap it tightly in plastic wrap and then in foil to prevent freezer burn. Thaw it overnight in the refrigerator before serving.
Final Thoughts
This no-bake Oreo cheesecake is more than just a dessert; it’s a delightful experience waiting to happen. It’s incredibly easy to make, requires no baking, and is guaranteed to impress. So gather your ingredients, unleash your inner baker, and prepare to indulge in a slice of pure Oreo heaven. I encourage you to experiment with variations and make this recipe your own. Don’t forget to share your creations and feedback – I can’t wait to hear what you think!