
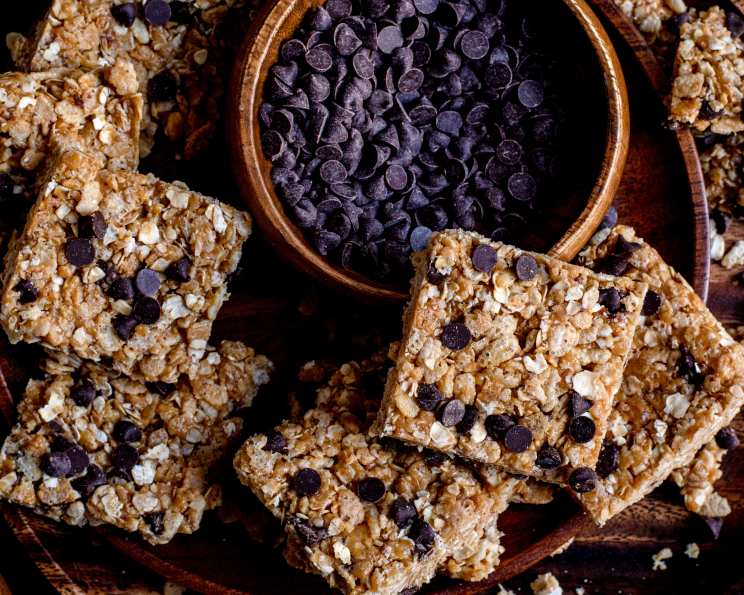
No-Bake Rice Krispies Peanut Butter Granola Bars (Lower-Fat)
I remember my first attempt at making granola bars. It was a sweltering summer afternoon, and the kitchen was already a sauna. I envisioned perfect, neatly sliced bars, but what emerged from the oven was a sticky, crumbly mess that defied all attempts at portioning. Determined, I transitioned to the no-bake method, and that’s when the magic truly happened. These Rice Krispies Peanut Butter Granola Bars, especially this lower-fat version, became a staple, a simple joy I could whip up without breaking a sweat, and always a crowd-pleaser.
Recipe Overview
- Prep Time: 15 minutes
- Cook Time: 7 minutes
- Total Time: 22 minutes
- Yields: 16 bars
- Dietary Type: Vegetarian
Ingredients
- 1 1⁄2 cups Rice Krispies (for a firmer bar increase up to 2 cups)
- 1 1⁄2 cups quick-cooking oats
- 1⁄2 cup brown sugar, packed
- 1⁄2 cup light corn syrup or 1/2 cup honey
- 1⁄2 cup reduced-fat peanut butter (or can use regular peanut butter)
- 1 teaspoon vanilla
- 1⁄2 cup dark raisins (or can use either 1/2 cup chopped nuts or 1/2 cup seeds or 1/2 cup coconut)
- 1⁄3 cup mini chocolate chips (to prevent melting refrigerate or freeze the chocolate chips before mixing in)
Equipment Needed
- 11 x 7-inch baking dish (or 13 x 9-inch for thinner bars)
- Large mixing bowl
- Saucepan
- Measuring cups and spoons
- Sharp knife
Instructions
-
Lightly grease an 11 x 7-inch baking dish. If you prefer thinner bars, you can use a 13 x 9-inch baking dish instead. Ensuring the dish is well-greased will prevent the bars from sticking and make them easier to remove later.
-
In a large bowl, combine the 1 1/2 cups of Rice Krispies cereal, 1 1/2 cups of quick-cooking oats, and 1/2 cup of raisins. If you’re opting for nuts, seeds, or coconut instead of raisins, add them at this stage. Gently mix the dry ingredients to ensure they are evenly distributed.
-
In a saucepan, stir together the 1/2 cup of corn syrup (or honey) and 1/2 cup of packed brown sugar. Heat the mixture over medium heat, stirring constantly, until it just reaches a boil. Be vigilant and keep stirring to prevent the sugar from burning or sticking to the bottom of the pan.
-
Immediately remove the saucepan from the heat. Stir in the 1/2 cup of peanut butter and 1 teaspoon of vanilla extract until everything is thoroughly combined and the mixture is smooth and creamy. The residual heat will help the peanut butter melt and blend seamlessly.
-
Pour the peanut butter mixture over the dry ingredients in the large bowl. Mix everything together quickly and thoroughly to ensure that the cereal, oats, and raisins are evenly coated. The mixture will start to harden as it cools, so work efficiently.
-
If you’re using mini chocolate chips, now is the time to mix them in. Remember to refrigerate or freeze the chocolate chips beforehand to minimize melting during the mixing process. Gently fold them into the mixture, distributing them evenly.
-
Transfer the mixture into the prepared baking dish. Using slightly wet hands, press the mixture evenly and firmly into the pan. Wetting your hands will prevent the mixture from sticking to them, making it easier to create a smooth, compact layer.
-
While the mixture is still soft, take a sharp knife and slice the bars into your desired size. Cutting them while they’re still pliable will result in cleaner, more uniform slices.
-
Chill the bars in the refrigerator until they are firm, this should take around 30-45 minutes. This step is crucial for allowing the bars to set properly and hold their shape when you remove them from the pan.
Expert Tips & Tricks
- For extra peanut butter flavor: Add a tablespoon or two of powdered peanut butter to the dry ingredients before adding the wet mixture.
- To prevent sticky hands: Lightly coat your hands with cooking spray instead of wetting them. This works especially well if you’re using regular peanut butter, which tends to be stickier than the reduced-fat variety.
- Nutty crunch: Toast the oats lightly in a dry skillet before adding them to the mixture for enhanced flavor and texture. Keep a close eye on them, as they can burn quickly.
- Even bar thickness: Use the bottom of a measuring cup or a rolling pin to firmly press the mixture into the pan for perfectly even bars.
- Soft bars: To keep your bars on the softer side, store them in an airtight container with a slice of bread.
Serving & Storage Suggestions
These no-bake bars are best served chilled or at room temperature. To serve attractively, arrange them on a platter or in a serving dish lined with parchment paper. Store leftover bars in an airtight container at room temperature for up to 3 days, or in the refrigerator for up to a week to maintain freshness. For longer storage, you can freeze the bars for up to 2 months. To thaw, simply transfer them to the refrigerator overnight or let them sit at room temperature for a few hours. There is no need to reheat.
Nutritional Information
| Nutrient | Amount per Serving | % Daily Value |
|---|---|---|
| Calories | 126 kcal | N/A |
| Calories from Fat | 14g | 12% |
| Total Fat | 1.6g | 2% |
| Saturated Fat | 0.7g | 3% |
| Cholesterol | 0mg | 0% |
| Sodium | 33.9mg | 1% |
| Total Carbohydrate | 28g | 9% |
| Dietary Fiber | 1.2g | 4% |
| Sugars | 14.4g | 57% |
| Protein | 1.5g | 2% |
Note: Nutritional information is an estimate and may vary based on specific ingredients and portion sizes.
Variations & Substitutions
- Gluten-free: Ensure that you are using certified gluten-free oats and Rice Krispies (some brands contain malt extract, which is derived from barley).
- Vegan: Use maple syrup instead of honey and dairy-free chocolate chips.
- Nut-free: Substitute the peanut butter with sunflower seed butter or tahini.
- Coconut lover’s dream: Replace the raisins with shredded coconut and add a splash of coconut extract to the peanut butter mixture.
- Spiced delight: Add a dash of cinnamon or nutmeg to the dry ingredients for a warm, comforting flavor.
FAQs (Frequently Asked Questions)
Q: Can I use regular peanut butter instead of reduced-fat?
A: Yes, you can, but the bars will be slightly higher in fat content. The texture will be richer and stickier.
Q: What if I don’t have corn syrup?
A: You can substitute honey, but be aware that it will slightly alter the flavor of the bars. Maple syrup can also be used but will lend a distinctive maple flavor.
Q: How do I prevent the chocolate chips from melting while mixing?
A: Refrigerating or freezing the chocolate chips for about 15-20 minutes before mixing them in will help them retain their shape. Work quickly after adding them.
Q: Can I add dried cranberries instead of raisins?
A: Absolutely! Dried cranberries add a lovely tartness that complements the peanut butter and chocolate. Other dried fruits like chopped apricots or cherries also work well.
Q: My bars are too crumbly. What did I do wrong?
A: This could be because the wet ingredients weren’t mixed thoroughly enough or because the mixture wasn’t pressed firmly enough into the pan. Ensure all the ingredients are well combined and press the mixture down with some force.
Final Thoughts
These No-Bake Rice Krispies Peanut Butter Granola Bars are a testament to the fact that deliciousness doesn’t always require hours in the kitchen. They’re perfect for a quick snack, a lunchbox treat, or a satisfying dessert. So go ahead, give this recipe a try and let your creativity shine with different variations. And be sure to share your creations with friends and family! I am confident everyone will be amazed. Don’t hesitate to leave a comment to let me know what you think!