
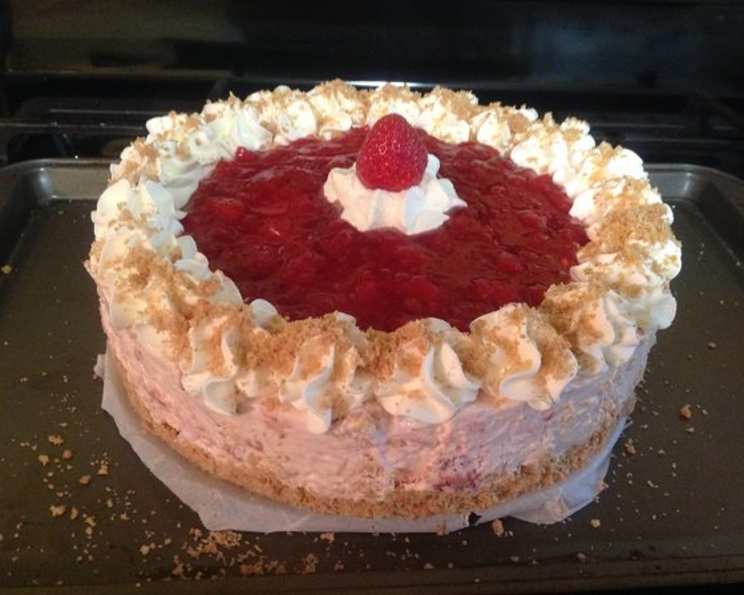
No-Bake Strawberry Cheesecake: A Slice of Summer Sunshine
There’s something inherently joyful about the first bite of a strawberry cheesecake. For me, it instantly transports me back to childhood summers spent at my grandmother’s farm. Her sprawling garden was always overflowing with plump, juicy strawberries, and she would use them to create the most incredible desserts. This no-bake version captures that same spirit of summer – effortless, vibrant, and utterly delicious. The bright strawberry flavor combined with the creamy cheesecake filling is a symphony of textures and tastes that always brings a smile to my face.
Recipe Overview
- Prep Time: 30 minutes
- Cook Time: 15 minutes (for the strawberry sauce)
- Total Time: 3 hours 45 minutes (includes chilling time)
- Servings: 8-10
- Yield: 1 cheesecake
- Dietary Type: Not specified (contains dairy and gluten)
Ingredients
For the Crust:
- 15 graham crackers, sheets
- 5 tablespoons unsalted butter, melted
- ¼ cup sugar
- ¼ teaspoon salt
For the Strawberry Sauce:
- 1 lb fresh strawberries, chopped
- ¼ cup sugar
- 1 teaspoon vanilla
- 1 tablespoon cornstarch
- 1 tablespoon water
For the Cheesecake Filling:
- 4 (8 ounce) packages cream cheese, softened
- ½ cup sugar
- 1 teaspoon vanilla
- ½ cup strawberry sauce (from the batch you made)
- 1 (8 ounce) container Cool Whip
Equipment Needed
- Food processor
- Mixing bowl
- Springform pan
- Parchment paper
- Saucepan
- Potato masher
- Small bowl
Instructions
- Prepare the Graham Cracker Crust: Begin by grinding the graham crackers in a food processor until they are finely ground. A homogenous crumb is key for a structurally sound crust.
- Combine Crust Ingredients: In a mixing bowl, combine the graham cracker crumbs with the melted butter, sugar, and salt. Mix thoroughly until all the crumbs are evenly moistened. The mixture should resemble wet sand.
- Press Crust into Pan: Line the bottom of a springform pan with parchment paper. This ensures easy removal of the cheesecake later. Press the graham cracker mixture firmly and evenly into the bottom of the pan. You can use the bottom of a measuring cup to help create a smooth, compact crust.
- Refrigerate the Crust: Place the springform pan with the crust in the refrigerator while you prepare the strawberry sauce and cheesecake filling. This allows the crust to firm up and hold its shape.
- Make the Strawberry Sauce: In a saucepan, combine the chopped strawberries and sugar. Cook over medium heat until the berries soften, about 10 minutes. The sugar will help draw out the juices from the strawberries, creating a natural sauce.
- Mash the Berries: Use a potato masher to mash the softened berries in the saucepan. This releases more of their flavor and creates a smoother sauce. Stir in the vanilla.
- Thicken the Sauce: In a small bowl, whisk together the cornstarch and water until smooth. This creates a slurry that will thicken the sauce. Stir the cornstarch mixture into the strawberry sauce.
- Cook Until Thickened: Continue to cook the strawberry sauce, stirring regularly, until it has thickened, about 5 minutes. The sauce should be thick enough to coat the back of a spoon.
- Cool the Sauce: Remove the strawberry sauce from the heat and allow it to cool completely. This is crucial, as adding hot sauce to the cream cheese will affect its texture.
- Prepare the Cheesecake Filling: In a large mixing bowl, beat the softened cream cheese, sugar, and vanilla until smooth and creamy. Make sure the cream cheese is truly softened to avoid lumps in the filling.
- Incorporate Strawberry Sauce: Stir ½ cup of the cooled strawberry sauce into the cream cheese mixture. Gently fold it in until it is evenly distributed. Be careful not to overmix, as this can deflate the filling.
- Fold in Cool Whip: Gently fold in the Cool Whip until just combined. This adds lightness and airiness to the cheesecake filling. Again, avoid overmixing.
- Assemble the Cheesecake: Pour the cheesecake mixture into the springform pan over the prepared graham cracker crust. Spread it evenly to the edges.
- Refrigerate to Set: Cover the springform pan with plastic wrap and refrigerate for at least 2-3 hours, or preferably overnight. This allows the cheesecake to set completely.
- Release from Pan: After chilling, remove the cheesecake from the refrigerator. Use a knife heated with hot water to carefully loosen the sides of the cheesecake from the springform pan. This will prevent the cheesecake from cracking when you release the sides. Open the springform pan.
- Decorate: Decorate the cheesecake with the remaining strawberry sauce. You can also add extra whipped cream, fresh strawberries, and graham cracker crumbs, if desired, either on the whole cake or on individual slices.
Expert Tips & Tricks
- Soften Cream Cheese Properly: The most common mistake is not softening the cream cheese enough. Leave it at room temperature for at least an hour or two before starting. You can also microwave it in short bursts (10-15 seconds) but be careful not to melt it.
- Prevent a Soggy Crust: For an extra sturdy crust, you can bake it at 350°F (175°C) for 8-10 minutes before adding the filling. Let it cool completely before adding the cheesecake mixture.
- Smooth Top: To get a perfectly smooth top on your cheesecake, gently tap the springform pan on the counter a few times after pouring in the filling. This will release any trapped air bubbles.
- Flavor Boost: Add a squeeze of lemon juice or a pinch of salt to the strawberry sauce to enhance the flavors.
Serving & Storage Suggestions
Serve the no-bake strawberry cheesecake chilled. It’s best enjoyed within 2-3 days of making it. Store leftovers in an airtight container in the refrigerator. The cheesecake can also be frozen for up to a month. To freeze, wrap the entire cheesecake tightly in plastic wrap and then in foil. Thaw overnight in the refrigerator before serving.
Nutritional Information
| Nutrient | Amount per Serving | % Daily Value |
|---|---|---|
| Calories | 720 kcal | N/A |
| Calories from Fat | 492 g | 69% |
| Total Fat | 54.8 g | 84% |
| Saturated Fat | 32.9 g | 164% |
| Cholesterol | 144 mg | 48% |
| Sodium | 509.1 mg | 21% |
| Total Carbohydrate | 51.6 g | 17% |
| Dietary Fiber | 1.5 g | 6% |
| Sugars | 42.1 g | 168% |
| Protein | 8.5 g | 16% |
Note: Nutritional information is an estimate and may vary based on specific ingredients and portion sizes.
Variations & Substitutions
- Gluten-Free: Use gluten-free graham crackers for the crust.
- Dairy-Free: Substitute vegan cream cheese and whipped topping. Be sure to check that your graham crackers are also dairy-free.
- Other Berries: Experiment with other berries like raspberries, blueberries, or blackberries.
- Chocolate Crust: Replace the graham crackers with chocolate wafers for a decadent twist.
- Lemon Zest: Add lemon zest to the cheesecake filling for a brighter flavor.
FAQs (Frequently Asked Questions)
Q: Can I use frozen strawberries instead of fresh?
A: Yes, you can use frozen strawberries for the sauce, but be sure to thaw them completely and drain any excess liquid before cooking. This will prevent the sauce from becoming too watery.
Q: Can I make this cheesecake ahead of time?
A: Absolutely! In fact, it’s best to make it a day in advance to allow the flavors to fully meld and the cheesecake to set properly.
Q: My crust is too crumbly. What can I do?
A: Add a little more melted butter, one tablespoon at a time, until the crumbs hold together when pressed.
Q: My cheesecake filling is too runny. What did I do wrong?
A: Make sure your cream cheese is fully softened before mixing. Also, avoid overmixing the filling after adding the Cool Whip.
Q: Can I bake this cheesecake instead of refrigerating it?
A: This recipe is specifically designed as a no-bake cheesecake. Baking it will likely result in a different texture and may not be successful. For a baked cheesecake, you’ll need a different recipe.
Final Thoughts
This no-bake strawberry cheesecake is a delightful treat that’s perfect for any occasion, from casual summer gatherings to elegant dinner parties. It’s incredibly easy to make, bursting with fresh strawberry flavor, and guaranteed to impress your friends and family. I encourage you to give this recipe a try and share your creations with me! Don’t be afraid to experiment with different variations and add your own personal touch. And remember, the best part of cooking is sharing it with those you love. Enjoy!