
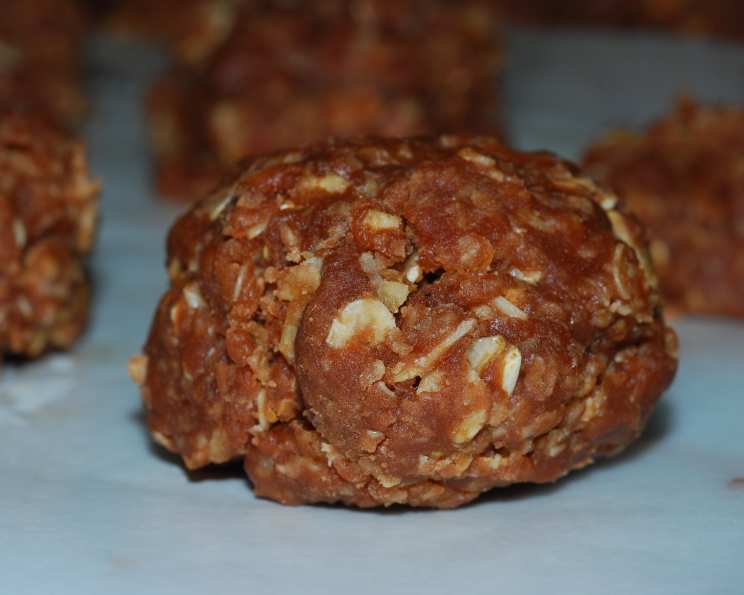
No Bake Cookies: A Sweet Flashback to Childhood
The scent of melting butter and cocoa still has the power to transport me back to my grandmother’s kitchen. Every summer, her counter would be covered with sheets of wax paper dotted with these delightfully lumpy, chocolatey oat cookies. My cousins and I would hover nearby, practically vibrating with anticipation, sneaking “quality control” tastes as soon as they were cool enough to handle. Each bite was a perfect blend of chewy oats, rich chocolate, and just a hint of peanut butter, a simple joy that defined those carefree summer days.
Recipe Overview
- Prep Time: 10 minutes
- Cook Time: 5 minutes
- Total Time: 25 minutes
- Yields: 24-36 cookies
- Dietary Type: Vegetarian
Ingredients
- 2 ¾ cups sugar
- ½ cup butter
- ½ cup milk
- 1 teaspoon vanilla extract
- 4 tablespoons cocoa
- 3 cups rolled oats (not instant)
- ½ cup peanut butter
- Pinch of salt
Equipment Needed
- Medium saucepan
- Measuring cups and spoons
- Wax paper
- Mixing spoon
- Airtight container
Instructions
-
In a medium saucepan, combine the sugar, butter, milk, salt, and cocoa.
-
Place the saucepan over medium heat and bring the mixture to a full rolling boil, stirring constantly to prevent scorching. A “full rolling boil” means the mixture is bubbling vigorously even while you’re stirring.
-
Once the mixture reaches a full rolling boil, set a timer and continue to boil for exactly 1 minute, stirring constantly. This is crucial for the cookies to set properly.
-
Remove the saucepan from the heat immediately after the minute is up.
-
Add the peanut butter to the hot mixture. Stir continuously until the peanut butter is completely melted and thoroughly blended into the chocolate mixture. Ensure no streaks of peanut butter remain.
-
Stir in the vanilla extract until well combined.
-
Add the rolled oats to the mixture. Stir vigorously until the oats are evenly coated with the chocolate-peanut butter mixture. Make sure there are no dry pockets of oats.
-
Working quickly, drop spoonfuls of the mixture onto sheets of wax paper. The size of the spoonful will determine the size of your cookies; aim for consistency for even cooling.
-
Allow the cookies to cool completely on the wax paper, about 20 minutes. They will firm up as they cool.
-
Once the cookies are fully cooled and set, transfer them to an airtight container for storage.
Expert Tips & Tricks
- Don’t skimp on the boiling time: Boiling for the full minute is crucial for achieving the right consistency. Under-boiling will result in soft, sticky cookies that don’t set properly, while over-boiling can lead to dry, crumbly cookies. Use a timer!
- Use old-fashioned rolled oats: Instant oats will become too mushy and won’t provide the desired chewy texture.
- Stir, stir, stir! Continuous stirring while boiling prevents the mixture from scorching and ensures even heat distribution.
- Room temperature butter is key: Softening the butter beforehand can help speed up the melting process and ensure a smoother, more consistent mixture.
- For a richer flavor: Use dark cocoa powder, but be mindful that it can also have a slightly bitter taste.
- If your cookies are too dry: Add a tablespoon of milk when mixing the peanut butter.
- If the cookies don’t set: Next time, make sure you boil for the whole minute and measure your ingredients properly.
Serving & Storage Suggestions
No Bake Cookies are best enjoyed at room temperature, allowing their chewy texture and rich flavors to fully shine. Serve them as a delightful afternoon treat, a simple dessert after dinner, or a sweet addition to a lunchbox.
Store the cooled cookies in an airtight container at room temperature for up to 3 days. For longer storage, refrigerate them for up to a week. You can also freeze them for up to 2 months; thaw them at room temperature before serving. Layer the cookies between sheets of wax paper in the freezer to prevent them from sticking together.
Nutritional Information
(Note: Nutritional information is an estimate and may vary based on specific ingredients and portion sizes.)
| Nutrient | Amount per Serving | % Daily Value |
|---|---|---|
| Calories | 200 kcal | 10% |
| Total Fat | 7.5g | 11% |
| Saturated Fat | 3.2g | 16% |
| Cholesterol | 10.9mg | 3% |
| Sodium | 54.8mg | 2% |
| Total Carbohydrate | 31.5g | 10% |
| Dietary Fiber | 1.5g | 5% |
| Sugars | 23.6g | 94% |
| Protein | 3.3g | 6% |
Variations & Substitutions
- Chocolate Lovers’ Delight: Add chocolate chips (milk, dark, or semi-sweet) to the oat mixture for an extra dose of chocolate.
- Nut-Free Option: Substitute the peanut butter with sunflower seed butter or tahini.
- Spiced No Bakes: Add a pinch of cinnamon or nutmeg to the sugar mixture for a warm, comforting flavor.
- Coffee Infusion: Add a teaspoon of instant espresso powder to the sugar mixture for a mocha-flavored cookie.
- Vegan No Bakes: Use a vegan butter substitute and non-dairy milk. Ensure your vanilla extract is vegan-friendly.
- Crispy No Bakes: Slightly toast the rolled oats in a dry pan before adding them to the wet mixture for a slightly nutty and crispy cookie.
FAQs (Frequently Asked Questions)
Q: Why are my no bake cookies not setting?
A: This is usually due to under-boiling the sugar mixture. Make sure you boil it for the full minute, stirring constantly, to reach the proper consistency. Incorrect ingredient measurements can also affect the setting process.
Q: Can I use quick oats instead of rolled oats?
A: It’s not recommended. Quick oats will result in a mushier cookie with a less desirable texture. Rolled oats provide the necessary chewiness.
Q: How do I prevent the cookies from sticking to the wax paper?
A: Make sure the wax paper is clean and dry. You can also lightly grease it with cooking spray, but this isn’t usually necessary.
Q: Can I add other ingredients to these cookies?
A: Absolutely! Feel free to add chopped nuts, dried fruit, or even sprinkles to customize your cookies to your liking.
Q: How long do no bake cookies last?
A: Stored in an airtight container at room temperature, they’ll last for about 3 days. Refrigerated, they can last up to a week, and frozen, up to 2 months.
Final Thoughts
These No Bake Cookies are more than just a simple dessert; they’re a nostalgic trip down memory lane. Easy to make and endlessly adaptable, they’re the perfect treat for satisfying your sweet cravings without turning on the oven. Whether you’re a seasoned baker or just starting out, this recipe is a guaranteed success. So gather your ingredients, grab a saucepan, and get ready to create a batch of these irresistible cookies. Share them with loved ones, or keep them all to yourself—we won’t judge! And remember, the best part of baking is sharing the joy with others.