
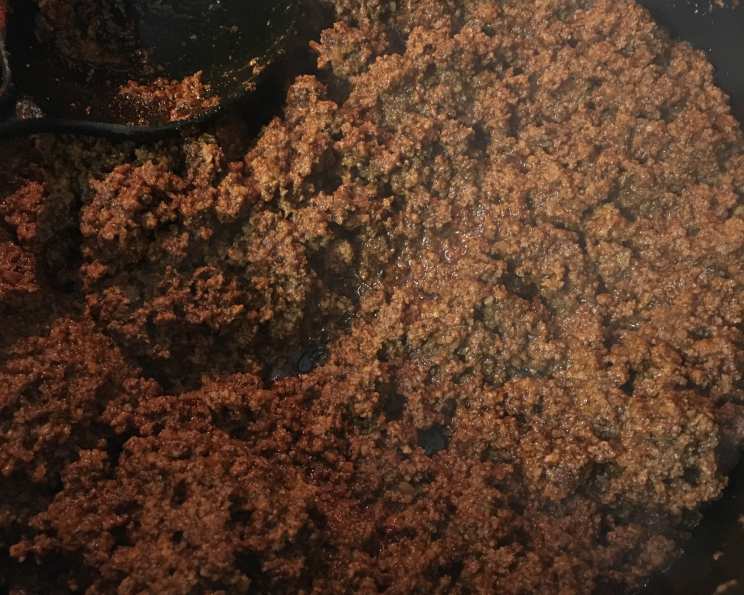
The Deep Flavors of Texas: No Beans, No Tomato Chili
The aroma alone transports me back to childhood. I remember huddling around a steaming bowl of this chili, the winter wind howling outside, my dad beaming with pride as he served up his award-winning concoction. He’d always joke, “Real chili doesn’t need beans or tomatoes!” and he was right. This version, a pure expression of beef, spices, and time, is comfort in a bowl and a true taste of Texas.
Recipe Overview
- Prep Time: 15 minutes
- Cook Time: 2 hours 30 minutes
- Total Time: 2 hours 45 minutes
- Servings: 4-6
- Yield: Varies
- Dietary Type: Gluten-Free (check seasoning mix ingredients)
Ingredients
- 2 lbs ground beef or chili-style ground beef
- 3 cups water
- 1 package William’s Chili Seasoning Mix
- ½ teaspoon pepper
- ½ teaspoon Accent seasoning
- 2 tablespoons chili powder
- 2 teaspoons garlic powder
- 2 teaspoons cumin
- 2 teaspoons onion powder
- Salt to taste
Equipment Needed
- Large pot or Dutch oven
- Stirring spoon
Instructions
- In a large pot or Dutch oven, bring the 3 cups of water to a simmer over medium-high heat.
- Add the ground beef (or chili-style ground beef) to the simmering water. Important: Do not brown the meat beforehand. This simmering process is key to the texture and flavor of the chili.
- As the meat cooks in the water, use a spoon or spatula to crumble it into small pieces. Aim for a fine, even texture throughout. Avoid large chunks. This should take about 30 minutes.
- After the meat has simmered for 30 minutes and is thoroughly crumbled, add the remaining ingredients: William’s Chili Seasoning Mix, pepper, Accent seasoning, chili powder, garlic powder, cumin, and onion powder.
- Stir well to ensure all the spices are evenly distributed throughout the meat and water mixture.
- Reduce the heat to low, cover the pot, and simmer for 2 hours, stirring occasionally. This long simmering time allows the flavors to meld and deepen. Be sure to stir every 20-30 minutes to prevent sticking and ensure even cooking.
- After 2 hours of simmering, taste the chili and add salt to taste. Remember, salt enhances all the other flavors, so add it gradually, tasting as you go.
- Continue to simmer for an additional 30 minutes, uncovered, to allow the chili to thicken slightly. Stir occasionally.
- Serve hot.
Expert Tips & Tricks
- The Meat Matters: Using chili-style ground beef, which is often ground coarser, can enhance the texture of the chili. However, regular ground beef works just as well.
- Spice Adjustment: The William’s Chili Seasoning Mix provides a good base, but feel free to adjust the other spices to your liking. If you prefer a spicier chili, add a pinch of cayenne pepper or a dash of hot sauce.
- Low and Slow: The key to a great chili is low and slow cooking. Don’t rush the simmering process. It’s what allows the flavors to develop fully.
- Fat Skimming: While the chili simmers, you may notice some fat rising to the surface. You can skim this off with a spoon if you prefer a leaner chili.
- Thickening: If the chili is too thin after simmering, you can thicken it by removing a cup of the liquid, mixing it with a tablespoon of cornstarch, and then stirring it back into the pot. Simmer for a few more minutes until thickened.
Serving & Storage Suggestions
Serve this chili hot in bowls, garnished with your favorite toppings. Classic choices include shredded cheddar cheese, diced onions, sour cream, and a dollop of Greek yogurt. Cornbread or tortilla chips are perfect accompaniments for soaking up every last drop.
For storage, allow the chili to cool completely before transferring it to an airtight container. It can be stored in the refrigerator for up to 3-4 days. For longer storage, freeze the chili in freezer-safe containers for up to 2-3 months. Thaw it in the refrigerator overnight before reheating.
To reheat, gently warm the chili in a pot over medium heat, stirring occasionally, until heated through. You can also reheat it in the microwave, stirring every minute or so to ensure even heating.
Nutritional Information
| Nutrient | Amount per Serving | % Daily Value |
|---|---|---|
| Calories | 512.8 kcal | N/A |
| Calories from Fat | 314 g | 61% |
| Total Fat | 34.9 g | 53% |
| Saturated Fat | 13.4 g | 67% |
| Cholesterol | 154.2 mg | 51% |
| Sodium | 194 mg | 8% |
| Total Carbohydrate | 4.7 g | 1% |
| Dietary Fiber | 1.7 g | 6% |
| Sugars | 1.1 g | 4% |
| Protein | 43.2 g | 86% |
Note: Nutritional information is an estimate and may vary based on specific ingredients and portion sizes.
Variations & Substitutions
- Spicy Version: Add a diced jalapeño pepper or a pinch of cayenne pepper during the simmering process to increase the heat.
- Smoky Version: Add a teaspoon of smoked paprika to the chili for a smoky flavor.
- Beef Alternatives: While this recipe is traditionally made with beef, you can substitute ground turkey, ground chicken, or even cubed pork for a different flavor profile.
- Vegetarian “Chili”: While technically not chili in the classic sense, you can create a similar dish using a plant-based ground meat substitute and vegetable broth.
FAQs (Frequently Asked Questions)
Q: Why simmer the meat in water instead of browning it first?
A: Simmering the meat in water creates a unique, tender texture and infuses the water with beefy flavor, which becomes the base of the chili. Browning can create a different flavor profile, but this recipe aims for a specific traditional taste.
Q: Can I use a different chili seasoning mix?
A: While this recipe recommends William’s Chili Seasoning Mix, you can use another brand if you prefer. Just be sure to adjust the other spices accordingly to achieve the desired flavor.
Q: How can I make this chili spicier?
A: Add a diced jalapeño pepper, a pinch of cayenne pepper, or a few dashes of hot sauce during the simmering process. You can also add chili flakes for extra heat.
Q: Can I make this chili in a slow cooker?
A: Yes, you can adapt this recipe for a slow cooker. Follow steps 1-5, then transfer the mixture to a slow cooker and cook on low for 6-8 hours or on high for 3-4 hours.
Q: What if my chili is too watery?
A: Remove the lid during the last 30 minutes of simmering to allow some of the liquid to evaporate. Alternatively, you can mix a tablespoon of cornstarch with a cup of the liquid and stir it back into the pot to thicken it.
Final Thoughts
I hope this chili recipe brings you as much joy as it has brought my family for generations. It’s a simple dish, but the depth of flavor that comes from the slow simmering process is truly remarkable. Don’t be afraid to experiment with the spices to find your perfect balance. Gather your loved ones, ladle up a bowl of this hearty chili, and create some memories of your own. And if you have any variations or questions, please don’t hesitate to share! This is a chili worth sharing.