
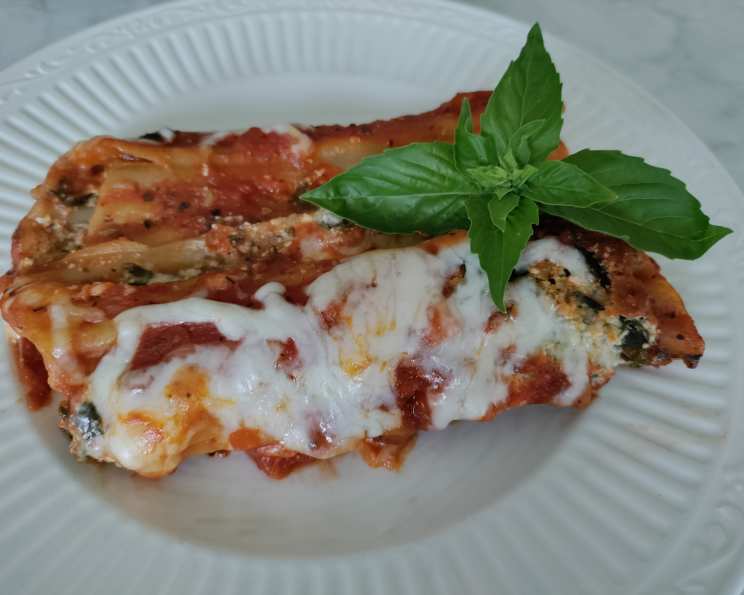
No-Boil Manicotti: An Effortless Italian Classic
The aroma of bubbling tomato sauce and melting mozzarella always takes me back to Sunday dinners at my grandmother’s house. While her manicotti involved what felt like a week-long process of boiling, stuffing, and baking, this no-boil version captures all the comforting flavors with a fraction of the effort. It’s the kind of dish that makes everyone feel loved and nourished, and it’s simple enough to whip up on a busy weeknight.
Recipe Overview
- Prep Time: 25 minutes
- Cook Time: 45 minutes
- Total Time: 1 hour 5 minutes
- Servings: 7
- Yield: 14 manicotti
- Dietary Type: Vegetarian
Ingredients
- 1 lb part-skim ricotta cheese
- 8 ounces shredded mozzarella cheese, divided
- 3 tablespoons shredded parmesan cheese
- 1 teaspoon sugar
- 1 egg, slightly beaten
- 2-3 dashes nutmeg
- 1 tablespoon dried parsley
- 3 dashes ground black pepper
- 14 manicotti shells, uncooked
For the Sauce:
- 1 (15 ounce) can diced tomatoes
- 1 (6 ounce) can tomato paste
- 3⁄4 cup water
- 1 tablespoon onion flakes
- 1 teaspoon dried basil
- 1⁄2 teaspoon dried rosemary
- 1⁄4 teaspoon dried oregano
- 1 teaspoon sugar
- 3 dashes salt
- 3 dashes ground black pepper
Equipment Needed
- 13 x 9 inch baking dish
- Small or medium saucepan
- Mixing bowl
- Aluminum foil
- Plastic bag (optional, for stuffing)
Instructions
-
Preheat your oven to 400°F (200°C). This ensures the manicotti cooks evenly and the cheese melts perfectly.
-
In a large mixing bowl, combine the ricotta cheese, 4 ounces of the shredded mozzarella cheese (reserve the rest for topping), parmesan cheese, 1 teaspoon of sugar, the slightly beaten egg, nutmeg, dried parsley, and black pepper. Mix all the ingredients thoroughly until well combined. This mixture is the heart of the dish, so make sure it’s flavorful and well-seasoned.
-
Stuff the uncooked manicotti shells generously with the cheese mixture, from both ends. This can be a little tricky, but be patient and work slowly. A helpful tip is to transfer the cheese mixture to a large plastic bag, cut off a small corner, and use it as a makeshift piping bag to squeeze the filling into the shells easily. Ensure each shell is packed full of cheesy goodness.
-
Arrange the stuffed manicotti in a single layer in a slightly greased 13 x 9 inch baking dish. This prevents overcrowding and ensures even cooking. Lightly greasing the dish prevents sticking and makes serving easier.
-
Prepare the sauce by combining the diced tomatoes, tomato paste, water, onion flakes, dried basil, dried rosemary, dried oregano, 1 teaspoon of sugar, salt, and black pepper in a small or medium saucepan. Stir well to combine all ingredients.
-
Bring the sauce to just a boil over medium heat, stirring occasionally. Once boiling, reduce the heat to low and simmer for about 5 minutes to allow the flavors to meld.
-
Pour the sauce over the arranged manicotti, ensuring they are completely covered. This sauce will cook the pasta, so make sure every shell is submerged. If necessary, add a little more water to the sauce to achieve the desired consistency.
-
Cover the baking dish tightly with aluminum foil, crimping the edges to seal completely. This creates a steam-filled environment that helps cook the pasta evenly.
-
Bake for 40 minutes at 400°F (200°C). The covered baking time is crucial for cooking the manicotti shells through.
-
Remove the foil from the baking dish. This allows the cheese to melt and brown beautifully.
-
Sprinkle the remaining mozzarella cheese generously over the manicotti. A generous layer of melted mozzarella is the perfect finishing touch.
-
Bake uncovered for an additional 5 minutes, or until the cheese is melted and bubbly. Keep a close eye on it to prevent burning.
Expert Tips & Tricks
- Spice it up: Add a pinch of red pepper flakes to the ricotta mixture for a touch of heat.
- Make it meaty: Brown some Italian sausage and mix it into the ricotta filling for a heartier dish.
- Get ahead: Assemble the manicotti ahead of time and store it in the refrigerator (covered) for up to 24 hours before baking. Add an extra 10-15 minutes to the baking time if baking from cold.
- Ensure al dente: Test the pasta by gently piercing a shell with a fork after the covered baking time. If it’s still too firm, add a few more minutes of covered baking time.
- Prevent sticking: Spray the baking dish generously with cooking spray or lightly coat it with olive oil to prevent the manicotti from sticking.
Serving & Storage Suggestions
Serve the no-boil manicotti hot from the oven, garnished with fresh basil or parsley. A side of garlic bread or a simple green salad complements the rich flavors perfectly.
Leftovers can be stored in an airtight container in the refrigerator for up to 3 days. To reheat, cover with foil and bake at 350°F (175°C) until heated through, or microwave in individual portions. For longer storage, freeze the cooked manicotti for up to 2 months. Thaw completely before reheating.
Nutritional Information
| Nutrient | Amount per Serving | % Daily Value |
|---|---|---|
| Calories | 246.1 kcal | N/A |
| Calories from Fat | N/A | 51% |
| Total Fat | 14 g | 21% |
| Saturated Fat | 8.1 g | 40% |
| Cholesterol | 74.2 mg | 24% |
| Sodium | 592.5 mg | 24% |
| Total Carbohydrate | 13.3 g | 4% |
| Dietary Fiber | 2 g | 7% |
| Sugars | 6.7 g | N/A |
| Protein | 18.1 g | 36% |
Note: Nutritional information is an estimate and may vary based on specific ingredients and portion sizes.
Variations & Substitutions
- Gluten-Free: Use gluten-free manicotti shells.
- Dairy-Free: Substitute the ricotta cheese with a plant-based ricotta alternative made from tofu or cashews. Use dairy-free mozzarella shreds.
- Vegetable-Packed: Add finely chopped spinach, zucchini, or mushrooms to the ricotta filling for extra nutrients.
- Spicy Arrabbiata: Replace the diced tomatoes with a can of arrabbiata-style diced tomatoes for a spicier sauce.
- Pesto Manicotti: Mix pesto into the ricotta filling for a burst of fresh, herbaceous flavor.
FAQs (Frequently Asked Questions)
Q: Can I use different types of cheese in the filling?
A: Absolutely! Feel free to experiment with different cheeses like provolone, fontina, or asiago for a unique flavor profile.
Q: Do I need to thaw frozen manicotti shells before stuffing them?
A: This recipe is specifically designed for uncooked, dried manicotti shells. Using frozen shells would alter the cooking time and texture.
Q: Can I make the sauce ahead of time?
A: Yes, the sauce can be made up to 2 days in advance. Store it in an airtight container in the refrigerator and reheat before pouring it over the manicotti.
Q: How do I prevent the manicotti from drying out?
A: Ensuring the dish is well-covered with sauce and tightly sealed with foil during the initial baking period is essential for preventing dryness.
Q: Can I add meat to this recipe?
A: Yes! Browned ground beef, Italian sausage, or shredded chicken can be added to the ricotta mixture for a heartier meal.
Final Thoughts
This no-boil manicotti recipe is a true testament to the idea that delicious Italian comfort food doesn’t have to be complicated. It’s a simple, satisfying dish that’s perfect for family dinners, potlucks, or any occasion where you want to share a little bit of culinary love. So, gather your ingredients, preheat your oven, and get ready to enjoy a taste of Italy without all the fuss. Don’t hesitate to experiment with your favorite fillings and sauces to create your own signature version. Buon appetito!