
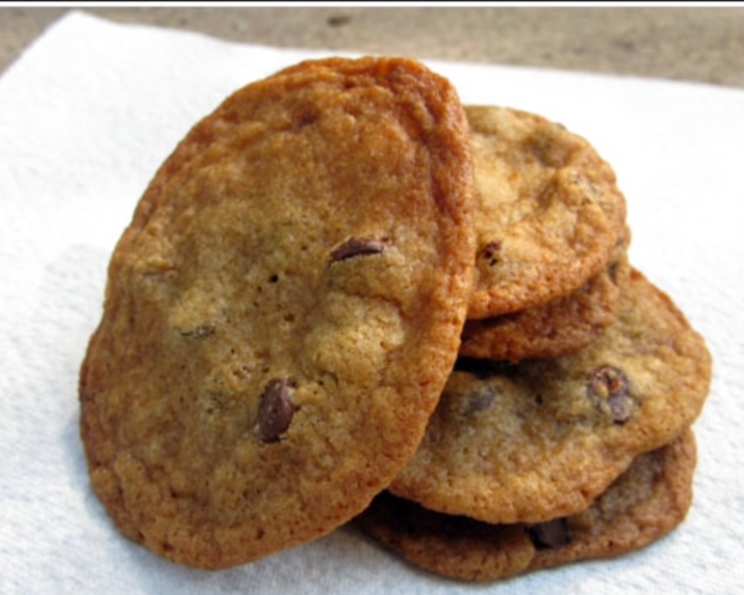
The Surprisingly Delicious No-Butter Chocolate Chip Cookie
There’s something magical about the aroma of chocolate chip cookies baking in the oven. It instantly transports me back to my childhood, standing on a stool next to my grandmother, eager to sneak a taste of the dough. Back then, everything was about butter – creamy, rich, undeniably delicious butter. I never imagined a cookie could rival that flavor without it, until I stumbled upon this recipe. And believe me, the warm, gooey, chocolate-studded results of this recipe will convince even the most ardent butter-lover that these cookies are just as, if not more, delightful.
Recipe Overview
- Prep Time: 15 minutes
- Cook Time: 12-14 minutes
- Total Time: 27-29 minutes
- Yields: 14-18 cookies
- Servings: 6
- Dietary Type: Can be easily modified for dairy-free options.
Ingredients
- 1 ½ cups flour
- ½ teaspoon baking soda
- ¼ teaspoon salt
- ½ cup sugar
- ¼ cup brown sugar
- ½ cup coconut oil (or ½ cup vegetable oil)
- 1 large egg
- 1 cup chocolate chips
Equipment Needed
- Mixing bowl
- Measuring cups and spoons
- Cookie sheet
- Parchment paper (optional)
- Whisk or spoon
- Oven
Instructions
-
Begin by preheating your oven to 350 degrees Fahrenheit (175 degrees Celsius). This step is crucial for even baking and that perfect golden-brown color.
-
In a mixing bowl, combine the coconut oil (or vegetable oil) and the egg. Ensure the coconut oil is in a softened or melted state for easy mixing. If using vegetable oil, simply pour and proceed. Whisk or mix with a spoon until the mixture is well combined.
-
Next, add the sugar and brown sugar to the oil and egg mixture. Stir vigorously until the sugars are fully incorporated and the mixture is smooth. The brown sugar adds a subtle molasses flavor and chewier texture, so don’t skip it!
-
In a separate bowl (or directly into the wet ingredients), add the flour, baking soda, and salt. The baking soda is essential for giving the cookies their signature rise and airy texture, while the salt balances the sweetness and enhances the flavors.
-
Gradually incorporate the dry ingredients into the wet ingredients, mixing until just combined. Be careful not to overmix the dough, as this can result in tough cookies. A few streaks of flour are perfectly fine at this stage.
-
Now for the best part: fold in the chocolate chips. Ensure they are evenly distributed throughout the dough. You can use any type of chocolate chips you prefer – milk chocolate, dark chocolate, semi-sweet, or even a mix!
-
Prepare your cookie sheet by lining it with parchment paper or lightly greasing it with cooking oil. Parchment paper makes for easy cleanup and prevents the cookies from sticking.
-
Using a spoon or cookie scoop, drop rounded tablespoons of cookie dough onto the prepared cookie sheet, leaving about 2 inches of space between each cookie. This is important because these cookies spread out quite a bit during baking.
-
Warning: These cookies spread significantly while baking! Ensure there is enough space between each cookie and the edge of the cookie sheet to prevent them from merging into one giant cookie.
-
Bake in the preheated oven for 12-14 minutes, or until the edges are golden brown and the centers are still slightly soft. Keep a close eye on them towards the end of the baking time, as ovens can vary.
-
Once baked, remove the cookie sheet from the oven and let the cookies cool on the sheet for a few minutes before transferring them to a wire rack to cool completely. This allows them to firm up slightly and prevents them from breaking.
-
Now it’s time to enjoy your freshly baked, no-butter chocolate chip cookies! Serve them warm with a tall glass of milk for the ultimate treat.
Expert Tips & Tricks
- Chill the dough: For thicker, chewier cookies, chill the dough in the refrigerator for at least 30 minutes before baking. This allows the gluten to relax and the flavors to meld together.
- Use room temperature egg: Using an egg at room temperature helps it incorporate more evenly into the dough, resulting in a smoother batter.
- Don’t overbake: Overbaking will result in dry, crumbly cookies. The cookies should be slightly soft in the center when you remove them from the oven, as they will continue to bake on the hot cookie sheet.
- Salted Butter Substitute: If you’re missing that je ne sais quoi from regular butter, consider adding a pinch of sea salt on top of each cookie right after they come out of the oven to give it that little extra somethin’.
Serving & Storage Suggestions
These cookies are best served warm, fresh from the oven, and are absolutely divine with a glass of cold milk or a scoop of vanilla ice cream. Store leftover cookies in an airtight container at room temperature for up to 3 days. You can also freeze them for longer storage – simply wrap them individually in plastic wrap and store them in a freezer bag for up to 2 months. To reheat frozen cookies, thaw them at room temperature or warm them in a low oven.
Nutritional Information
Note: Nutritional information is an estimate and may vary based on specific ingredients and portion sizes.
| Nutrient | Amount per Serving | % Daily Value |
|---|---|---|
| Calories | 516 kcal | N/A |
| Calories from Fat | 249 g | 48% |
| Total Fat | 27.7 g | 42% |
| Saturated Fat | 21 g | 104% |
| Cholesterol | 31 mg | 10% |
| Sodium | 220.1 mg | 9% |
| Total Carbohydrate | 67.5 g | 22% |
| Dietary Fiber | 2.5 g | 10% |
| Sugars | 40.9 g | N/A |
| Protein | 5.5 g | 10% |
Variations & Substitutions
- Dairy-Free: For a completely dairy-free version, use dairy-free chocolate chips and ensure your vegetable or coconut oil is a dairy-free brand.
- Nutty: Add ½ cup of chopped nuts, such as walnuts, pecans, or almonds, to the dough for added flavor and texture.
- Spice it Up: Add ½ teaspoon of ground cinnamon or nutmeg to the dry ingredients for a warm, spiced flavor.
- Oatmeal Chocolate Chip: Substitute ½ cup of the flour with ½ cup of rolled oats for a heartier cookie.
- Citrus Zest: For a brighter flavor, add the zest of one orange or lemon to the dough.
FAQs (Frequently Asked Questions)
Q: Can I use butter instead of coconut oil or vegetable oil?
A: Yes, you can substitute the oil with ½ cup of softened butter. However, the texture and flavor will be slightly different.
Q: Why are my cookies flat?
A: Flat cookies can be caused by using too much oil, not chilling the dough, or using old baking soda.
Q: Can I use different types of sugar?
A: You can experiment with different types of sugar, such as granulated sugar, brown sugar, or coconut sugar. However, the texture and flavor of the cookies will vary.
Q: How do I know when the cookies are done?
A: The cookies are done when the edges are golden brown and the centers are still slightly soft. They will continue to bake on the hot cookie sheet after you remove them from the oven.
Q: Can I freeze the cookie dough?
A: Yes, you can freeze the cookie dough for up to 2 months. Simply scoop the dough into individual balls and freeze them on a baking sheet before transferring them to a freezer bag. Bake from frozen, adding a few minutes to the baking time.
Final Thoughts
Don’t be afraid to experiment and make this recipe your own! Whether you’re looking for a healthier alternative to traditional chocolate chip cookies or simply want to try something new, this no-butter version is sure to impress. The subtle flavor of the coconut or vegetable oil allows the chocolate chips to really shine, creating a truly irresistible treat. So go ahead, preheat your oven, gather your ingredients, and bake up a batch of these delicious cookies. I guarantee they’ll disappear in no time! And, be sure to share your baking success (or funny mishaps!) with me. Happy baking!