
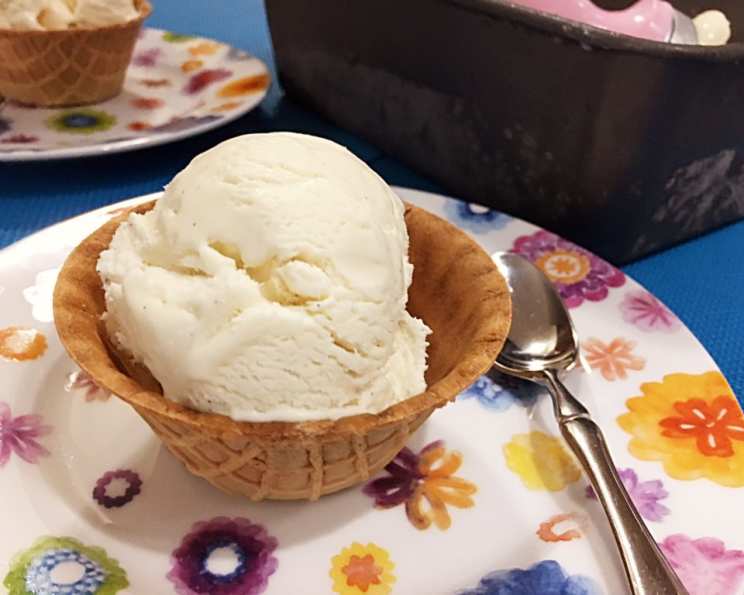
No-Churn Vanilla Bean Ice Cream: A Taste of Childhood Summers
I remember my grandmother’s ice cream maker, a behemoth of wood and metal that seemed to take up half the kitchen counter. The anticipation of turning the crank, the rhythmic slush of ice and salt, and the final, glorious taste of homemade vanilla ice cream are summer memories etched in my heart. While I cherish those memories, this no-churn vanilla bean ice cream offers all the classic flavor with a fraction of the effort, letting you spend more time enjoying the sunshine and less time chained to the kitchen.
Recipe Overview
- Prep Time: 15 minutes
- Freeze Time: 5-7 hours
- Total Time: 5 hours 15 minutes
- Yields: 2 liters
- Dietary Type: Vegetarian
Ingredients
- 1 (14 ounce) can sweetened condensed milk
- 1 teaspoon pure vanilla extract
- 1 large vanilla bean, seeds scraped
- Pinch of fine salt
- 2 cups heavy cream
Equipment Needed
- Mixing bowl
- Stand mixer (or hand mixer)
- Whisk attachment (if using a stand mixer)
- Rubber spatula
- 9 x 5 x 3 inch metal loaf pan
- Plastic wrap or wax paper
Instructions
-
In a mixing bowl, combine the sweetened condensed milk, pure vanilla extract, vanilla bean seeds, and a pinch of salt. Stir these ingredients together thoroughly until well combined and set the mixture aside. This fragrant base will form the foundation of your delicious ice cream.
-
Place the heavy cream into the chilled bowl of a stand mixer fitted with the chilled whisk attachment. If you don’t have a stand mixer, a hand mixer and a large mixing bowl will work just fine. Chilling the bowl and whisk attachment is crucial for helping the cream whip up quickly and achieve the desired stiff peaks.
-
Begin to whip the heavy cream on medium speed, gradually increasing the speed as the cream thickens. Continue to process until stiff peaks form. Stiff peaks are achieved when you lift the whisk, and the cream holds its shape without immediately collapsing. Be careful not to overwhip, or you will end up with butter!
-
Scoop about half of the whipped cream into the bowl with the sweetened condensed milk mixture. Gently fold the whipped cream into the sweetened condensed milk mixture using a rubber spatula. Folding is essential to avoid deflating the whipped cream, which would result in a dense ice cream.
-
Pour the combined sweetened condensed milk and whipped cream mixture into the remaining whipped cream in the stand mixer bowl (or the bowl you used to whip the cream). Gently fold the two mixtures together until they are thoroughly blended and homogenous. Again, be gentle! You want to maintain as much air as possible in the mixture for a light and airy ice cream.
-
Pour the finished ice cream mixture into a chilled 9 x 5 x 3 inch metal loaf pan. A chilled pan will help the ice cream freeze more evenly.
-
Cover the loaf pan tightly with plastic wrap, pressing the plastic wrap directly onto the surface of the ice cream to prevent ice crystals from forming. Alternatively, you can use wax paper.
-
Transfer the loaf pan to the freezer and freeze for at least 5 to 7 hours, or preferably overnight. This allows the ice cream to fully set and develop its creamy texture.
Expert Tips & Tricks
-
Chill Everything: Chilling your mixing bowl, whisk attachment, and even the loaf pan beforehand makes a significant difference in the texture of your ice cream. Colder equipment helps the cream whip up faster and prevents the ice cream from melting too quickly during the mixing process.
-
Don’t Overwhip: Overwhipping the heavy cream will result in butter. Aim for stiff peaks that hold their shape without being grainy.
-
Gentle Folding: When combining the whipped cream and sweetened condensed milk mixture, use a gentle folding motion to avoid deflating the cream. This will ensure a light and airy ice cream texture.
-
Prevent Ice Crystals: Pressing plastic wrap directly onto the surface of the ice cream before freezing prevents ice crystals from forming.
-
Infuse the Cream (for Extra Vanilla Flavor): For an even more intense vanilla flavor, you can infuse the heavy cream with the vanilla bean before whipping it. Simply heat the cream with the scraped vanilla bean seeds and the pod over low heat until just simmering. Remove from heat, let steep for 30 minutes, then chill completely before whipping. Remember to remove the pod before whipping.
-
Add a Little Booze: A tablespoon or two of vodka or other clear spirit can help prevent the ice cream from freezing too hard. The alcohol lowers the freezing point and keeps the ice cream scoopable.
Serving & Storage Suggestions
Let the ice cream sit at room temperature for about 5-10 minutes before scooping to soften it slightly. Serve it in bowls or cones, topped with your favorite toppings like fresh fruit, chocolate sauce, sprinkles, or chopped nuts.
Store leftover ice cream in the freezer in an airtight container for up to 2 weeks. After that, the texture may start to deteriorate. It’s best enjoyed sooner rather than later!
Nutritional Information
(Estimated values per serving, based on 8 servings)
| Nutrient | Amount per Serving | % Daily Value |
|---|---|---|
| Calories | 366 kcal | 18% |
| Total Fat | 29g | 45% |
| Saturated Fat | 18g | 90% |
| Cholesterol | 98mg | 33% |
| Sodium | 50mg | 2% |
| Carbohydrates | 21g | 7% |
| Fiber | 0g | 0% |
| Sugar | 20g | N/A |
| Protein | 3g | 6% |
Note: Nutritional information is an estimate and may vary based on specific ingredients and portion sizes.
Variations & Substitutions
- Chocolate Chip Cookie Dough: Fold in chunks of your favorite cookie dough before freezing.
- Strawberry Swirl: Swirl in strawberry jam or a homemade strawberry puree.
- Mint Chocolate Chip: Add a few drops of peppermint extract and some chocolate chips.
- Coffee Ice Cream: Add a tablespoon or two of instant espresso powder to the sweetened condensed milk mixture.
- Salted Caramel: Swirl in a homemade salted caramel sauce.
- Dairy-Free: While this recipe relies on dairy, experiment with full-fat coconut cream (the solid part from a chilled can) whipped in a similar fashion to the heavy cream. The condensed milk would need to be replaced with a sweetened condensed coconut milk alternative if available, or a homemade substitute using coconut milk and sweetener. Note that the texture and flavor will be different.
FAQs (Frequently Asked Questions)
Q: Why is my ice cream grainy?
A: Grainy ice cream is usually caused by ice crystals forming. Ensure you cover the ice cream tightly with plastic wrap, pressing it directly onto the surface, before freezing. Avoid temperature fluctuations in the freezer.
Q: Can I use a different type of milk?
A: This recipe relies on the high fat content of heavy cream for its creamy texture. Using milk will result in a much icier ice cream.
Q: Do I have to use a vanilla bean?
A: While the vanilla bean provides the most intense vanilla flavor, you can use 2 teaspoons of pure vanilla extract instead.
Q: How long does this ice cream last in the freezer?
A: Properly stored in an airtight container, this ice cream will last for up to 2 weeks in the freezer.
Q: My ice cream is too hard to scoop. What can I do?
A: Let the ice cream sit at room temperature for about 5-10 minutes before scooping to soften it slightly. You can also run your ice cream scoop under warm water for easier scooping.
Final Thoughts
This no-churn vanilla bean ice cream is a testament to the fact that you don’t need fancy equipment or complicated techniques to create a truly exceptional dessert. It’s a simple recipe that yields a rich, creamy, and utterly delicious treat perfect for any occasion. So go ahead, give it a try, and share your creations with friends and family. I guarantee it will bring a smile to their faces – and yours! Consider pairing this ice cream with a warm slice of apple pie or a fudgy brownie for the ultimate dessert experience. Enjoy!