
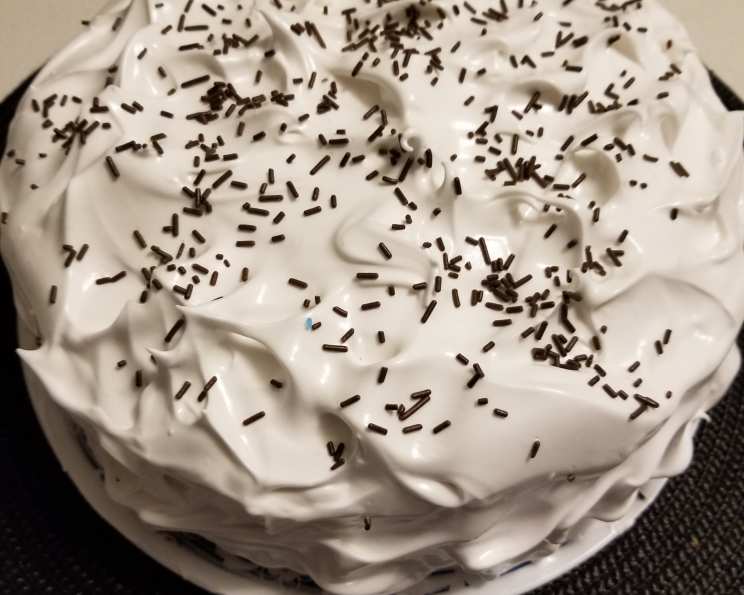
The Magic of No-Cook Boiled Icing: A Timeless Classic
I still remember being a young, aspiring baker, intimidated by the prospect of making a perfectly smooth, glossy icing. I would spend hours watching my grandmother effortlessly whip up frostings that seemed to defy gravity. One day, she let me in on a secret: a no-cook “boiled” icing recipe, passed down through generations, that required no actual boiling at all! It was a revelation – a simple, foolproof method that yielded the same beautiful results. It felt like unlocking a culinary treasure, and to this day, it remains one of my most cherished and reliable frosting recipes.
Recipe Overview
- Prep Time: 5 minutes
- Cook Time: 0 minutes
- Total Time: 5 minutes
- Servings: Varies depending on use
- Yield: Enough for a large angel or chiffon cake
- Dietary Type: Not specified
Ingredients
- 1 cup white sugar
- 1 unbeaten egg white
- 1 teaspoon vanilla
- ¼ teaspoon cream of tartar
- ½ cup boiling water
Equipment Needed
- Mixing bowl
- Electric mixer (handheld or stand mixer)
- Measuring cups and spoons
Instructions
-
In a mixing bowl, combine the white sugar, unbeaten egg white, vanilla, and cream of tartar.
-
Gradually add the boiling water to the mixture while simultaneously beating with an electric mixer. Start on a low speed to prevent splashing, then increase the speed to medium-high.
-
Continue to beat the icing until it becomes stiff enough to frost a cake. The icing should hold its shape and form firm peaks when the beaters are lifted. This typically takes several minutes of beating.
-
Once the icing reaches the desired consistency, it is ready to use. Frost your cake or cupcakes immediately.
Expert Tips & Tricks
- The Importance of Stiff Peaks: Achieving stiff peaks is crucial for this icing. If the icing is too thin, continue beating for a longer period. Don’t be afraid to let the mixer run for a few extra minutes.
- Egg White Safety: While this recipe has been used for generations, some may be concerned about using an unbeaten egg white. Pasteurized egg whites can be used as a safer alternative. They are readily available in most grocery stores.
- Vanilla Quality: Using a high-quality vanilla extract will make a noticeable difference in the final flavor of the icing. Opt for pure vanilla extract rather than imitation vanilla.
- Preventing Graininess: To ensure a smooth icing, make sure the sugar is fully dissolved. The boiling water helps, but continue beating until no sugar granules remain.
- Adjusting Consistency: If the icing becomes too stiff, add a very small amount of water (a teaspoon at a time) and beat until it reaches the desired consistency.
- Troubleshooting Runny Icing: If your icing is too runny even after extended beating, try adding a tiny pinch more cream of tartar. This helps stabilize the egg whites.
- Temperature Matters: The boiling water is key to creating the right texture. Make sure it’s truly boiling when you add it to the other ingredients.
- Coloring the Icing: You can easily add food coloring to this icing. Gel food coloring is preferred as it is more concentrated and won’t thin the icing as much as liquid food coloring. Add color gradually, mixing well after each addition until you achieve the desired shade.
- Flavor Variations: Experiment with different extracts. Almond extract, lemon extract, or even a dash of peppermint extract can add unique flavor profiles.
Serving & Storage Suggestions
This no-cook boiled icing is best used immediately after it’s made. It provides a beautiful, glossy finish to cakes, cupcakes, and even cookies.
- Serving: Apply the icing generously to your baked goods using a spatula or piping bag. For a smooth finish, dip a spatula in warm water and gently smooth the surface of the icing.
- Storage: Leftover icing can be stored in an airtight container in the refrigerator for up to 24 hours. However, it’s important to note that the texture may change slightly upon refrigeration. It might become a little less glossy or slightly more watery.
- Re-whipping: If the icing separates or becomes too thin after refrigeration, you can try re-whipping it with an electric mixer before using it. However, the results may vary. For best results, use the icing fresh.
- Not suitable for freezing: This icing is not recommended for freezing, as the texture will significantly degrade upon thawing.
Nutritional Information
Please note that the nutritional information is an estimate and can vary based on specific ingredients and serving size.
| Nutrient | Amount per Serving | % Daily Value |
|---|---|---|
| Calories | 67 kcal | 3% |
| Total Fat | 0g | 0% |
| Saturated Fat | 0g | 0% |
| Cholesterol | 0mg | 0% |
| Sodium | 5mg | 0% |
| Total Carbohydrate | 17g | 6% |
| Dietary Fiber | 0g | 0% |
| Sugars | 17g | 66% |
| Protein | 0g | 0% |
Variations & Substitutions
- Lemon Icing: Substitute the vanilla extract with 1 teaspoon of lemon extract and add 1 tablespoon of lemon juice for a bright, citrusy flavor.
- Chocolate Icing: Add 2 tablespoons of unsweetened cocoa powder to the mixture along with the other ingredients. You may need to add a tiny bit more boiling water to achieve the desired consistency.
- Peppermint Icing: Use ½ teaspoon of peppermint extract instead of vanilla for a festive holiday flavor.
- Almond Icing: Substitute the vanilla extract with 1 teaspoon of almond extract.
- Maple Icing: Use maple extract instead of vanilla extract, and consider adding a tablespoon of maple syrup.
- For a Vegan Version: I would not recommend this recipe for a vegan version. The egg white is essential for its structure.
FAQs (Frequently Asked Questions)
Q: Why is my icing not getting stiff?
A: The most common reason for icing not getting stiff is not beating it long enough. Keep beating it, even if it seems like it will never thicken. Also, make sure your mixing bowl and beaters are clean and free of any grease.
Q: Can I use cold water instead of boiling water?
A: No, using boiling water is crucial for this recipe. The boiling water partially cooks the egg white and helps create the desired texture.
Q: Can I make this icing ahead of time?
A: It’s best to use this icing immediately after making it. While you can store it in the refrigerator for a short period, the texture may change.
Q: Can I double or triple this recipe?
A: Yes, you can easily double or triple this recipe. Just make sure to adjust the ingredient quantities accordingly.
Q: How do I know when the icing is ready?
A: The icing is ready when it forms stiff, glossy peaks when you lift the beaters from the bowl. It should be thick enough to hold its shape.
Final Thoughts
This no-cook boiled icing recipe is a testament to the fact that sometimes, the simplest techniques yield the most impressive results. It’s a reliable, fuss-free method for creating a beautiful and delicious frosting that’s perfect for any occasion. So, go ahead, give it a try! You might just find yourself unlocking a new favorite in your own baking journey. Don’t hesitate to share your creations and any variations you come up with – I’d love to hear about your experience! This icing pairs wonderfully with a classic vanilla cake or a batch of freshly baked cupcakes. Enjoy!