
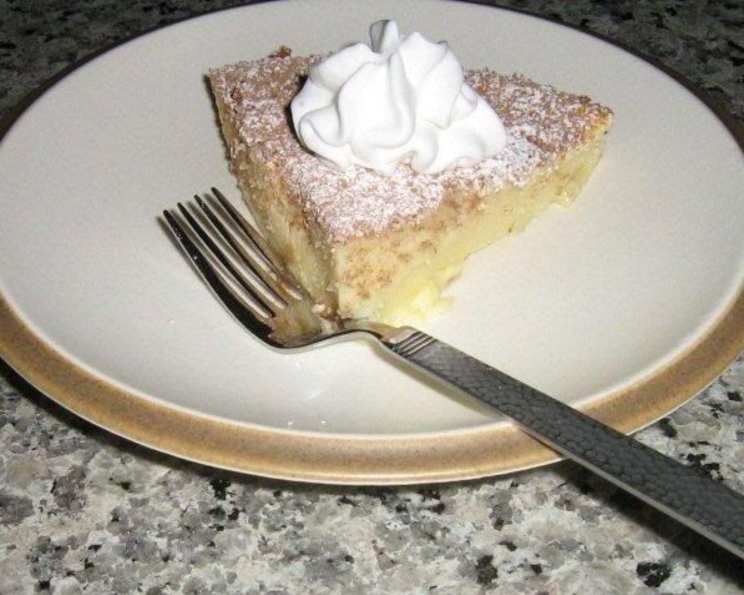
No-Crust Buttermilk Pie: A Southern Classic
The memory is etched in my mind: sitting at my grandmother’s worn kitchen table, the scent of vanilla and warm butter filling the air. It was one of those sweltering summer afternoons in South Carolina, and she had just pulled a pie from her ancient oven. No fancy lattice work, no elaborate decorations, just a simple, golden-brown disc of pure comfort. That was the first time I tasted No-Crust Buttermilk Pie, and it has been a beloved taste of home ever since. The simplicity of the recipe belies the incredible flavor – a creamy, tangy sweetness that’s impossible to resist. This pie embodies the best of Southern baking: unfussy, delicious, and made with love.
Recipe Overview
- Prep Time: 10 minutes
- Cook Time: 45 minutes
- Total Time: 55 minutes
- Servings: 8
- Yield: 1 pie
- Dietary Type: Vegetarian
Ingredients
- 1 cup buttermilk
- ½ cup Bisquick
- 1 ½ cups sugar
- ⅓ cup real butter, melted
- 1 teaspoon vanilla extract
- 3 large eggs
Equipment Needed
- Blender
- Measuring cups and spoons
- Un-greased Pyrex pie plate (9-inch)
- Oven
- Knife or cake tester
- Cooling rack (optional)
Instructions
-
Preheat your oven to 350 degrees Fahrenheit (175 degrees Celsius). This consistent temperature is crucial for even baking.
-
Combine all ingredients in a blender. Start with the liquids – buttermilk, melted butter, and vanilla – then add the eggs, sugar, and finally the Bisquick. Adding the Bisquick last will help prevent clumping.
-
Blend on medium speed until the mixture is completely smooth and well combined. Ensure there are no lumps of Bisquick remaining. This usually takes about 30-60 seconds.
-
Pour the batter directly into an un-greased 9-inch Pyrex pie plate. The absence of a crust means it’s essential to use a material like Pyrex, which distributes heat evenly and helps prevent sticking.
-
Bake in the preheated oven for 45 minutes, or until a knife inserted into the center comes out clean. The edges should be set and lightly golden brown, while the center might still have a slight jiggle. Don’t worry, it will firm up as it cools.
-
Cool completely on a wire rack before slicing and serving. This allows the pie to fully set and prevents it from being too runny. Resist the urge to cut into it while it’s still warm!
Expert Tips & Tricks
-
Melted Butter is Key: Using melted butter, as opposed to softened butter, ensures that the fat is evenly distributed throughout the batter, contributing to a smoother, richer texture.
-
Prevent Burning: If the edges of the pie start to brown too quickly during baking, you can loosely cover the pie with foil for the remaining bake time.
-
Checking for Doneness: Because this pie has no crust, it’s important to test for doneness carefully. A slight jiggle in the very center is acceptable, but the pie should be mostly set. Overbaking will result in a dry, crumbly texture.
-
Blender Alternatives: If you don’t have a blender, you can use a stand mixer or whisk vigorously by hand. Ensure all ingredients are fully incorporated and no lumps remain.
-
Flavor Boost: For a deeper, richer flavor, try browning the butter before adding it to the batter. Be careful not to burn it; you want a nutty aroma, not a burnt taste.
Serving & Storage Suggestions
This No-Crust Buttermilk Pie is best served chilled or at room temperature. A dusting of powdered sugar or a dollop of whipped cream adds an elegant touch. It pairs wonderfully with fresh berries, a scoop of vanilla ice cream, or a drizzle of caramel sauce.
Leftovers can be stored in the refrigerator for up to 3-4 days, covered tightly with plastic wrap or in an airtight container. While freezing is not recommended due to potential changes in texture, the pie will retain its flavor and moistness for several days when properly refrigerated. The flavor actually develops more overnight!
Nutritional Information
| Nutrient | Amount per Serving | % Daily Value |
|---|---|---|
| Calories | 288 kcal | 14% |
| Total Fat | 11g | 17% |
| Saturated Fat | 6g | 30% |
| Cholesterol | 92mg | 31% |
| Sodium | 208mg | 9% |
| Total Carbohydrate | 44g | 15% |
| Dietary Fiber | 0g | 0% |
| Sugars | 40g | – |
| Protein | 4g | 8% |
Note: Nutritional information is an estimate and may vary based on specific ingredients and preparation methods.
Variations & Substitutions
-
Lemon Buttermilk Pie: Add the zest of one lemon to the batter for a bright, citrusy flavor.
-
Coconut Buttermilk Pie: Substitute ½ cup of the buttermilk with coconut milk and add ¼ cup of shredded coconut to the batter.
-
Spiced Buttermilk Pie: Add ½ teaspoon of ground cinnamon and ¼ teaspoon of ground nutmeg to the batter for a warm, comforting spice profile.
-
Gluten-Free Option: While the original recipe calls for Bisquick, which contains gluten, you can substitute it with a gluten-free baking mix. Ensure the mix is a 1:1 replacement for all-purpose flour.
-
Vanilla Bean: For an intense vanilla flavour, substitute the vanilla extract with the seeds of one vanilla bean.
FAQs (Frequently Asked Questions):
Q: Why is it called “No-Crust” Buttermilk Pie?
A: Because the recipe deliberately omits the traditional pie crust, offering a creamy filling baked directly in a pie plate.
Q: Can I use regular milk instead of buttermilk?
A: While you can, buttermilk’s acidity gives the pie a characteristic tang and helps to tenderize the filling. If you must substitute, add a tablespoon of lemon juice or vinegar to regular milk and let it sit for 5 minutes before using.
Q: How do I know when the pie is done baking?
A: A knife inserted into the center should come out clean, although a slight jiggle in the very center is acceptable as it will set further as it cools.
Q: Why did my pie crack on top?
A: Cracking can occur if the oven temperature is too high or if the pie is overbaked. Ensure accurate oven temperature and avoid overbaking.
Q: Can I add fruit to this pie?
A: Yes! Berries, sliced peaches, or apples can be added to the batter before baking. Adjust baking time as needed, depending on the moisture content of the fruit.
Final Thoughts
This No-Crust Buttermilk Pie is a reminder that the simplest things in life are often the most satisfying. With just a handful of ingredients and minimal effort, you can create a dessert that’s bursting with flavor and evokes memories of Southern hospitality. Whether you’re a seasoned baker or a novice in the kitchen, I encourage you to give this recipe a try. Share it with your loved ones, gather around the table, and savor the taste of pure comfort. Don’t be afraid to experiment with variations and make it your own. And most importantly, enjoy the process of creating something delicious!