
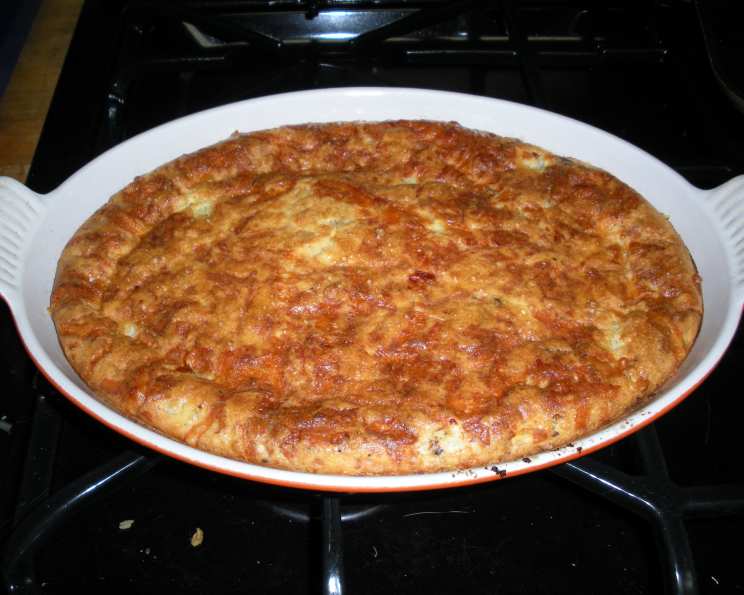
The Ultimate No-Crust Quiche: Effortless Elegance
My earliest food memories often revolve around the comforting aroma of my mother’s cooking. While she wasn’t a classically trained chef, she had an uncanny knack for transforming simple ingredients into memorable meals. This no-crust quiche, a dish she often made, evokes those feelings of home. I can almost see her now, humming along to the radio as she crisped the bacon to perfection, the savory scent filling our cozy kitchen. It’s a testament to how truly great food doesn’t need to be complicated – it just needs to be made with love.
Recipe Overview
- Prep Time: 15 minutes
- Cook Time: 40 minutes
- Total Time: 55 minutes
- Servings: 6
- Yield: 1 pie
- Dietary Type: Gluten-Free (if using certified gluten-free Bisquick or alternative)
Ingredients
- ½ lb sliced bacon
- 1 cup shredded Swiss cheese
- ⅓ cup chopped onion
- 2 cups milk
- 1 cup Bisquick
- 4 eggs
- ¼ teaspoon salt
- ⅛ teaspoon pepper
Equipment Needed
- Oven
- Frying pan
- 9-inch pie plate
- Whisk
- Mixing bowl
- Knife
Instructions
-
Preheat your oven to 400 degrees Fahrenheit. Ensuring a consistent oven temperature is key to even cooking. If your oven tends to run hot or cold, adjust accordingly.
-
In a frying pan over medium heat, cook the bacon until it is almost burnt and incredibly crispy. The key here is almost burnt – that extra level of crispness infuses the quiche with incredible smoky flavor. Be careful not to actually burn it, or the flavor will be bitter.
-
Remove the bacon from the pan and place it on a paper towel-lined plate to drain excess grease. Once cooled slightly, crush the bacon into small pieces. You can do this with your hands, a fork, or even by pulsing it briefly in a food processor.
-
Lightly grease a 9-inch pie plate with butter. This will prevent the quiche from sticking and make it easier to remove after baking. Alternatively, you can use cooking spray.
-
Sprinkle the crushed bacon, shredded Swiss cheese, and chopped onion evenly across the bottom of the prepared pie plate. Distributing the ingredients evenly ensures every bite is packed with flavor.
-
Optional: For an extra boost of bacon flavor, carefully drizzle a small amount of the reserved bacon fat (from the frying pan) over the ingredients in the pie plate. Use caution, as too much fat can make the quiche greasy.
-
In a large mixing bowl, whisk together the milk, Bisquick, eggs, salt, and pepper until smooth. Be sure to break up any lumps of Bisquick to ensure a uniform batter. An immersion blender can also be used for this step.
-
Pour the Bisquick mixture evenly into the pie plate, over the bacon, cheese, and onion. Distribute the liquid evenly to ensure that all the ingredients are properly suspended.
-
Bake in the preheated oven for approximately 40 minutes, or until the top is golden brown and a knife inserted into the center comes out clean. The baking time may vary depending on your oven. Start checking for doneness around 35 minutes. If the top is browning too quickly, you can loosely tent the quiche with aluminum foil.
-
Remove the quiche from the oven and let it stand for 5 minutes before cutting and serving. This allows the quiche to set slightly, making it easier to slice.
Expert Tips & Tricks
- Cheese Choice: While Swiss cheese is traditional, feel free to experiment with other cheeses like Gruyere, cheddar, or even a blend of Italian cheeses.
- Vegetable Variations: Add sauteed mushrooms, spinach, bell peppers, or asparagus to the quiche for added nutrients and flavor. Just be sure to sauté them beforehand to remove excess moisture.
- Spice it Up: A pinch of red pepper flakes can add a subtle kick to the quiche.
- Make Ahead: This quiche can be assembled ahead of time and stored in the refrigerator for up to 24 hours before baking.
- Prevent a Soggy Bottom: Baking the bacon first and draining any excess fat is crucial to preventing a soggy quiche.
- Gluten-Free Option: Replace regular Bisquick with a gluten-free blend to make this recipe suitable for those with gluten sensitivities. Be sure the blend is a 1:1 substitute.
Serving & Storage Suggestions
Serve the no-crust quiche warm or at room temperature. It’s delicious on its own, but also pairs well with a side salad, fresh fruit, or a cup of soup.
- Storage: Leftover quiche can be stored in the refrigerator for up to 3 days. Cover tightly with plastic wrap or store in an airtight container.
- Reheating: Reheat individual slices in the microwave, oven, or toaster oven until warmed through.
- Freezing: For longer storage, you can freeze the quiche. Allow it to cool completely, then wrap it tightly in plastic wrap and foil. Freeze for up to 2 months. Thaw overnight in the refrigerator before reheating.
Nutritional Information
| Nutrient | Amount per Serving | % Daily Value |
|---|---|---|
| Calories | 648.3 kcal | N/A |
| Calories from Fat | 424 g | 65% |
| Total Fat | 47.1 g | 72% |
| Saturated Fat | 18.8 g | 94% |
| Cholesterol | 292.6 mg | 97% |
| Sodium | 1182.9 mg | 49% |
| Total Carbohydrate | 28.3 g | 9% |
| Dietary Fiber | 0.8 g | 3% |
| Sugars | 4.8 g | 19% |
| Protein | 26.7 g | 53% |
Note: Nutritional information is an estimate and may vary based on specific ingredients and portion sizes.
Variations & Substitutions
- Vegetarian Option: Omit the bacon and add more vegetables, such as sauteed mushrooms, spinach, or bell peppers.
- Dairy-Free: Substitute the milk with unsweetened almond milk or soy milk. Use a dairy-free shredded cheese alternative.
- Spicy Quiche: Add a pinch of cayenne pepper or a dash of hot sauce to the Bisquick mixture.
- Herbed Quiche: Add fresh herbs like thyme, rosemary, or chives to the Bisquick mixture for a more aromatic flavor.
- Crust Addition: While this is a “no-crust” recipe, you can easily add a pre-made pie crust if desired. Simply press the crust into the pie plate before adding the filling.
FAQs (Frequently Asked Questions)
Q: Can I use a different type of cheese?
A: Absolutely! Feel free to experiment with your favorite cheeses, such as cheddar, Gruyere, or Monterey Jack. Just be sure to shred the cheese before adding it to the pie plate.
Q: Can I add vegetables to this quiche?
A: Yes, you can! Sauté your favorite vegetables, such as onions, mushrooms, spinach, or bell peppers, and add them to the pie plate along with the bacon and cheese.
Q: How do I know when the quiche is done?
A: The quiche is done when the top is golden brown and a knife inserted into the center comes out clean. If the top is browning too quickly, you can loosely tent it with aluminum foil.
Q: Can I make this quiche ahead of time?
A: Yes, you can assemble the quiche ahead of time and store it in the refrigerator for up to 24 hours before baking.
Q: Can I freeze this quiche?
A: Yes, you can freeze the quiche for up to 2 months. Allow it to cool completely, then wrap it tightly in plastic wrap and foil. Thaw overnight in the refrigerator before reheating.
Final Thoughts
This no-crust quiche is more than just a recipe; it’s an invitation to create your own memories in the kitchen. It’s a dish that’s both elegant and approachable, perfect for a weekend brunch, a light lunch, or even a simple weeknight dinner. So, gather your ingredients, preheat your oven, and let the aroma of crispy bacon and cheesy goodness fill your home. I encourage you to put your own twist on this recipe and share your creations with loved ones. And don’t hesitate to let me know what you think! Perhaps serve it with a crisp glass of Sauvignon Blanc – you won’t be disappointed.