
The Unbelievably Easy No-Crust Ricotta Cheesecake
I still remember the first time I tasted a truly authentic Italian ricotta cheesecake. It was at a small trattoria nestled in the hills of Tuscany, the kind of place where Nonna still reigns supreme in the kitchen. I had expected something dense and heavy, like the New York cheesecake I was used to. Instead, I was greeted with a cloud-like texture, a delicate sweetness, and a subtle hint of lemon that danced on my tongue. It was so light, so airy, and so unexpectedly delicious. This no-crust ricotta cheesecake recipe captures that same magic, bringing a touch of Italian sunshine to your kitchen.
Recipe Overview
- Prep Time: 20 minutes
- Cook Time: 1 hour 20 minutes
- Total Time: 1 hour 40 minutes (plus chilling)
- Servings: 8-10
- Yield: 1 cheesecake
- Dietary Type: Gluten-Free
Ingredients
- 2 (15 ounce) containers whole milk ricotta cheese
- 6 large eggs, at room temperature, separated
- 2/3 cup granulated sugar
- 2 teaspoons pure vanilla extract
- 2 teaspoons grated lemon zest
- 1/2 teaspoon ground cinnamon
- 1 pinch ground nutmeg
- Confectioners’ sugar, for dusting (optional)
Equipment Needed
- 9-inch springform pan
- Cooking spray
- Strainer
- Large mixing bowls
- Electric mixer with whisk attachment
- Rubber spatula
- Baking sheet
- Wire rack
- Paring knife
- Plastic wrap
Instructions
- Begin by preheating your oven to 325 degrees Fahrenheit (160 degrees Celsius). This lower temperature ensures a gentle bake, preventing the cheesecake from cracking.
- Prepare your 9-inch springform pan by thoroughly coating the inside with cooking spray. This will prevent the cheesecake from sticking and make removal much easier.
- Next, address the ricotta cheese. Place it in a strainer set over a bowl. Let it stand for 15 minutes, stirring occasionally, to drain off any excess moisture. This step is crucial for achieving the perfect light and airy texture.
- In a large mixing bowl, place the egg whites. Using an electric mixer fitted with a whisk attachment, beat on high speed until the whites just hold stiff peaks. Be cautious not to overwhip; the whites should appear smooth and glossy, not grainy or dry. Overwhipped egg whites will result in a dry, crumbly cheesecake.
- In another large mixing bowl, combine the egg yolks and granulated sugar. Beat on high speed until the mixture is pale yellow and thickened, about 5 minutes. This step incorporates air and creates a stable base for the cheesecake.
- To the yolk mixture, add the ricotta cheese, vanilla extract, lemon zest, cinnamon, and nutmeg. Stir until just combined. Be careful not to overmix at this stage, as it can deflate the mixture.
- Gently fold the egg whites into the ricotta mixture using a rubber spatula. Fold in thirds, being careful to not deflate the egg whites. This should be done in a gentle, circular motion, lifting the mixture from the bottom and folding it over the top until just combined. A few streaks of egg white are fine.
- Place the prepared springform pan on a baking sheet. This will make it easier to transfer the cheesecake to and from the oven, and will also protect the bottom of the cheesecake from direct heat.
- Pour the filling into the prepared springform pan.
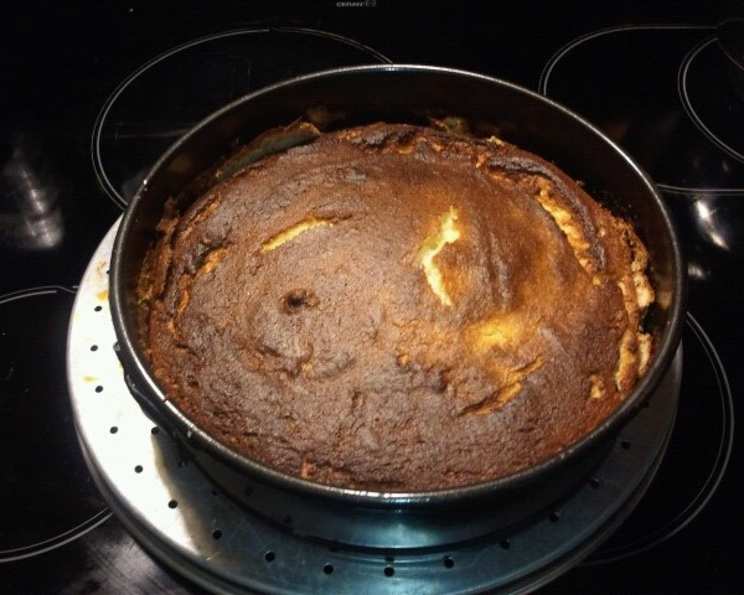
- Bake the cheesecake until it is deep golden brown and pulling away from the sides of the pan, about 1 hour and 20 minutes. Start checking around the 1-hour mark. The center may still have a slight wobble, which is perfectly normal.
- As soon as the cake is out of the oven, run a sharp paring knife around the edge of the pan to separate the cheesecake from the sides. This will prevent cracking as the cheesecake cools and contracts.
- Transfer the pan to a wire rack and let the cheesecake cool completely. This is a crucial step. Don’t be tempted to cut into it while it’s still warm.
- Once cooled, cover the cheesecake with plastic wrap and refrigerate it until serving, at least 6 hours and up to 1 day. Chilling allows the cheesecake to fully set and develop its flavors.
- Before serving, remove the sides of the pan and dust with confectioners’ sugar, if desired.
Expert Tips & Tricks
- Room Temperature Eggs: Using room temperature eggs is essential for achieving maximum volume when whipping the egg whites and for creating a smooth, emulsified batter. If you forgot to take your eggs out of the refrigerator in advance, you can quickly warm them by placing them in a bowl of warm (not hot) water for about 10 minutes.
- Water Bath (Optional): For an even more decadent and crack-free cheesecake, consider baking it in a water bath. Wrap the bottom of the springform pan tightly in aluminum foil and place it in a larger roasting pan. Pour hot water into the roasting pan until it reaches about halfway up the sides of the springform pan.
- Lemon Infusion: For an extra burst of lemony flavor, you can infuse the sugar with lemon zest. Simply combine the granulated sugar and lemon zest in a sealed container a day or two before baking, allowing the sugar to absorb the citrus oils.
- Don’t Overbake: Overbaking is the enemy of a creamy cheesecake. It’s better to err on the side of slightly underbaked rather than overbaked. The cheesecake will continue to set as it cools.
Serving & Storage Suggestions
This no-crust ricotta cheesecake is best served chilled. A light dusting of confectioners’ sugar just before serving adds a touch of elegance. It pairs beautifully with fresh berries, such as strawberries, raspberries, or blueberries. A drizzle of honey or a dollop of whipped cream are also delightful accompaniments.
Leftovers can be stored in the refrigerator for up to 3-4 days. Cover the cheesecake tightly with plastic wrap or place it in an airtight container. While freezing is not recommended due to potential texture changes, you can freeze individual slices for up to a month. Thaw them in the refrigerator overnight before serving.
Nutritional Information
| Nutrient | Amount per Serving | % Daily Value |
|---|---|---|
| Calories | 307 kcal | N/A |
| Calories from Fat | 156 g | 51% |
| Total Fat | 17.4 g | 26% |
| Saturated Fat | 10 g | 50% |
| Cholesterol | 193.7 mg | 64% |
| Sodium | 142.9 mg | 5% |
| Total Carbohydrate | 20.5 g | 6% |
| Dietary Fiber | 0.1 g | 0% |
| Sugars | 17.2 g | 68% |
| Protein | 16.7 g | 33% |
Note: Nutritional information is an estimate and may vary based on specific ingredients and preparation methods.
Variations & Substitutions
- Chocolate Chip Ricotta Cheesecake: Add 1/2 cup of mini chocolate chips to the ricotta mixture for a delightful chocolatey twist.
- Citrus Burst: Experiment with different citrus zests, such as orange or lime, for a unique flavor profile.
- Almond Extract: Substitute 1 teaspoon of vanilla extract with 1/2 teaspoon of almond extract for a nutty aroma.
- Spiced Cheesecake: Add a pinch of ground cardamom or ginger to the ricotta mixture for a warm, spiced flavor.
- Berry Swirl: Before baking, swirl a few tablespoons of your favorite berry jam or preserve into the filling for a beautiful marbled effect.
FAQs (Frequently Asked Questions)
Q: Why is it important to drain the ricotta cheese?
A: Draining the ricotta cheese removes excess moisture, preventing the cheesecake from being too watery and ensuring a light, airy texture.
Q: Can I use part-skim ricotta cheese?
A: While you can use part-skim ricotta cheese, the cheesecake will not be as rich and creamy. Whole milk ricotta cheese is recommended for the best results.
Q: How can I prevent my cheesecake from cracking?
A: Baking at a low temperature, avoiding overbaking, and running a knife around the edge of the pan immediately after baking can all help prevent cracking. Using a water bath is also a great option.
Q: Can I make this cheesecake ahead of time?
A: Yes, this cheesecake is a great make-ahead dessert. In fact, it benefits from being refrigerated for at least 6 hours, or even overnight, to allow the flavors to meld and the texture to set.
Q: Is it normal for the cheesecake to jiggle slightly in the center after baking?
A: Yes, a slight jiggle in the center is perfectly normal. The cheesecake will continue to set as it cools and chills.
Final Thoughts
This no-crust ricotta cheesecake is more than just a dessert; it’s an experience. It’s a taste of simple elegance, a reminder that the most delicious things in life are often the easiest to create. So, gather your ingredients, preheat your oven, and prepare to be transported to a sun-drenched Italian hillside with every bite. Don’t be afraid to experiment with variations and make it your own. And most importantly, share your creation with loved ones and enjoy the sweet moments together.