
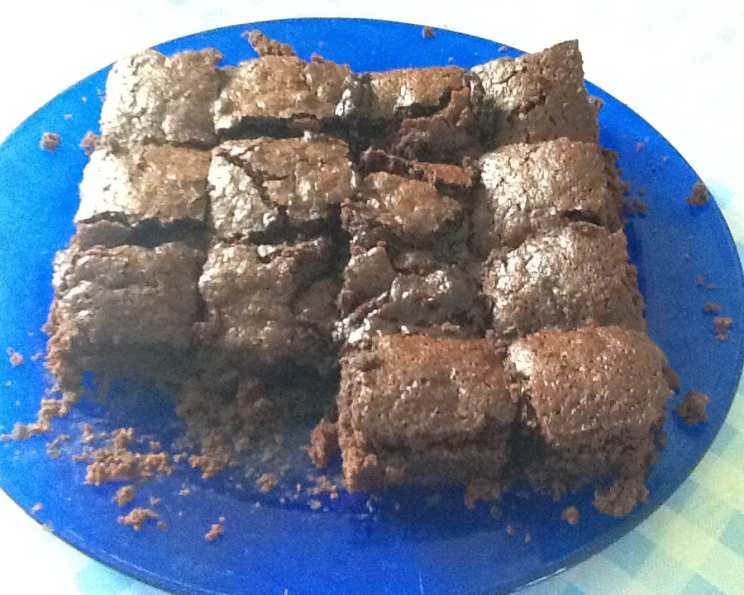
No-Egg Brownies: Indulgent Chocolate Bliss
The aroma of freshly baked brownies always takes me back to my childhood. My grandmother, a master of simple yet satisfying desserts, used to make these No-Egg Brownies whenever we visited. They were fudgy, intensely chocolatey, and proof that you didn’t need a dozen eggs to create something truly magical. These brownies were a staple at family gatherings, a sweet symbol of love and togetherness, and every bite brings back those cherished memories.
Recipe Overview
- Prep Time: 15 minutes
- Cook Time: 25 minutes
- Total Time: 40 minutes
- Servings: 12
- Yield: 1 11×7 inch pan
- Dietary Type: Egg-Free (can be adapted to be vegan and nut-free)
Ingredients
- 2 cups flour
- 1 cup water
- 1 cup brown sugar
- 1 cup granulated sugar
- 1 teaspoon salt
- 1 teaspoon vanilla extract
- ¾ cup baking cocoa
- ½ cup oil (vegetable or canola recommended)
- ½ teaspoon baking powder
- ½ cup chopped nuts (optional; walnuts, pecans, or almonds work well)
- ½ cup chocolate chips (optional; milk, semi-sweet, or dark)
- ½ cup dried cranberries (optional)
Equipment Needed
- Medium saucepan
- Large mixing bowl
- Measuring cups and spoons
- Rubber spatula or wooden spoon
- 11×7 inch baking pan
- Parchment paper (optional, for easy removal)
- Oven
Instructions
-
Preheat your oven to 350°F (175°C). Grease an 11×7-inch baking pan thoroughly. For easy brownie removal, you can also line the pan with parchment paper, leaving an overhang on the sides to lift the brownies out after baking.
-
In a medium saucepan, combine the water and ½ cup of the flour. Cook over low heat, stirring constantly, until the mixture thickens to the consistency of a thin glue paste. This step is crucial for the brownie’s fudgy texture. Be patient and stir continuously to prevent lumps from forming. It usually takes about 3-5 minutes.
-
Remove the flour-water mixture from the heat and let it cool slightly before proceeding. While it’s cooling, in a large mixing bowl, combine the brown sugar, granulated sugar, salt, vanilla extract, baking cocoa, and oil.
-
Add the cooled flour-water mixture to the sugar mixture in the large bowl. Mix well until everything is thoroughly combined and the batter is smooth.
-
In the same bowl, add the remaining 1 ½ cups flour and the baking powder. Gently fold these dry ingredients into the wet ingredients until just combined. Be careful not to overmix the batter, as this can result in tough brownies.
-
Now, if you’re adding any of the optional ingredients, fold them in gently. This could include the chopped nuts, chocolate chips, and/or dried cranberries. Distribute them evenly throughout the batter.
-
Pour the brownie batter into the prepared 11×7-inch baking pan and spread it evenly.
-
Bake in the preheated oven for 25 minutes, or until a knife (or toothpick) inserted into the center comes out cleanly. Keep a close eye on the brownies towards the end of the baking time. Ovens can vary, so start checking for doneness around 23 minutes.
-
Once baked, remove the brownies from the oven and let them cool completely in the pan before cutting into squares. Cooling them completely is important; warm brownies are delicious, but they will be much easier to cut cleanly once cooled. If you used parchment paper, simply lift the brownies out of the pan using the overhang.
Expert Tips & Tricks
- Blooming the cocoa: For an even richer chocolate flavor, try blooming the cocoa powder. Add the cocoa powder to the warm water mixture and let it sit for a few minutes before mixing it with the other ingredients. This helps to release the cocoa’s full flavor potential.
- Doneness test: The knife test is a good indicator, but remember that these brownies are meant to be fudgy. A few moist crumbs clinging to the knife are fine. If the knife comes out completely clean, the brownies may be slightly overbaked.
- Customizing sweetness: Adjust the ratio of brown sugar to granulated sugar to your liking. More brown sugar will result in a chewier, more molasses-like flavor, while more granulated sugar will make the brownies slightly lighter in texture.
- Make-ahead tip: You can prepare the batter a day in advance and store it in the refrigerator. Allow it to come to room temperature for about 30 minutes before baking.
- Troubleshooting: If your brownies are too dry, try reducing the baking time by a few minutes next time. If they are too gooey, increase the baking time slightly.
Serving & Storage Suggestions
Serve these No-Egg Brownies at room temperature. A dusting of powdered sugar adds a touch of elegance. They are also delicious with a scoop of vanilla ice cream or a dollop of whipped cream.
Store leftover brownies in an airtight container at room temperature for up to 3 days, in the refrigerator for up to a week, or in the freezer for up to 2 months. To reheat, microwave individual squares for a few seconds until slightly warmed or let thaw at room temperature.
Nutritional Information
Note: Nutritional information is an estimate and may vary based on specific ingredients and portion sizes.
| Nutrient | Amount per Serving | % Daily Value |
|---|---|---|
| Calories | 320 kcal | 16% |
| Total Fat | 14g | 22% |
| Saturated Fat | 3g | 15% |
| Cholesterol | 0mg | 0% |
| Sodium | 220mg | 9% |
| Total Carbohydrate | 50g | 17% |
| Dietary Fiber | 2g | 8% |
| Sugars | 35g | |
| Protein | 3g | 6% |
Variations & Substitutions
- Vegan Brownies: To make these brownies vegan, substitute the oil with melted coconut oil or applesauce. Be sure to use vegan chocolate chips.
- Gluten-Free Brownies: Replace the all-purpose flour with a gluten-free blend. You may need to experiment with different blends to find one that works best for you. A blend containing xanthan gum is recommended.
- Nut-Free Brownies: Simply omit the chopped nuts. You can replace them with sunflower seeds or pepitas for added texture.
- Espresso Brownies: Add a teaspoon of instant espresso powder to the batter for a richer, more intense chocolate flavor.
- Peanut Butter Swirl Brownies: Swirl a few tablespoons of peanut butter into the batter before baking for a delicious peanut butter chocolate combination.
- Mint Chocolate Brownies: Add a few drops of peppermint extract to the batter and use mint chocolate chips for a refreshing twist.
FAQs (Frequently Asked Questions)
Q: Why are these brownies called “No-Egg Brownies”?
A: Because they don’t contain any eggs! The unique flour-water paste creates the fudgy texture typically achieved with eggs.
Q: Can I use a different size pan?
A: Yes, but you may need to adjust the baking time. A smaller pan will require a longer baking time, while a larger pan will require a shorter baking time.
Q: Can I use unsweetened chocolate instead of cocoa powder?
A: Yes, but you will need to adjust the amount of sugar accordingly. Melt the unsweetened chocolate and reduce the granulated sugar by about ¼ cup.
Q: How do I prevent the brownies from sticking to the pan?
A: Grease the pan thoroughly with butter or cooking spray. For extra insurance, line the pan with parchment paper, leaving an overhang on the sides.
Q: Are these brownies suitable for people with egg allergies?
A: Yes, these brownies are a great option for people with egg allergies. However, always double-check all ingredient labels to ensure they are free from any potential allergens.
Final Thoughts
These No-Egg Brownies are a testament to the fact that you don’t need complicated ingredients or techniques to create a truly delicious dessert. They are perfect for satisfying a chocolate craving, sharing with friends and family, or simply enjoying a quiet moment of indulgence. I encourage you to try this recipe and make it your own. Feel free to experiment with different add-ins and variations. And most importantly, enjoy the process of baking and the delightful reward of a warm, fudgy brownie. Happy baking!