
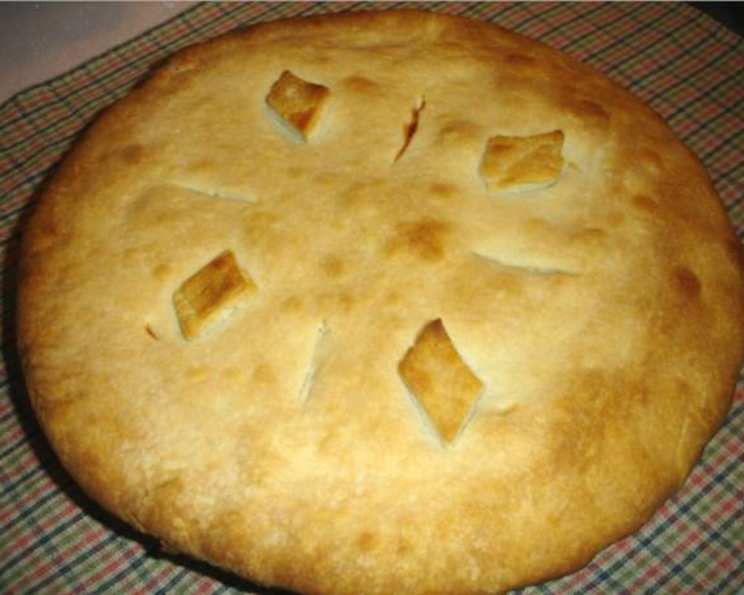
My Grandma’s Never-Fail Pie Crust: A Recipe for Generations
I can still smell the warm, comforting aroma of my grandmother’s kitchen, especially during the holidays. She had this worn, stained recipe card for pie crust that she swore by, pulling it out every Thanksgiving and Christmas. The magic of that recipe wasn’t just in the ingredients, but in the confidence it gave her. With this crust, she could whip up pies of any kind, knowing they’d come out flaky, tender, and absolutely perfect every single time. This recipe isn’t just a set of instructions; it’s a connection to my family’s traditions, a legacy of deliciousness passed down through generations.
Recipe Overview
- Prep Time: 30 minutes (plus chilling)
- Cook Time: 12-15 minutes (for unfilled crust)
- Total Time: 1 hour 5 minutes
- Yield: 5 pie crusts or 1 crust and 2 double-crust pies
- Dietary Type: Vegetarian (can be made vegan with shortening substitution)
Ingredients
- 4 cups flour
- 1 tablespoon sugar
- 2 teaspoons salt
- 1 3/4 cups shortening (NOT refrigerated, do not use oil, lard, margarine, or butter)
- 1/2 cup water
- 1 tablespoon white vinegar or 1 tablespoon cider vinegar
- 1 large egg
Equipment Needed
- Large mixing bowl
- Small mixing bowl
- Fork
- Plastic wrap or waxed paper
- Rolling pin
- Floured surface (board or pastry cloth)
- Pie pan(s)
- Wire rack
Instructions
-
In a large bowl, thoroughly stir together the flour, sugar, and salt using a fork. This ensures even distribution of the dry ingredients, which is crucial for a consistent crust.
-
Cut in the shortening with a fork. This is arguably the most important step! You want to work the shortening into the flour mixture until it resembles coarse crumbs. The key here is to not overmix; you should still see small pieces of shortening. These little pockets of fat are what create the flaky layers when baked.
-
In a small bowl, whisk together the water, vinegar, and egg. The vinegar helps to tenderize the dough by inhibiting gluten development. The egg adds richness and helps bind the ingredients.
-
Add the wet ingredients (water, vinegar, egg mixture) to the flour mixture. Stir until just moistened. Don’t overmix! Overmixing develops the gluten in the flour, leading to a tough crust.
-
Divide the dough into 5 equal portions. Gently shape each portion into a flat, round patty with your hands. This makes rolling out the dough much easier later on.
-
Wrap each patty individually in plastic wrap or waxed paper. This prevents the dough from drying out and allows it to relax in the refrigerator.
-
Chill the wrapped dough patties in the refrigerator for at least 1/2 hour. This chilling time is essential! It allows the gluten to relax, making the dough easier to roll out and preventing it from shrinking in the oven.
-
When you’re ready to use a pie crust, lightly flour both sides of one of the dough patties. This prevents the dough from sticking to your rolling pin and work surface.
-
Roll out the dough on a lightly floured board or pastry cloth. Keeping the pastry round, roll from the center outwards to a 1/8-inch thickness into a circle 2 inches larger than the top of your pie pan. Avoid rolling back and forth too much, as this can toughen the dough. Lift and rotate the dough frequently to prevent sticking and maintain a circular shape.
-
Fold the rolled-out pastry in halves or quarters for easy transfer to the pie pan. Carefully transfer it to the pie pan, then unfold and fit it in loosely. Avoid stretching the dough, as this can cause it to shrink during baking.
-
Press gently with your fingers to remove any air pockets between the dough and the pie pan. This will prevent the crust from bubbling up unevenly during baking.
-
For a filled pie, proceed with filling the crust according to your chosen pie recipe. Place the other crust on top, if applicable. Flute the edges with a fork or your fingers to create a decorative and sealed edge. Make decorative slits in the top crust to allow steam to escape during baking; this prevents the crust from puffing up and cracking.
-
Bake the filled pie as directed in the pie recipe you are following. It is suggested that you bake a filled pie on the LOWEST rack in the oven to prevent the bottom crust from becoming soggy.
-
To bake an unfilled pie crust (pie shell), prick the bottom and sides of the pastry-lined pie pan with a fork. This prevents the crust from puffing up during baking.
-
Bake the unfilled pie crust on the CENTER rack in a preheated 450 degree Fahrenheit oven for 12 to 15 minutes, or until golden brown. A metal pie pan will generally take longer to bake than a glass pie pan. Keep a close eye on the crust to prevent burning.
-
Cool the baked pie shell on a wire rack. As it cools, the shell will shrink slightly, and the edges may pull away from the pan. This is normal.
-
Fill the cooled pie shell as desired with your favorite filling (e.g., pudding, fruit, cream).
Expert Tips & Tricks
- Keep everything cold! While the shortening isn’t refrigerated, using ice water can also help keep the dough cold, which is essential for flakiness.
- Don’t be afraid to re-roll. This recipe is incredibly forgiving. If you have scraps of dough, you can re-roll them without compromising the texture.
- Blind baking for perfection: For pies with very wet fillings (like quiche), consider blind baking the crust first. This involves pre-baking the crust partially or fully before adding the filling. To blind bake, line the crust with parchment paper, fill it with pie weights or dried beans, and bake at 375°F (190°C) for 15-20 minutes, then remove the weights and bake for another 5-10 minutes until lightly golden.
- Egg Wash: For a beautiful golden brown crust, brush the top of the crust with a beaten egg before baking. You can also sprinkle with sugar for extra sparkle.
Serving & Storage Suggestions
Serve your pie chilled or at room temperature, depending on the filling. A dollop of whipped cream or a scoop of ice cream always makes a delicious addition!
To store leftover pie, cover it loosely with plastic wrap or foil and refrigerate. It will typically last for 2-3 days in the refrigerator. For longer storage, you can freeze the baked pie for up to 2-3 months. Thaw it in the refrigerator overnight before serving. Unbaked pie crusts can be stored in the refrigerator for up to 3 days or frozen for up to 2 months. Thaw the dough in the refrigerator overnight before rolling out.
Nutritional Information
Note: Nutritional information is an estimate and may vary based on specific ingredients and portion sizes.
| Nutrient | Amount per Serving | % Daily Value |
|---|---|---|
| Calories | 409 kcal | 20% |
| Total Fat | 27g | 42% |
| Saturated Fat | 7g | 35% |
| Cholesterol | 18mg | 6% |
| Sodium | 119mg | 5% |
| Carbohydrates | 36g | 12% |
| Fiber | 1g | 4% |
| Sugar | 1g | – |
| Protein | 4g | 8% |
Variations & Substitutions
- Vegan Pie Crust: Substitute the shortening with a vegan shortening alternative. Omit the egg, and slightly increase the amount of water (add 1-2 tablespoons extra).
- Gluten-Free Pie Crust: Use a high-quality gluten-free flour blend specifically designed for baking. You may need to adjust the amount of liquid depending on the blend.
- Lemon Zest: Adding a teaspoon of lemon zest to the dry ingredients can brighten the flavor of the crust, especially for fruit pies.
- Spice it up: A pinch of cinnamon, nutmeg, or ginger in the flour mixture can add warmth and complexity to the crust, particularly for autumn-inspired pies.
FAQs (Frequently Asked Questions)
Q: Why is my pie crust tough?
A: Overmixing the dough is the most common culprit for a tough crust. Be gentle when mixing the wet and dry ingredients, and avoid overworking the dough when rolling it out.
Q: Can I use butter instead of shortening?
A: While shortening is recommended for the flakiest crust, you can use butter, but it requires more careful handling. Use very cold butter, cut it into small cubes, and work quickly to prevent it from melting.
Q: How can I prevent my pie crust from shrinking during baking?
A: Chilling the dough well and avoiding stretching it when fitting it into the pie pan are the best ways to prevent shrinkage. Also, make sure your oven is properly preheated.
Q: My pie crust is browning too quickly. What should I do?
A: If your pie crust is browning too quickly, you can tent it loosely with aluminum foil to shield it from the heat.
Q: Can I make the pie dough ahead of time?
A: Absolutely! This pie dough can be stored in the refrigerator for up to 3 days or frozen for up to 2 months, making it a convenient option for busy bakers.
Final Thoughts
This pie crust recipe is more than just a set of instructions; it’s an invitation to create memories, share deliciousness, and connect with a tradition that has stood the test of time. Don’t be intimidated by the idea of making pie crust from scratch. With a little patience and these simple steps, you can achieve a flaky, tender crust that will impress your friends and family. So go ahead, grab your rolling pin, and bake up a masterpiece! I’d love to hear how it turns out! Share your experiences and variations in the comments below. Perhaps you’ll pair it with a scoop of homemade vanilla ice cream or a hot cup of apple cider. The possibilities are endless. Happy baking!