
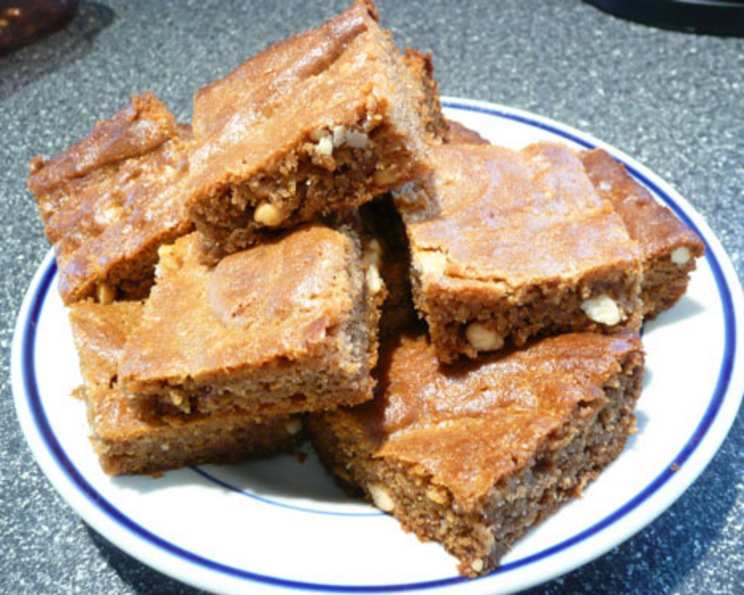
No-Flour Peanut Butter Bars: A Deliciously Simple Treat
The scent of peanut butter baking in the oven always takes me back to my grandmother’s kitchen. She wasn’t much for complicated recipes, but her peanut butter cookies were legendary. These No-Flour Peanut Butter Bars capture that same comforting flavor and simplicity, but in an even easier, quicker form. One bite, and I’m transported to her sunny kitchen, enveloped in the warmth of her love and the irresistible aroma of peanut butter. This recipe is a tribute to those cherished memories, a reminder that the best things in life are often the simplest.
Recipe Overview
- Prep Time: 10 minutes
- Cook Time: 25 minutes
- Total Time: 35 minutes
- Servings: 12
- Yield: 12 bars
- Dietary Type: Gluten-Free (naturally), Dairy-Free
Ingredients
- 2 cups natural-style peanut butter (ensure it is well-stirred)
- ¾ cup honey
- 2 eggs
- 2 teaspoons vanilla extract
- 1 teaspoon baking soda
Equipment Needed
- Mixing bowl
- Fork
- 9″ x 13″ baking pan
- Measuring cups and spoons
- Oven
- Cooling rack
Instructions
- Preheat your oven to 300°F (150°C). This lower temperature is crucial for even baking and prevents the bars from becoming dry.
- Lightly grease a 9″ x 13″ baking pan. You can use cooking spray, butter, or oil. Lining the pan with parchment paper is also a great option for easy removal and cleanup.
- In a mixing bowl, combine all the ingredients: 2 cups natural-style peanut butter, ¾ cup honey, 2 eggs, 2 teaspoons vanilla extract, and 1 teaspoon baking soda.
- Using a fork, thoroughly combine all the ingredients. The mixture will be thick and somewhat sticky, so be prepared to put in a little elbow grease. Ensure that the baking soda is evenly distributed to help the bars rise properly.
- Spread the batter evenly into the prepared 9″ x 13″ baking pan. A spatula or the back of a spoon works well for this. Aim for a uniform thickness to ensure even baking.
- Bake in the preheated oven for approximately 25 minutes, or until the edges are nicely browned. The center should be set, but still slightly soft to the touch. Be careful not to overbake, as this will result in dry bars. Check for doneness by inserting a toothpick into the center; it should come out with a few moist crumbs attached.
- Cool completely in the pan on a cooling rack before cutting into squares. This allows the bars to firm up and makes them easier to slice. Cooling completely prevents crumbling.
- Once cooled, cut the bars into squares. Depending on your preference, you can cut them into 12 larger bars or 24 smaller ones.
Expert Tips & Tricks
- Peanut Butter Perfection: Natural-style peanut butter works best for this recipe, as it contains only peanuts and sometimes salt. However, it tends to separate, so make sure to stir it well before measuring. Avoid using peanut butter with added sugar or stabilizers, as this can affect the texture and sweetness of the bars.
- Honey Hacks: The honey not only adds sweetness but also helps to bind the ingredients together. If you’re not a fan of honey, you can substitute it with maple syrup or agave nectar. Keep in mind that this may slightly alter the flavor and texture of the bars.
- Egg Essentials: The eggs provide structure and moisture to the bars. If you’re looking for a vegan alternative, you can try using flax eggs (1 tablespoon of ground flaxseed mixed with 3 tablespoons of water per egg) or applesauce (¼ cup per egg).
- Baking Soda Boost: The baking soda helps the bars to rise and become light and airy. Make sure to use fresh baking soda for the best results. To test its freshness, add a teaspoon of baking soda to a small amount of vinegar; it should fizz vigorously.
- Preventing Dryness: Overbaking is the enemy of these bars. Start checking for doneness around 20 minutes and adjust the baking time accordingly. If the edges are browning too quickly, you can tent the pan with foil to prevent burning.
- Elevated Flavors: To elevate the flavor profile, consider adding a pinch of sea salt to the batter. The salt enhances the sweetness and nutty flavor of the peanut butter.
- Chocolate Drizzle: For an extra touch of indulgence, drizzle melted chocolate over the cooled bars. You can use dark, milk, or white chocolate, depending on your preference.
Serving & Storage Suggestions
Serve these No-Flour Peanut Butter Bars as a delicious and satisfying snack, dessert, or even breakfast on the go. They pair perfectly with a glass of milk, a cup of coffee, or a scoop of vanilla ice cream.
- Storage: Store the bars in an airtight container at room temperature for up to 3 days, in the refrigerator for up to a week, or in the freezer for up to 2 months.
- Freezing: To freeze, wrap the bars individually in plastic wrap or foil and then place them in a freezer-safe bag or container. This will prevent freezer burn and maintain their freshness.
- Reheating: If frozen, thaw the bars in the refrigerator overnight or at room temperature for a few hours. You can also microwave them for a few seconds to soften them up.
Nutritional Information
| Nutrient | Amount per Serving | % Daily Value |
|---|---|---|
| Calories | 331 kcal | N/A |
| Calories from Fat | 202 kcal | N/A |
| Total Fat | 22.5 g | 34% |
| Saturated Fat | 4.7 g | 23% |
| Cholesterol | 31 mg | 10% |
| Sodium | 124.9 mg | 5% |
| Total Carbohydrate | 26 g | 8% |
| Dietary Fiber | 2.6 g | 10% |
| Sugars | 21.5 g | N/A |
| Protein | 11.9 g | 23% |
Note: Nutritional information is an estimate and may vary based on specific ingredients and portion sizes.
Variations & Substitutions
- Chocolate Chip Peanut Butter Bars: Add ½ cup of chocolate chips (milk, dark, or semi-sweet) to the batter for a chocolatey twist.
- Peanut Butter Cup Bars: Swirl in some melted chocolate and peanut butter cup pieces before baking.
- Cinnamon Peanut Butter Bars: Add 1 teaspoon of ground cinnamon to the batter for a warm and comforting flavor.
- Nut-Free Option: Use sunflower seed butter (sunbutter) in place of the peanut butter for those with peanut allergies.
- Lower-Sugar Version: Reduce the amount of honey slightly, or use a sugar-free honey alternative.
- Add-Ins: Mix in chopped nuts, dried fruit, or sprinkles for added texture and flavor.
FAQs (Frequently Asked Questions)
Q: Can I use creamy peanut butter instead of natural-style peanut butter?
A: While you can, natural-style peanut butter provides a richer, more authentic peanut butter flavor and avoids added sugars and stabilizers. Creamy peanut butter may result in a slightly sweeter and less textured bar.
Q: Why is my batter so thick and difficult to spread?
A: This is normal! The peanut butter and honey combination creates a thick batter. Use a spatula or the back of a spoon and gently press it into the pan, ensuring it’s evenly distributed.
Q: My bars are too dry. What did I do wrong?
A: Overbaking is the most common cause of dry peanut butter bars. Reduce the baking time by a few minutes and check for doneness frequently. Also, ensure your oven temperature is accurate.
Q: Can I double the recipe?
A: Yes, you can easily double the recipe. Use a larger baking pan, such as a 13″ x 18″ pan, and adjust the baking time accordingly.
Q: Are these bars suitable for people with diabetes?
A: While these bars are naturally gluten-free and dairy-free, they are still high in sugar. It’s best to consult with a healthcare professional or registered dietitian to determine if they are suitable for your individual dietary needs. Consider reducing the honey content if needed.
Final Thoughts
These No-Flour Peanut Butter Bars are a testament to the fact that deliciousness doesn’t require complexity. With just a handful of ingredients and minimal effort, you can create a treat that’s sure to satisfy any sweet tooth. I encourage you to try this recipe and make it your own by experimenting with different variations and add-ins. Whether you’re enjoying them as an afternoon snack, a simple dessert, or a quick breakfast, these bars are guaranteed to bring a smile to your face. Don’t forget to share your creations and feedback – I’d love to hear how they turned out! Consider pairing them with a cold glass of almond milk or a steaming mug of herbal tea for the perfect comforting combination. Happy baking!