
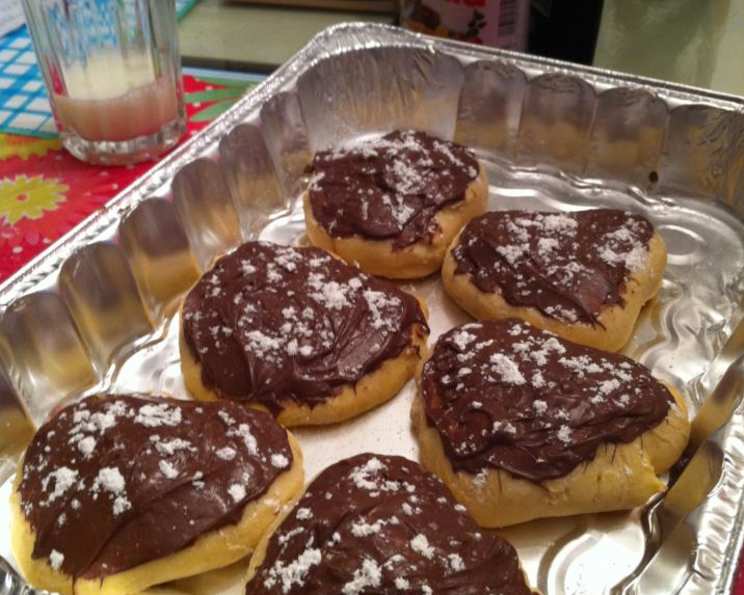
No-Fry Doughnuts: A Healthier Twist on a Classic Treat
The aroma of freshly fried doughnuts always evokes vivid memories of my childhood trips to the local bakery. I remember the sheer joy of selecting my favorite – the classic glazed – and savoring every bite of its warm, sugary goodness. As a chef, I’ve always strived to recreate that delightful experience in a healthier way, leading me to explore the world of no-fry doughnuts. This recipe, inspired by a classic, delivers all the comforting flavor without the guilt of deep-frying.
Recipe Overview
- Prep Time: 45 minutes
- Cook Time: 20 minutes
- Total Time: 2 hours 30 minutes (includes rising time)
- Servings: 24
- Yield: 24 doughnuts
- Dietary Type: Vegetarian
Ingredients
- 2 (1/4 ounce) packages active dry yeast
- 1/4 cup warm water
- 1 1/2 cups warm milk
- 1/3 cup shortening
- 1/2 cup sugar
- 2 eggs
- 1 teaspoon salt
- 1 teaspoon ground nutmeg
- 1/4 teaspoon ground cinnamon
- 4 1/2 – 5 cups all-purpose flour, plus extra for dusting
- 1/4 cup melted butter or margarine
GLAZE
- 1/2 cup butter
- 2 cups confectioners’ sugar
- 5 teaspoons water
- 2 teaspoons vanilla extract
Equipment Needed
- Large mixing bowl
- Measuring cups and spoons
- Electric mixer (optional, but recommended)
- Doughnut cutter (approximately 2.75 inches)
- Greased baking sheets
- Saucepan
- Wire rack
Instructions
- Activate the Yeast: In a small bowl, dissolve the active dry yeast in 1/4 cup warm water. Let it stand for about 5-10 minutes until foamy. This step ensures the yeast is alive and ready to leaven the dough.
- Combine Wet Ingredients: In a large mixing bowl, add the warm milk and shortening. Stir for about 1 minute until the shortening begins to melt and incorporate.
- Add Sweeteners and Spices: Add the sugar, eggs, salt, nutmeg, and cinnamon to the milk mixture.
- Incorporate Flour (Part 1): Add 2 cups of all-purpose flour to the wet ingredients. Using an electric mixer on low speed, beat until the mixture is smooth and well combined.
- Incorporate Flour (Part 2): Gradually stir in the remaining all-purpose flour, adding enough to form a soft dough. The dough should be slightly sticky but manageable. Avoid kneading at this stage; the goal is to create a soft, enriched dough.
- First Rise: Cover the bowl with a clean cloth or plastic wrap and let the dough rise in a warm place until it has doubled in size. This typically takes about 1 to 1.5 hours, depending on the temperature of your environment.
- Punch Down and Roll Out: Once the dough has doubled, punch it down gently to release the air. Turn the dough out onto a lightly floured surface. Roll the dough out to about 1/2 inch thickness.
- Cut Doughnuts: Using a 2.75-inch doughnut cutter, cut out the doughnuts. If you don’t have a doughnut cutter, you can use two different-sized round cookie cutters or even a knife to cut out circles and holes.
- Second Rise: Place the cut doughnuts about 2 inches apart on greased baking sheets. Brush the tops of the doughnuts with melted butter or margarine. Cover the baking sheets and let the doughnuts rise again in a warm place until they have doubled in size, about 30-45 minutes.
- Bake: Preheat your oven to 350°F (180°C). Bake the doughnuts for 20 minutes, or until they are lightly browned. Keep a close eye on them, as baking times can vary depending on your oven.
- Prepare the Glaze: While the doughnuts are baking, melt the butter in a saucepan over low heat. Add the confectioners’ sugar, water, and vanilla extract. Stir over low heat until the glaze is smooth and all the sugar has dissolved. Do not boil the glaze. Keep the glaze warm until the doughnuts are ready.
- Glaze the Doughnuts: Once the doughnuts are out of the oven, let them cool slightly for a few minutes. While they are still warm, dip each doughnut, one at a time, into the warm glaze, turning to coat completely.
- Drain and Serve: Place the glazed doughnuts on a wire rack to allow any excess glaze to drip off. Serve immediately and enjoy the warm, soft, and delicious no-fry doughnuts!
Expert Tips & Tricks
- Yeast Activation: Always check the expiration date on your yeast and ensure the water is not too hot (about 105-115°F or 40-46°C). Too hot water will kill the yeast.
- Dough Consistency: The dough should be soft and slightly sticky. Avoid adding too much flour, as this will result in dry, dense doughnuts.
- Warm Environment for Rising: Create a warm environment for rising by placing the dough in a slightly warmed oven (turned off) or near a warm stovetop.
- Brush with Butter: Brushing the doughnuts with melted butter before the second rise helps to create a golden-brown crust and adds extra flavor.
- Glaze Consistency: If the glaze is too thick, add a little more water, one teaspoon at a time, until you reach the desired consistency. If it’s too thin, add a little more confectioners’ sugar.
- Adding Extracts: Feel free to experiment with different extracts in the glaze, such as almond, lemon, or maple, to customize the flavor.
Serving & Storage Suggestions
Serve these no-fry doughnuts warm for the best experience. The warmth enhances their soft texture and allows the glaze to melt slightly, creating a truly decadent treat.
To store any leftovers, place them in an airtight container at room temperature. They will stay fresh for about 1-2 days. For longer storage, you can freeze the unglazed doughnuts. Thaw them completely before glazing and serving. Reheating is not generally recommended, as it can dry them out.
Nutritional Information
Note: Nutritional information is an estimate and may vary based on specific ingredients and serving size.
| Nutrient | Amount per Serving | % Daily Value |
|---|---|---|
| Calories | 235.5 kcal | – |
| Total Fat | 9.9 g | 15% |
| Saturated Fat | 4.9 g | 24% |
| Cholesterol | 32.9 mg | 10% |
| Sodium | 162.1 mg | 6% |
| Total Carbohydrate | 33.1 g | 11% |
| Dietary Fiber | 0.8 g | 3% |
| Sugars | 14.1 g | – |
| Protein | 3.8 g | 7% |
Variations & Substitutions
- Spiced Doughnuts: Add a pinch of ground ginger, allspice, or cloves to the dough for a warmer, more festive flavor.
- Chocolate Glaze: Substitute some of the confectioners’ sugar in the glaze with cocoa powder for a rich chocolate flavor.
- Lemon Glaze: Add lemon zest and lemon juice to the glaze for a bright, citrusy twist.
- Cinnamon Sugar Coating: Instead of glazing, brush the warm doughnuts with melted butter and then roll them in a mixture of cinnamon and sugar.
- Gluten-Free Doughnuts: Substitute the all-purpose flour with a gluten-free blend, ensuring it contains xanthan gum or another binder to help with the dough structure.
FAQs (Frequently Asked Questions)
Q: Why aren’t these doughnuts fried?
A: This recipe offers a healthier alternative to traditional fried doughnuts by baking them in the oven, which significantly reduces the fat content.
Q: Can I use instant yeast instead of active dry yeast?
A: Yes, you can use instant yeast. You can skip the initial activation step and add it directly to the dry ingredients.
Q: What if my dough doesn’t rise?
A: Ensure your yeast is fresh and the water/milk is warm, not hot. Also, provide a warm environment for the dough to rise. If it still doesn’t rise, your yeast may be inactive.
Q: Can I make the dough ahead of time?
A: Yes, you can prepare the dough the night before and store it in the refrigerator. Let it come to room temperature before rolling and cutting the doughnuts.
Q: How do I prevent the doughnuts from becoming dry?
A: Avoid overbaking them. Bake until they are lightly golden brown. Brushing with melted butter before the second rise and glazing them while warm also helps retain moisture.
Final Thoughts
These No-Fry Doughnuts offer a delightful way to enjoy a classic treat with a healthier twist. Baking instead of frying allows you to savor the delicious flavors without the added guilt. Whether you’re enjoying them for breakfast, brunch, or a sweet snack, I encourage you to give this recipe a try. Feel free to experiment with different glazes and toppings to create your own signature doughnuts. Share your creations with friends and family, and don’t hesitate to let me know how they turn out!