
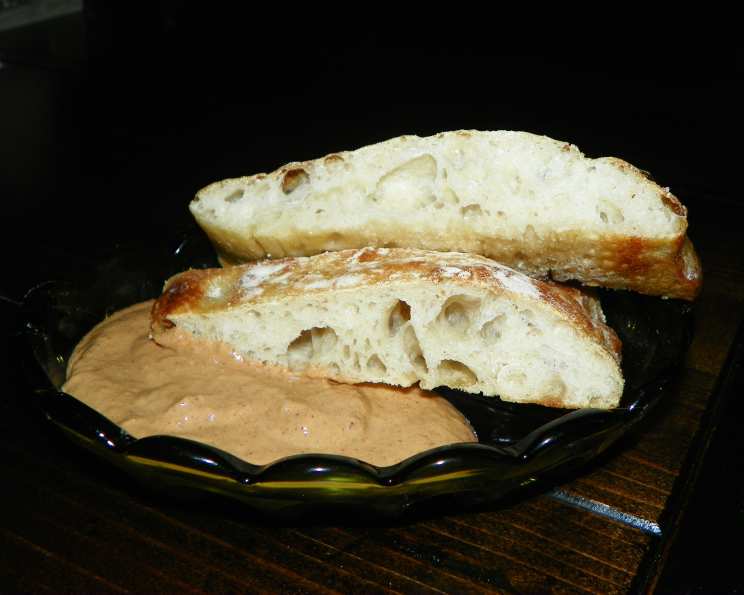
The Easiest No-Knead Ciabatta: Rustic Bread Made Simple
The aroma of baking bread has always been synonymous with home for me. I remember, as a child, the impatient anticipation I felt waiting for my grandmother’s crusty, chewy ciabatta to cool just enough to tear into a warm piece. The crackling sound as you broke through the golden crust was pure magic. This no-knead version, while simpler than Grandma’s, delivers that same comforting magic and brings those memories flooding back with every bite.
Recipe Overview
- Prep Time: 15 minutes
- Cook Time: 20-30 minutes
- Total Time: 18-20 hours (mostly inactive)
- Servings: 6-8
- Yield: 1 large loaf
- Dietary Type: Vegetarian
Ingredients
- 2 cups water
- ¼ teaspoon instant yeast
- 1 ½ teaspoons salt
- 3 ½ cups unbleached all-purpose flour
- ½ cup whole wheat flour
Equipment Needed
- Large bowl
- Kitchen towel
- Rubber spatula
- Baking sheet
Instructions
-
In a large bowl, combine the water, instant yeast, and salt. Make sure the water is at room temperature, not too hot or too cold, to ensure proper yeast activation.
-
Add the unbleached all-purpose flour and whole wheat flour to the bowl, one cup at a time. Incorporating the flour gradually helps prevent lumps and ensures even distribution.
-
Stir the mixture until all the flour is mostly absorbed. Don’t worry about achieving a perfectly smooth dough; a slightly shaggy texture is perfectly fine. The dough will be very wet and sticky – this is what gives ciabatta its characteristic airy crumb.
-
Cover the bowl with a clean kitchen towel and set aside for 18 hours, or overnight, at room temperature. This long fermentation period is crucial for developing the complex flavors and airy texture of the ciabatta. Avoid placing the dough in a cold area, as this will significantly slow down the fermentation process.
-
The next morning, uncover the dough. You’ll notice it has significantly expanded and is bubbly. Gently pat the dough down slightly with a rubber spatula to deflate it. Be careful not to over-handle the dough, as this can release too much of the trapped gas.
-
Sprinkle cornmeal generously onto a baking sheet. The cornmeal will prevent the dough from sticking to the pan and adds a subtle textural element to the crust.
-
With a rubber spatula, scrape the wet dough out onto the prepared baking sheet. Don’t be concerned if the dough looks messy or uneven.
-
Using floured hands, gently straighten out the dough on the baking sheet, forming a rough loaf shape. Avoid overworking the dough; the goal is simply to shape it slightly without deflating it. Remember, a flat loaf is typical for no-knead ciabatta, with a maximum height of approximately 5-7 inches.
-
Set the pan aside, uncovered, for 2 hours to rise. While the dough won’t rise dramatically during this second rise, it will relax and expand slightly, further enhancing the airy texture.
-
Preheat your oven to 425°F (220°C) one hour before the bread is done rising. Ensure your oven is properly preheated for optimal baking results.
-
If desired, sprinkle flour over the top of the risen dough right before placing it in the oven. This will create a beautiful, crackly, floured crust when the ciabatta is baked.
-
Bake the bread for 20-30 minutes, or until the crust has a deep golden-brown color. The baking time may vary depending on your oven, so keep a close eye on the bread.
-
Once baked, remove the ciabatta from the oven and let it cool on a wire rack before slicing and serving. The crust will continue to crackle as it cools, a delightful sound that signals a perfectly baked loaf.
Expert Tips & Tricks
- For extra flavor: Experiment with adding herbs like rosemary or thyme to the dough during the initial mixing stage. You can also incorporate sun-dried tomatoes or olives for a Mediterranean twist.
- Dealing with sticky dough: The dough will be very sticky, so don’t be afraid to use plenty of flour on your hands and spatula when shaping it.
- Achieving a crispier crust: Place a baking sheet or oven-safe dish filled with water on the bottom rack of the oven during baking. This creates steam, which helps develop a crispier crust. Remove the water-filled dish during the last 5-10 minutes of baking to allow the crust to brown properly.
- If you only have active dry yeast: Double the amount of yeast to ½ teaspoon.
- Using Whole Wheat Flour: If you desire, you can add up to ½ cup of whole wheat flour to this recipe. Adding more than that will make the bread dense.
Serving & Storage Suggestions
Serve the ciabatta warm, either sliced or torn into pieces. It’s delicious on its own, drizzled with olive oil, or as a base for sandwiches and bruschetta. Leftover ciabatta can be stored at room temperature in a bread bag for up to 2 days. For longer storage, wrap it tightly in plastic wrap and freeze for up to 2 months. To reheat frozen ciabatta, thaw it completely and then bake it in a preheated oven at 350°F (175°C) for 5-10 minutes, or until warmed through.
Nutritional Information
| Nutrient | Amount per Serving | % Daily Value |
|---|---|---|
| Calories | 300 kcal | N/A |
| Calories from Fat | 72 kcal | N/A |
| Total Fat | 8g | 12% |
| Saturated Fat | 0.2g | 1% |
| Cholesterol | 0mg | 0% |
| Sodium | 585.5mg | 24% |
| Total Carbohydrate | 62.9g | 21% |
| Dietary Fiber | 3.1g | 12% |
| Sugars | 0.2g | 0% |
| Protein | 8.9g | 18% |
Note: Nutritional information is an estimate and may vary based on specific ingredients and preparation methods.
Variations & Substitutions
- Garlic and Herb Ciabatta: Add 2-3 cloves of minced garlic and 1 tablespoon of chopped fresh herbs (such as rosemary, thyme, or oregano) to the dough along with the flour.
- Olive Ciabatta: Add ½ cup of pitted and chopped Kalamata olives to the dough along with the flour.
- Cheese Ciabatta: Add ½ cup of grated Parmesan or Asiago cheese to the dough along with the flour.
- Spicy Ciabatta: Add ½ teaspoon of red pepper flakes to the dough along with the flour.
FAQs (Frequently Asked Questions)
Q: Why is my ciabatta so flat?
A: No-knead ciabatta is naturally a flatter loaf. However, ensuring your yeast is active and allowing the dough to rise properly for the full time will help achieve a slightly higher loaf.
Q: Can I use bread flour instead of all-purpose flour?
A: Yes, you can substitute bread flour for all-purpose flour. Bread flour has a higher protein content, which may result in a slightly chewier texture.
Q: How do I know when the ciabatta is done baking?
A: The ciabatta is done when the crust is a deep golden-brown color and the internal temperature reaches 200-210°F (93-99°C). You can also tap the bottom of the loaf; it should sound hollow.
Q: Can I make this dough ahead of time and bake it later?
A: Yes, you can refrigerate the dough after the initial 18-hour rise. The cold temperature will slow down the fermentation process. When you’re ready to bake, remove the dough from the refrigerator and let it sit at room temperature for about an hour before proceeding with the shaping and baking steps.
Q: My dough is very sticky and hard to handle. Is this normal?
A: Yes, the dough is meant to be very wet and sticky. Use plenty of flour on your hands and spatula to prevent it from sticking.
Final Thoughts
This no-knead ciabatta recipe is truly a testament to the beauty of simplicity. With just a handful of ingredients and minimal effort, you can create a rustic, flavorful loaf that is sure to impress. So, preheat your oven, gather your ingredients, and prepare to fill your home with the comforting aroma of freshly baked bread. Don’t be afraid to experiment with different variations and share your creations with loved ones. Happy baking!