
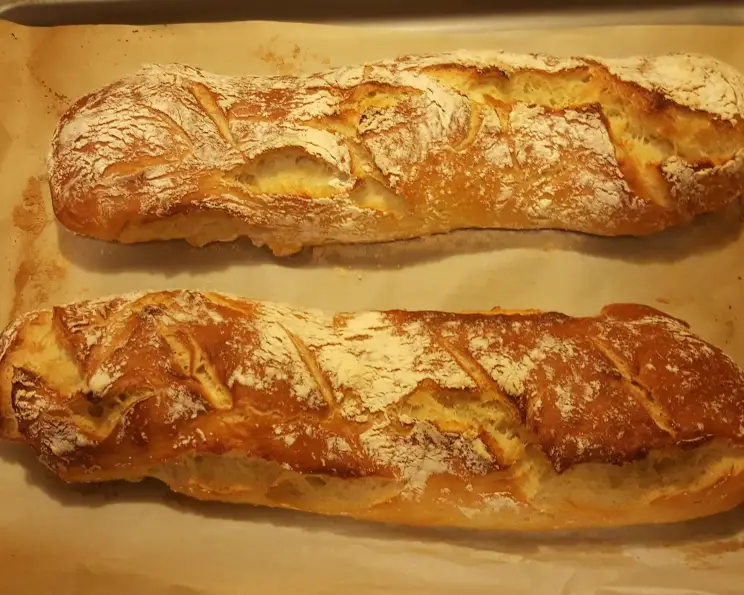
The Magic of No-Knead Crusty White Bread
I still remember the first time I smelled truly amazing bread baking. I was a young culinary student, volunteering at a local bakery before dawn. The air, thick with the aroma of yeast and caramelized sugars, wrapped around me like a comforting blanket. Watching the baker pull those golden, crackling loaves from the oven, a primal feeling stirred within me – a deep connection to the simple magic of transforming flour, water, and salt into something so utterly satisfying. I vowed then to master the art of bread making, and this no-knead recipe is the perfect place to start for anyone looking to experience that magic in their own kitchen.
Recipe Overview:
- Prep Time: 15 minutes
- Cook Time: 25-35 minutes
- Total Time: 2 hours 40 minutes (minimum)
- Servings: 8
- Yields: 3-4 loaves depending on size
- Dietary Type: Vegetarian
Ingredients:
- 3 cups lukewarm water
- 6 1/2 – 7 1/2 cups unbleached all-purpose flour (see tips for accurate measurement)
- 1 tablespoon salt
- 1 1/2 tablespoons yeast
Equipment Needed:
- Large mixing bowl or 6-quart food-safe plastic bucket
- Lid or plastic wrap (or shower cap)
- Measuring cups and spoons
- Stand mixer (optional)
- Parchment paper
- Baking sheet or baking stone
- Sharp knife
- Shallow metal or cast iron pan
- Cooling rack
Instructions:
-
In a large mixing bowl, or a 6-quart, food-safe plastic bucket, combine all of the ingredients. Remember, lukewarm water should be about 105°F – comfortably warm to the touch. Don’t worry too much about getting the temperature exact. Yeast is a living thing, so be gentle.
-
Mix and stir everything together to make a very sticky, rough dough. If you have a stand mixer, beat at medium speed with the beater blade for 30 to 60 seconds. If you don’t have a mixer, simply stir with a big spoon or dough whisk until everything is combined.
-
Now, it’s time for the first rise. If you mixed the dough in a plastic bucket, just let it stay there, covering the bucket with a lid or plastic wrap. A shower cap actually works quite well here. If you mixed the dough in a bowl that’s not at least 6-quart capacity, transfer it to a larger bowl; the dough is going to rise significantly. There’s no need to grease the bowl, though you can if you like; it’ll make it easier to get the dough out later.
-
Cover the bowl or bucket, and let the dough rise at room temperature for 2 hours. After this initial rise, refrigerate the dough for at least 2 hours, or for up to about 7 days. (If you’re pressed for time, you can skip the room-temperature rise and place the dough directly into the fridge). The longer the dough chills in the fridge, the tangier it will become; a 7-day chill will result in a flavor reminiscent of sourdough. Over the first day or so, the dough will rise, then fall. This is perfectly normal.
-
When you’re ready to bake, sprinkle the top of the dough with flour; this will make it easier to handle. Grease your hands, and pull off about 1/4 to 1/3 of the dough – a 14-ounce to 19-ounce piece, if you have a scale. This should be roughly the size of a softball or a large grapefruit.
-
Plop the sticky dough onto a floured work surface and round it into a ball, or a longer log shape. Don’t worry about perfection; just do the best you can.
-
Place the loaf on a piece of parchment paper (if you’re using a baking stone) or onto a lightly greased or parchment-lined baking sheet. Sift a light coating of flour over the top; this will help keep the bread moist as it rests before baking.
-
Let the loaf warm to room temperature and rise; this should take about 60 minutes (or longer, up to a couple of hours, if your house is cool). The dough won’t rise dramatically upwards; instead, it will seem to settle and expand outward. Preheat your oven to 450°F (232°C) while the loaf rests. If you’re using a baking stone, position it on a middle rack while the oven preheats. Place a shallow metal or cast iron pan (not glass, Pyrex, or ceramic) on the lowest oven rack and have 1 cup of hot water ready.
-
When you’re ready to bake, take a sharp knife and slash the bread 2 or 3 times, making cuts about 1/2″ deep. The bread may deflate a bit; don’t worry, it will recover in the hot oven.
-
Place the bread in the oven – onto the baking stone, if you’re using one, or simply onto a middle rack, if it’s on a pan – and carefully pour the 1 cup of hot water into the shallow pan on the rack beneath. It will bubble and steam; close the oven door quickly.
-
Bake the bread for 25 to 35 minutes, or until it’s a deep, golden brown.
-
Remove the bread from the oven and cool it on a rack. Store leftover bread in a plastic bag at room temperature.
Expert Tips & Tricks:
- Flour Measurement Matters: The flour-to-liquid ratio is crucial in this recipe. If you measure flour by sprinkling it into your measuring cup, then gently sweeping off the excess, use 7 1/2 cups. If you measure flour by dipping your cup into the canister, then sweeping off the excess, use 6 1/2 cups. For the most accurate results, measure by weight: 32 ounces of flour.
- Half Batch: You can easily make a half-recipe using the same ratios and measuring techniques.
- Dealing with Sticky Dough: Don’t be afraid of the stickiness! Embrace it. A generous dusting of flour on your hands and work surface is your best friend.
- Achieving the Perfect Crust: The steam created by pouring water into the hot pan is essential for a truly crusty loaf. Don’t skip this step!
- Oven Variations: Every oven is different. Keep a close eye on the bread during the last 10 minutes of baking to ensure it doesn’t burn. If it’s browning too quickly, reduce the oven temperature by 25°F (14°C).
Serving & Storage Suggestions:
This no-knead crusty white bread is fantastic served warm with butter, olive oil, or your favorite spread. It’s also excellent for sandwiches, toast, or as an accompaniment to soups and stews.
Store leftover bread in a plastic bag at room temperature for up to 3 days. For longer storage, wrap the bread tightly in plastic wrap and freeze it for up to 2 months. To reheat frozen bread, thaw it completely and then warm it in a 350°F (175°C) oven for 5-10 minutes, or until heated through.
Nutritional Information:
| Nutrient | Amount per Serving | % Daily Value |
|---|---|---|
| Calories | 377 kcal | N/A |
| Calories from Fat | 10 g | N/A |
| Total Fat | 1.2 g | 1% |
| Saturated Fat | 0.2 g | 0% |
| Cholesterol | 0 mg | 0% |
| Sodium | 877.9 mg | 36% |
| Total Carbohydrate | 78.4 g | 26% |
| Dietary Fiber | 3.4 g | 13% |
| Sugars | 0.3 g | 1% |
| Protein | 11.4 g | 22% |
Variations & Substitutions:
- Whole Wheat Variation: You can substitute up to half of the all-purpose flour with whole wheat flour. Add an additional 2 teaspoons of water per cup of whole wheat flour to prevent the dough from being too dry.
- Bread Flour: While all-purpose flour is recommended, you can use bread flour. However, the crust will be slightly thicker, and you may not achieve the same open-holed structure. If using bread flour, increase the water by about 2 teaspoons per cup of flour.
- Herb Infusion: Add a tablespoon of dried herbs like rosemary, thyme, or oregano to the dough for a flavorful twist.
- Cheese Bread: Mix in 1 cup of shredded cheddar, parmesan, or asiago cheese before the first rise.
- Garlic Bread: Mix in 2-3 cloves of minced garlic before the first rise for a tasty garlic bread.
FAQs (Frequently Asked Questions):
Q: Why is my dough so sticky?
A: This no-knead dough is intentionally very sticky. Don’t worry, that’s how it’s supposed to be! Just use plenty of flour on your hands and work surface when shaping the loaf.
Q: Can I use active dry yeast instead of instant yeast?
A: Yes, you can. If using active dry yeast, dissolve it in the lukewarm water for about 5-10 minutes before adding the other ingredients.
Q: How long can I keep the dough in the refrigerator?
A: You can keep the dough in the refrigerator for up to 7 days. The longer it chills, the tangier the flavor will become.
Q: My bread is browning too quickly. What should I do?
A: Reduce the oven temperature by 25°F (14°C) and continue baking until the bread is cooked through. You can also tent the bread with foil to prevent further browning.
Q: How can I tell if the bread is done?
A: The bread is done when it’s a deep, golden brown and sounds hollow when tapped on the bottom. An internal temperature of 200-210°F (93-99°C) is also a good indicator.
Final Thoughts:
This no-knead crusty white bread recipe is a testament to the fact that incredible flavor doesn’t always require hours of hard work. With just a few simple ingredients and a little patience, you can create a loaf that rivals anything you’d find in a bakery. Don’t be intimidated by bread making – give this recipe a try and discover the joy of fresh, homemade bread. I encourage you to experiment with variations and find your own perfect loaf. Share your creations, and don’t hesitate to reach out with any questions. Happy baking!