
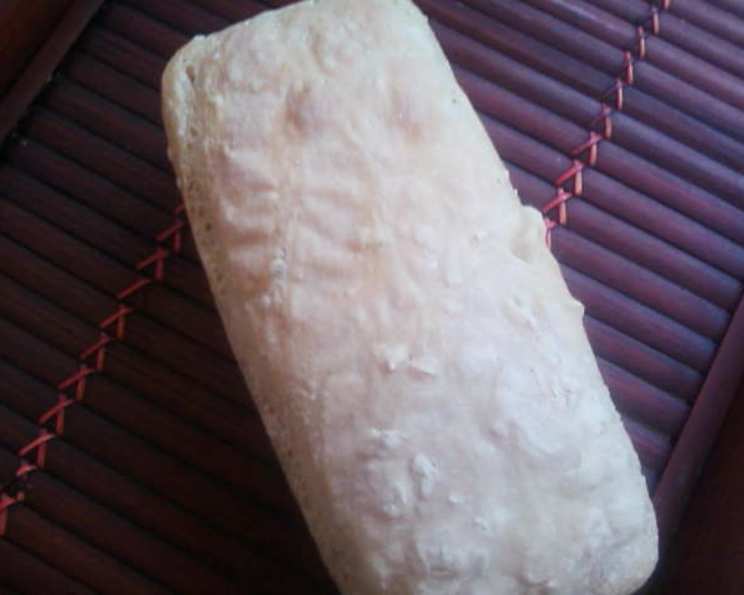
No-Knead European Peasant Bread: Simple Rustic Perfection
The scent of baking bread has always been my culinary sanctuary. I recall my grandmother’s kitchen, perpetually warm and fragrant, where she’d effortlessly whip up loaves that tasted of simple goodness. This No-Knead European Peasant Bread evokes those memories perfectly. It’s crusty, chewy, and deeply flavorful, a true testament to the magic that happens when flour, water, yeast, and time come together. It’s more than just bread; it’s a taste of home.
Recipe Overview
- Prep Time: 15 minutes
- Cook Time: 35 minutes
- Total Time: 2 hours 50 minutes (includes rising time)
- Yields: 4 1-pound loaves
- Dietary Type: Vegetarian
Ingredients
- 3 cups lukewarm water
- 1 1/2 tablespoons granulated yeast
- 1 1/2 tablespoons salt
- 1/2 cup rye flour
- 1/2 cup whole wheat flour
- 5 1/2 cups unbleached all-purpose flour
- Cornmeal, for the pizza peel
Equipment Needed
- 5-quart bowl or lidded (not airtight) food container
- Spoon or heavy-duty stand mixer with dough hook
- Pizza peel
- Baking stone
- Cast iron skillet or empty broiler tray
- Serrated bread knife
- Wire rack
Instructions
-
In a 5-quart bowl or a lidded (not airtight) food container, mix the yeast and salt with the lukewarm water. It’s crucial that the water is lukewarm – too hot, and you’ll kill the yeast; too cold, and it won’t activate properly.
-
Mix in the rye flour, whole wheat flour, and unbleached all-purpose flour without kneading. You can use a spoon, or if you prefer, a heavy-duty stand mixer fitted with a dough hook.
-
Note: If you’re not using a mixer, you might need to use wet hands to incorporate the last bit of the flour. The dough will be shaggy and sticky, and that’s perfectly fine. Don’t be tempted to add more flour unless it is absolutely unmanageable.
-
Cover the bowl or container (not airtight) and allow the dough to rest at room temperature until it rises and collapses (or flattens on top). This usually takes approximately 2 hours. The exact time will depend on the temperature of your room; a warmer environment will speed up the process.
-
The dough can be used immediately after rising, however, it is easier to handle when cold. Refrigerate in a lidded (not airtight) container and use over the next 14 days. This refrigerated resting period develops more complex flavors in the bread.
-
When you’re ready to bake, dust the surface of the refrigerated dough with flour and cut off a grapefruit-sized piece (about 1 pound).
-
Dust the piece with more flour and quickly shape it into a ball. Do this by stretching the surface of the dough around to the bottom on all four sides, rotating the ball a quarter-turn as you go. This creates tension on the surface of the dough, which will help it rise in the oven.
-
Place the shaped dough ball on a cornmeal-dusted pizza peel and allow it to rise for 40 minutes. The cornmeal prevents the dough from sticking to the peel, making it easier to slide into the oven.
-
20 minutes before baking time, preheat your oven to 450º F (232°C), with a baking stone placed on the middle rack. A baking stone helps to distribute heat evenly and creates a crispy crust.
-
Place a cast iron skillet or an empty broiler tray on the bottom rack of the oven.
-
Sprinkle the loaf liberally with flour and slash the top using a serrated bread knife. The slashes allow the bread to expand properly in the oven and also create an attractive appearance. Make the slashes about 1/2 inch deep.
-
Slide the loaf directly onto the hot baking stone.
-
Pour 1 cup of hot tap water into the cast iron skillet or broiler tray and quickly close the oven door. The steam created by the hot water helps to create a chewy interior and a crispy crust. Be careful when pouring the water, as it will create a burst of steam.
-
Bake for 35 minutes, or until the top of the crust is dark brown and sounds hollow when thumped. The color of the crust is a good indicator of doneness, but the hollow sound is the most reliable way to tell if the bread is fully baked.
-
Remove the loaf from the oven and cool on a wire rack.
-
Allow the bread to cool completely before slicing. This allows the internal structure of the bread to set and prevents it from becoming gummy.
Expert Tips & Tricks
- Don’t overmix the dough: The beauty of this recipe is that it requires minimal effort. Overmixing can lead to a tough bread.
- Use a digital scale: For the most accurate measurements, especially with flour, use a digital kitchen scale.
- Experiment with flours: Feel free to play around with different types of flours, such as spelt or semolina, to add unique flavors and textures.
- For an extra crispy crust: After baking, turn off the oven and crack the door open slightly for about 10 minutes. This will allow the steam to escape and further crisp up the crust.
- If you don’t have a baking stone: You can use a baking sheet, but the crust won’t be quite as crispy.
- If your dough is too sticky to handle: Use wet hands or a bench scraper to work with it.
Serving & Storage Suggestions
This No-Knead European Peasant Bread is incredibly versatile. Serve it warm with butter, olive oil, or your favorite spread. It’s also fantastic for sandwiches, toast, or as an accompaniment to soups and stews.
Store the bread at room temperature in a paper bag or a breadbox for up to 3 days. For longer storage, wrap the bread tightly in plastic wrap and freeze it for up to 2 months. To reheat, thaw the bread completely and then bake it in a 350ºF oven for about 10-15 minutes, or until warmed through. You can also slice the bread and toast it.
Nutritional Information
| Nutrient | Amount per Serving | % Daily Value |
|---|---|---|
| Calories | 765 kcal | N/A |
| Calories from Fat | 29g | N/A |
| Total Fat | 3.3 g | 5% |
| Saturated Fat | 0.5 g | 2% |
| Cholesterol | 0 mg | 0% |
| Sodium | 2632.4 mg | 109% |
| Total Carbohydrate | 157.1 g | 52% |
| Dietary Fiber | 11.4 g | 45% |
| Sugars | 0.7 g | 2% |
| Protein | 26.6 g | 53% |
Note: Nutritional information is an estimate and may vary based on specific ingredients and portion sizes.
Variations & Substitutions
- Herbed Bread: Add 1-2 tablespoons of dried herbs, such as rosemary, thyme, or oregano, to the dough along with the flours.
- Cheese Bread: Incorporate 1 cup of shredded cheese, such as cheddar, Gruyere, or Parmesan, into the dough.
- Olive Bread: Add 1/2 cup of chopped olives to the dough.
- Spicy Bread: Add 1/2 teaspoon of red pepper flakes to the dough.
- Sweet Bread: Add 1/4 cup of sugar or honey to the dough, and consider adding dried fruits or nuts.
FAQs (Frequently Asked Questions)
Q: Can I use active dry yeast instead of instant yeast?
A: Yes, you can. However, you may need to proof the active dry yeast in warm water for 5-10 minutes before adding it to the other ingredients.
Q: What if I don’t have rye flour or whole wheat flour?
A: You can substitute them with all-purpose flour. However, the bread will have a slightly different flavor and texture.
Q: Can I make this dough in a bread machine?
A: While the recipe is designed for a no-knead method, you could potentially use a bread machine on the dough setting. Monitor the dough closely and adjust the liquid or flour as needed.
Q: Why is my dough so sticky?
A: This dough is meant to be quite sticky. Resist the urge to add more flour unless it’s completely unmanageable. Wet hands or a bench scraper will help you handle it.
Q: How can I tell if my bread is done?
A: The best way to tell if the bread is done is to check the internal temperature with a thermometer. It should be around 200-210°F (93-99°C). You can also thump the bottom of the loaf; it should sound hollow.
Final Thoughts
This No-Knead European Peasant Bread is a testament to the fact that incredible bread doesn’t require hours of labor. Its rustic charm and satisfying flavor make it a welcome addition to any table. So, gather your ingredients, embrace the simplicity, and prepare to be amazed by the warm, comforting goodness of homemade bread. Don’t hesitate to experiment with variations and make it your own. Share your baking triumphs (and even your learning curves!) – happy baking!